- Joined
- April 16, 2002
- Messages
- 3,324
- Reaction score
- 28
- City, State
- British Columbia
- Year, Model & Trim Level
- 93 4 dr 4x4 manual XL.
Hey kids!
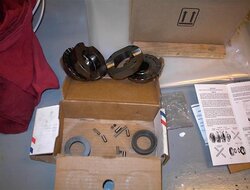
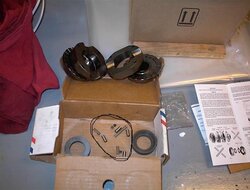
My buddy carsonm from the site decided to get a Detroit EZ-locker for his 8.8. We did the install last night.
I did a lot of looking around here, and figured we needed a good write-up for the site.
His axle is an OPEN type, so this is the proceedure for it.
They don`t call it EZ locker for nothing!
Was it easy?
-Fo`sheezy!
We both have virtually no experience poking around in an axle. We tackled the job with just a little unease and some nervous laughter. Turned out to be a snap, easier than my body lift, or both our suspension lifts.
Tools:
Apart from a socket set, we needed
-a small flathead screwdriver
-a pick
-torque wrench
-pliers
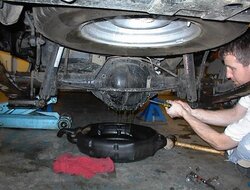
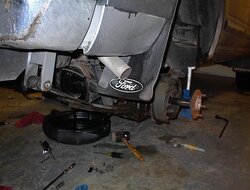
Step 1:
Support with jack stands, and remove both rear tires.
We put the stands near the leaf spring connection towards the forward part of the Ex.
here`s Carson happily undoing some lugs.
My buddy carsonm from the site decided to get a Detroit EZ-locker for his 8.8. We did the install last night.
I did a lot of looking around here, and figured we needed a good write-up for the site.
His axle is an OPEN type, so this is the proceedure for it.
They don`t call it EZ locker for nothing!
Was it easy?
-Fo`sheezy!
We both have virtually no experience poking around in an axle. We tackled the job with just a little unease and some nervous laughter. Turned out to be a snap, easier than my body lift, or both our suspension lifts.
Tools:
Apart from a socket set, we needed
-a small flathead screwdriver
-a pick
-torque wrench
-pliers
Step 1:
Support with jack stands, and remove both rear tires.
We put the stands near the leaf spring connection towards the forward part of the Ex.
here`s Carson happily undoing some lugs.


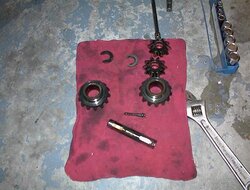


 guess what? almost done!


