I've been helping the mustang crowd come up with a decent set of rods to use in place of the stock forged I-beam rods and I've found a couple different options out there. I want to use this thread for documentation purposes for all the options found and eventually, there will be info about all things needed to build this motor along with the estimated cost. Finally, after the research is done I'm going to put a motor together.
The Objective
A 4.0 SOHC that will consistently hold 500HP and 600HP at the drag strip. (for a decent cost) - in other words, if this can't be done for a certain price, then a different motor is a better option.
Stock 4.0 SOHC INFO
Deck Height 8.858
Bore 3.953
Stroke 3.31
Rod Length 5.748
Piston Pin Height 1.44
Cylinder Bore
Diameter 3.9530
Out-of-round limit 0.0010
Taper 0.0010
Piston / Rings
Standard DIA 3.9520 3.9528
.5 MM OS 3.9716 3.9724
1 MM OS 3.9900 3.9910
Piston to bore limit 0.0012 0.0020
Compression Ring end gap (top) 0.0080 0.0180
Compression Ring end gap (Bottom) 0.0180 0.0280
Oil Ring Snug Fit
Crankshaft and connecting rods
Crankshaft endplay 0.0020 0.0126
Connection rod journal DIA 2.1250 2.1260
Out-of-round and Taper limit 0.0003
Bearing oil clearance (desired) 0.0003 0.0024
Bearing oil clearance (allowable) 0.0005 0.0020
Connection rod endplay 0.0036 0.0106
Main bearing journal DIA 2.2430 2.2440
Out-of-round and Taper limit 0.0003
Main bearing oil clearance (desired) 0.0008 0.0015
Main bearing oil clearance (allowable) 0.0005 0.0020
Valves and related
Intake
valve seat angle 45 Degrees
valve seat width 0.0600 0.0940
valve seat runout limit 0.0020
Stem diameter standard 0.2740 0.2750
stem to guide clearance 0.0010 0.0020
valve face angle 45 Degrees
valve face runout limit 0.0010
Heads
68CC cambered
Camshafts
lobe lift (intake and exhaust) 0.2590
Allowable Lobe lift loss 0.0050
endplay 0.0003 0.0070
Journal DIA (ALL) 1.1000 1.1040
Bearing Inside DIA (ALL) 1.1020 1.1040
Journal-to-bearing (oil) clearance Standard 0.0020 0.0040
Journal-to-bearing (oil) clearance Service Limit 0.0060
Rods
Rod Option 1
The first rod option is a Forged H-beam Manley rod that states it holds 700-800HP on a 4.6 V8. We v6 dudes have to overkill here because 500 HP on a v8 is different for 500HP on a v6.
4.6 L Stroker w/ 22 mm pin and a 2.000" crank journal
Part No. 14044-8
Center-to Center 5.850"
Big End Bore 2.125"
Big End Width .940"
Pin End Width .940"
Pin Bore .8671"
Gram Weight 612
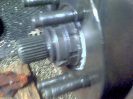
Here is the rod.
With this rod option, the rod journal (big end with the lip) will have to be narrowed by .064" per side. It should only be the little lip you see sticking out. The chamfer will then have to be re-cut and this should be it.
This rod is longer than the stock 4.0 SOHC (Stock is 5.748" and this one is 5.840") this means the custom piston being made needs to have a shorter pin height.
Custom pistons with floating pins will then need to be made to whatever compression you want. These rods go for around $579.50 for a set of 8. This means if you buy 3 set's for a v6, the fourth set is free. Furthermore this means the rod cost per rod will be $72.44 (Not counting the machining cost) If we estimate the machining cost, say 150.00 per set of 8, we come up with $91.19 / rod.
The H-beam rod option already available for the 4.0 SOHC is $125.00 per rod so you can see we've already beat that.
So, to recap this option.
Estimate $91.19 / Rod
Estimate HP the rod can handle is 700-800HP
This should be good for 500HP on the 4.0 SOHC
Rod Option 2
SBC rods.
UPDATE (9-5-2009) - I've decided to go this route for rods. The first option is still available; however, the cost was the deciding factor.
The second rod option is a SBC eagle H-Beam rod that is 5.7" long from center to center. The stock 4.0 sohc rod is 5.748" so this rod is .048" shorter. This means the custom piston being made needs to have a longer pin height depending on the compression desired. The rod journal bore on this rod is 2.1" where as the stock 4.0 SOHC has a 2.125" rod journal. This means the bore has to be opened up. The cost per a set of 8 is lower for this rod ($359.00) so this puts us at $44.87 / rod. The machining cost will offset this and I'll update the thread when I get the info.
The good about this option is the ARP rod bolts are 7/16" where as the first option has 3/8" rod bolts.
Pistons
Compression Ratio for boost
UPDATE (9-5-2009) - I've decided to go with a 9.5:1 compression ratio (custom forged piston) and then get the piston tops coated.
Here is a formula for helping pick a compression ratio for a boosted engine. Anything between 16:1 to 18:1 is what to shoot for on a street set-up. Anything above 20:1 is race car country.
((boost psi / 14.7) + 1) x motor compression = effective compression.
Here is the 4.0 SOHC with 9.7:1 compression running 14 LBS of boost...
Effective Compression
18.93809524
Here is the 4.0 SOHC with 9.5:1 compression running 14 LBS of boost...
Effective Compression
18.54761905
Here is the 4.0 SOHC with 9.5:1 compression running 16 LBS of boost...
Effective Compression
20.25782313
Here is the 4.0 SOHC with 9.5:1 compression running 50 LBS of boost...
Effective Compression
42.69319728
(Okay, this is a little much)
A motor with 8:1 compression running 18 lbs boost VS a 9.5:1 compression motor running 12 lbs boost will have almost the same effective compression and about the same peak power. The big difference will be where you see the power, and how much of a demand will be placed on the supercharger/turbo. Obviously, the 9.5:1 motor is going to have far greater torque and low end power as the boost is only starting to come in. It is also going to be much easier to find a blower/turbo to survive at only 12 lbs of boost -vs- one that would have to put out 18 lbs of boost. It is now very easy to see why a higher compression motor with lower boost is becoming so popular.
Assembly Instructions
Download SOHC_Engine.pdf from FileFactory.com
There's still a BUNCH of work that needs to be done here so this should be considered "A work in progress" until I remove this line from the thread.
The Objective
A 4.0 SOHC that will consistently hold 500HP and 600HP at the drag strip. (for a decent cost) - in other words, if this can't be done for a certain price, then a different motor is a better option.
Stock 4.0 SOHC INFO
Deck Height 8.858
Bore 3.953
Stroke 3.31
Rod Length 5.748
Piston Pin Height 1.44
Cylinder Bore
Diameter 3.9530
Out-of-round limit 0.0010
Taper 0.0010
Piston / Rings
Standard DIA 3.9520 3.9528
.5 MM OS 3.9716 3.9724
1 MM OS 3.9900 3.9910
Piston to bore limit 0.0012 0.0020
Compression Ring end gap (top) 0.0080 0.0180
Compression Ring end gap (Bottom) 0.0180 0.0280
Oil Ring Snug Fit
Crankshaft and connecting rods
Crankshaft endplay 0.0020 0.0126
Connection rod journal DIA 2.1250 2.1260
Out-of-round and Taper limit 0.0003
Bearing oil clearance (desired) 0.0003 0.0024
Bearing oil clearance (allowable) 0.0005 0.0020
Connection rod endplay 0.0036 0.0106
Main bearing journal DIA 2.2430 2.2440
Out-of-round and Taper limit 0.0003
Main bearing oil clearance (desired) 0.0008 0.0015
Main bearing oil clearance (allowable) 0.0005 0.0020
Valves and related
Intake
valve seat angle 45 Degrees
valve seat width 0.0600 0.0940
valve seat runout limit 0.0020
Stem diameter standard 0.2740 0.2750
stem to guide clearance 0.0010 0.0020
valve face angle 45 Degrees
valve face runout limit 0.0010
Heads
68CC cambered
Camshafts
lobe lift (intake and exhaust) 0.2590
Allowable Lobe lift loss 0.0050
endplay 0.0003 0.0070
Journal DIA (ALL) 1.1000 1.1040
Bearing Inside DIA (ALL) 1.1020 1.1040
Journal-to-bearing (oil) clearance Standard 0.0020 0.0040
Journal-to-bearing (oil) clearance Service Limit 0.0060
Rods
Rod Option 1
The first rod option is a Forged H-beam Manley rod that states it holds 700-800HP on a 4.6 V8. We v6 dudes have to overkill here because 500 HP on a v8 is different for 500HP on a v6.
4.6 L Stroker w/ 22 mm pin and a 2.000" crank journal
Part No. 14044-8
Center-to Center 5.850"
Big End Bore 2.125"
Big End Width .940"
Pin End Width .940"
Pin Bore .8671"
Gram Weight 612
Here is the rod.
With this rod option, the rod journal (big end with the lip) will have to be narrowed by .064" per side. It should only be the little lip you see sticking out. The chamfer will then have to be re-cut and this should be it.
This rod is longer than the stock 4.0 SOHC (Stock is 5.748" and this one is 5.840") this means the custom piston being made needs to have a shorter pin height.
Custom pistons with floating pins will then need to be made to whatever compression you want. These rods go for around $579.50 for a set of 8. This means if you buy 3 set's for a v6, the fourth set is free. Furthermore this means the rod cost per rod will be $72.44 (Not counting the machining cost) If we estimate the machining cost, say 150.00 per set of 8, we come up with $91.19 / rod.
The H-beam rod option already available for the 4.0 SOHC is $125.00 per rod so you can see we've already beat that.
So, to recap this option.
Estimate $91.19 / Rod
Estimate HP the rod can handle is 700-800HP
This should be good for 500HP on the 4.0 SOHC
Rod Option 2
SBC rods.
UPDATE (9-5-2009) - I've decided to go this route for rods. The first option is still available; however, the cost was the deciding factor.
The second rod option is a SBC eagle H-Beam rod that is 5.7" long from center to center. The stock 4.0 sohc rod is 5.748" so this rod is .048" shorter. This means the custom piston being made needs to have a longer pin height depending on the compression desired. The rod journal bore on this rod is 2.1" where as the stock 4.0 SOHC has a 2.125" rod journal. This means the bore has to be opened up. The cost per a set of 8 is lower for this rod ($359.00) so this puts us at $44.87 / rod. The machining cost will offset this and I'll update the thread when I get the info.
The good about this option is the ARP rod bolts are 7/16" where as the first option has 3/8" rod bolts.
Pistons
Compression Ratio for boost
UPDATE (9-5-2009) - I've decided to go with a 9.5:1 compression ratio (custom forged piston) and then get the piston tops coated.
Here is a formula for helping pick a compression ratio for a boosted engine. Anything between 16:1 to 18:1 is what to shoot for on a street set-up. Anything above 20:1 is race car country.
((boost psi / 14.7) + 1) x motor compression = effective compression.
Here is the 4.0 SOHC with 9.7:1 compression running 14 LBS of boost...
Effective Compression
18.93809524
Here is the 4.0 SOHC with 9.5:1 compression running 14 LBS of boost...
Effective Compression
18.54761905
Here is the 4.0 SOHC with 9.5:1 compression running 16 LBS of boost...
Effective Compression
20.25782313
Here is the 4.0 SOHC with 9.5:1 compression running 50 LBS of boost...
Effective Compression
42.69319728
(Okay, this is a little much)
A motor with 8:1 compression running 18 lbs boost VS a 9.5:1 compression motor running 12 lbs boost will have almost the same effective compression and about the same peak power. The big difference will be where you see the power, and how much of a demand will be placed on the supercharger/turbo. Obviously, the 9.5:1 motor is going to have far greater torque and low end power as the boost is only starting to come in. It is also going to be much easier to find a blower/turbo to survive at only 12 lbs of boost -vs- one that would have to put out 18 lbs of boost. It is now very easy to see why a higher compression motor with lower boost is becoming so popular.
Assembly Instructions
Download SOHC_Engine.pdf from FileFactory.com
There's still a BUNCH of work that needs to be done here so this should be considered "A work in progress" until I remove this line from the thread.