Ronin8002's 4th Gen custom coilover conversion | Page 4 | Ford Explorer Forums - Serious Explorations

  • Register Today It's free!

Ronin8002's 4th Gen custom coilover conversion

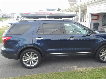
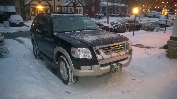
I'm going to be doing a project over the holidays to convert from the stock OEM style struts in the front of my 2008 4x4 Explorer to Fox coilover shocks.

The goal is to get a mild amount of lift (around 2.5") and increase the front suspension travel.

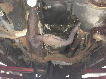
In stock form, the 4th Gen OEM front suspension with the OEM type struts has a bit over 4" of wheel travel.

I will be using Fox 2.0 Emulsion coilovers with 5" of travel. If my math is right, this should result in about 8.5" of wheel travel available (will probably be slightly less than that since I'll need to run limit straps)

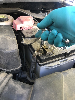
I am going to do everything possible to make this a bolt on installation as far as the way the shock brackets are designed. So far, I've just gotten the shocks and springs (10" 750lb spring rate eibach coils) and extended lower shock eyelets.


I think it would be possible to run a 6.5" travel shock, but the front diff might have to be dropped down a bit with brackets in order to reduce the stress on the CV axles at full droop. So for now, I'm staying with a 5" travel shock.

More to come.


Join the Elite Explorers for $20 each year.
Elite Explorer members see no advertisements, no banner ads, no double underlined links,.
Add an avatar, upload photo attachments, and more!
.


Join the Elite Explorers for $20 each year.
Elite Explorer members see no advertisements, no banner ads, no double underlined links,.
Add an avatar, upload photo attachments, and more!
.


Thanks, I installed them over the weekend. Much more of a precision fit than the last ones and I am confident that these will hold up to abuse better too.

Overall travel is better now since the shock is now pushing along the arc of the control arm as it cycles rather than more outward. Lift went up a little, but what I also noticed is that preload adjustments have more of an effect on ride height than they did before. I'm going to keep the passenger side at zero preload and the driver's side at about 3/8" preload, that keeps both sides at the same level height.

For fun, I took the spring off one of the coilovers and cycled the suspension on that side from full droop to full compression with everything hooked up except the swaybar. Actual total travel at the wheel measured out to be 7.25" When I first started this project I calculated 8.5", but where I was wrong was the motion ratio of the suspension changes as it cycles, so that means you get less shock movement to wheel movement as you get closer and closer to full droop. No big deal, it's still a huge improvement over stock, which has got to be less than 4" of travel based on what I know now.

Much more than 7.25" and I would be stuffing the tire too much at full compression, and at full droop the upper control arm would hit the brake line bracket. Also, still need limit straps for the last .25" of droop travel as there is a bit of CV boot rubbing on the coilover mount tab at that point, but for normal street driving it will be fine for now.

Also, I checked to see that the shock is approaching (but not exceeding) a perpendicular angle to the lower control arm at full bump. Fortunately, it is...Looks to be about 83 degrees (perfect would be 90) but this is close enough.

Ride quality is maybe a little better than with the old lower brackets...could just be in my head but it feels a little "tighter" for lack of a better description.

Final alignment will happen this week. I've got the camber pretty much as dialed in as I can get it with my bubble level. I'll probably just leave the toe for the alignment shop but I can see that it's toeing in too much right now.


Good to see it done and all worked out!:thumbsup:


Alignment is done, made a huge difference in how the steering feels. With that all taken care of, I took it for some long highway drives and was amazed at how well the front suspension soaks up rough patches and potholes...rides like a dream!

I've completely removed the front swaybar and there is no weird handling even when I take exit ramps fast or swerve back and forth quickly...so I am going to keep it off for the long term to take advantage of the extra flex.

Limit straps will be this week's project.


No big deal, it's still a huge improvement over stock, which has got to be less than 4" of travel based on what I know now.

First of all, super nice build! I'm a huge believer in proper suspension travel, from trucks to sports cars to dirt bikes. :thumbsup:

But, is the stock travel really 4"!!!??? That's horrible. My Vette has more travel than that! Here's a shot of a Z06 at full droop:

ringzr1gallery4564.jpg


And the car will easily tuck the tires at full compression.

What's limiting our stock travel? A super short travel shock?


4 inches at the shock is way more at the end of the a arm,,


I believe Ronin said it's 1.5" at the shock, and 4" at the wheel. But correct me if I'm wrong (hope I am).


According to the specs on Monroe's site for their OEM type replacement struts, they have 2.83" of travel. With the springs installed on my OEM ones it's hard to cycle them completely to get a measurement, but if you calculate the motion ratio from the suspension links and factor in the strut mounting angles, it ends up being around 4" at the wheel. Most of that is uptravel.


Setup has done well and held up to offroading. I've made a couple of little changes recently though.

-the 750lb springs settled and I wanted to crank up the preload, but there just wasn't enough travel in the springs to do it without causing the coils to bind at full compression. So, I got a set of 12" long eibach springs with an 800lb rate. This raised the front back up a bit and will also allow for up to an inch of preload before coil bind.

-I noticed that the bolt heads on the lower shock eyelets were rubbing the CVs boots a bit at full droop. Wasn't too big of a deal but just kind of annoyed me, so I made another set of brackets that offset the mounting point forward about 1/4" and inward about 1/2", now there's no clearance issue.

-I have welded some limit strap tabs to the lower control arms and installed some threaded limit strap clevis mounts through the top of the shock towers. Currently using 15" straps...they seem to work fine.

Still rides great overall and I am still glad I ditched the front swaybar after lots of street driving and some offroading :thumbsup:

I'll post pics of everything when I get a little extra time.


see, i said the sway bar wasn't needed on my 96 too, it just works that much better,,

good work, glad it's working great,,:thumbsup::thumbsup::thumbsup:


Here are some pics of the new lower bracket setup.

The lower bracket was made out of a 2.75” section of steel angle (aka angle iron), 0.25” thick, and it has 3.5” long legs. I cut it at a 15* angle so that the CV boot would not rub the bracket at full droop. I also shortened the leg on the front side of the LCA so it would sit nice and flat against the front of the lower control arm. I also beveled the leading edge of the part that sits flat on top of the LCA due to the shape of the LCA. Once I cut it out and shaped I drilled a hole for the lower strut bolt to pass through the bracket so it would be clamped to the LCA. Otherwise it just sits on the flat part of the LCA over the old strut mounting hole.

For the shock tabs, I used this bracket from ruff stuff specialties and just welded it on: http://www.ruffstuffspecialties.com/catalog/SBRKT-FLT.html

Notice I had to offset it inboard so it’s closer to the inner LCA pivot, and it’s also offset more towards the front edge of the bracket. This lets the bolt head that holds the lower eyelet of the fox shock to clear the CV boot at full droop.

On to the pics:

View of the lower bracket from the front at ride height:
IMAG0605_zps23d2c293.jpg


View of the whole setup, full droop:
IMAG0612_zps82486c4d.jpg


Overhead view of the lower bracket at full droop:
IMAG0613_zpsead8c3d7.jpg


UCA angle/clearance and spindle to spring clearance at full droop:
IMAG0615_zpsfd063e9f.jpg


View of the whole setup, with the suspension jacked up to approximate ride height:
IMAG0617_zpsf51d3ed9.jpg


Overhead view of the lower bracket at approximate ride height:
IMAG0618_zps8bec0194.jpg


Limit strap at approximate ride height:
IMAG0620_zps4a7f61a1.jpg


I finally figured out a way to convert the rear over to Fox coilovers as well, so I've ordered some 6.5" travel shocks and all the parts I need to make it work. This should be a bit easier now that I sort of know what I am doing. Should start getting my parts in next week and I will probably begin working on the brackets this weekend. Stay tuned for updates.


wonder why nobody is doing a "knuckle" lift...

With as much fab and calculations that were involved in this setup, would it be that much harder to do a knuckle lift like are popular with GM full size trucks? You know, dropped bracket across LCA frame mounts, and a spacer atop the factory upper ball joint mount of the knuckle and either coil-overs for more travel, or reuse factory struts with a spacer between upper mount and frame if you were only after lift and not more travel. Additionally, if you were to fab up cross members for LCA's, you could move the new mount points more inboard and run longer LCA's to match the extended UCA's already available. This would bring the Short/Long Arm relationship back to stock, but, you'd need to extend your steering rack end links by this amount as well so it won't cause toe angle changes as the suspension jounces and rebounds.
All of this would maintain stock track-width and bring the arms back to working in the mid-point of the circular arc that is their travel path, rather than going more extremely in as they travel downward. As you lift an independent suspension by forcing the arms more downward, they are also moving inward, sacrificing track width which can make the truck less stable (although probably not severely so, I would just prefer to keep as much stability and linearity in suspension travel as possible).
By the way, awesome work figuring all those variables out and gettin' some more air under your X! Just thought I might put a bug in someone's ear who might be planning something like this in the future :D


Very good points. Now that I have a lot more fabrication experience and more tools I'd feel like I could tackle an LCA drop bracket set and put a ball joint spacer up top. Main reason to do so besides those you mentioned would be so I could run 35s. It would be super cool but not sure I want to dump the time and money into an effort that would take a while to get just right. An SAS would probably take a bit more but be more capable in the long run. Lately I've been busy enough with work and school and other projects that I've kept putting off doing the rear ones, but would at least want to get those done and roll with them for a while before stepping up to something bigger, if I decide to.

With as much fab and calculations that were involved in this setup, would it be that much harder to do a knuckle lift like are popular with GM full size trucks? You know, dropped bracket across LCA frame mounts, and a spacer atop the factory upper ball joint mount of the knuckle and either coil-overs for more travel, or reuse factory struts with a spacer between upper mount and frame if you were only after lift and not more travel. Additionally, if you were to fab up cross members for LCA's, you could move the new mount points more inboard and run longer LCA's to match the extended UCA's already available. This would bring the Short/Long Arm relationship back to stock, but, you'd need to extend your steering rack end links by this amount as well so it won't cause toe angle changes as the suspension jounces and rebounds.
All of this would maintain stock track-width and bring the arms back to working in the mid-point of the circular arc that is their travel path, rather than going more extremely in as they travel downward. As you lift an independent suspension by forcing the arms more downward, they are also moving inward, sacrificing track width which can make the truck less stable (although probably not severely so, I would just prefer to keep as much stability and linearity in suspension travel as possible).
By the way, awesome work figuring all those variables out and gettin' some more air under your X! Just thought I might put a bug in someone's ear who might be planning something like this in the future :D


woohoo!

35's on a 3rd gen! Nice! If I decide to mess with my suspension, LCA drop will definitely be the way I go. Also, rather than SAS the rear, I'd do another LCA drop and rearrange the frame to either drop below where the CV axleshafts would go, or stiffen the remaining portion above them. Add Eaton E-lockers front and rear, wouldn't matter if I lift tires off the ground! :D also, either get air shocks similar to an earlier caddy, or Firestone ride-rite to go between top of strut and frame.


Back
Top