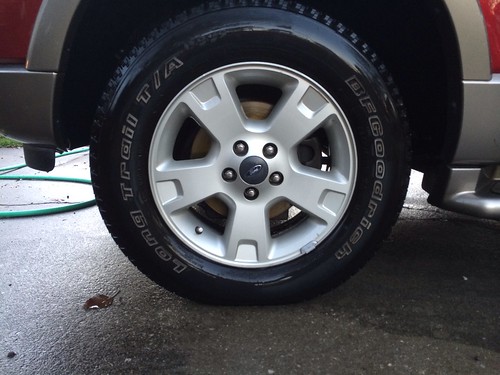
Due to the massive snow storm today, I found some time to write up the How-to for converting a 2002-2005 Ford Explorer to 2003-2005 Lincoln Aviator Front Brakes. WARNING: I take no responsibility for any problems related to this conversion or failure of your brakes.
The reason for the upgrade is significantly better braking, through larger rotors, calipers, and brake pads. The rear brakes between the two vehicles are the same except the Aviator has knuckles which reposition the caliper for 1” larger diameter rotors. Also not these vehicles use the same brake master cylinder.
The comparison between the front brakes of the Ford Explorer and Lincoln Aviator:
2002 -2005 Explorer: 12.06” Diameter, twin 46mm calipers, min 16” wheel, 5 ¼” long pads
2003-2005 Aviator: 13” Diameter, twin 48mm calipers, min 17” wheel, 6” long pads
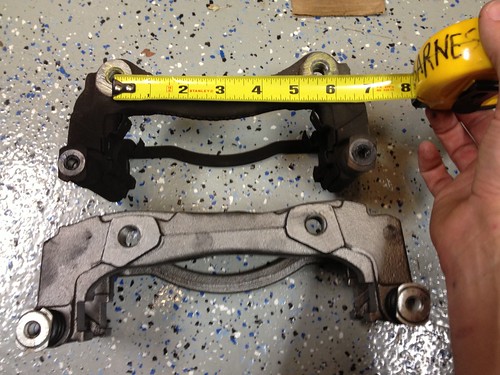
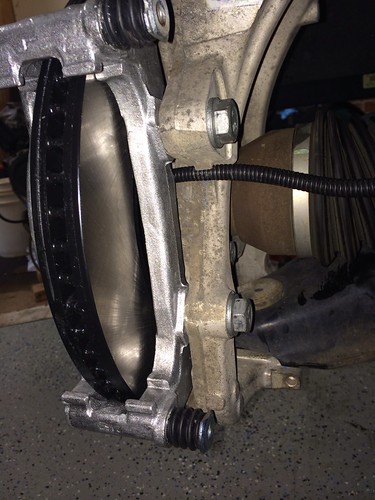
Must use the Aviator Knuckles for this conversion due to the spacing of the bolt holes for Caliper Bracket and the backspacing of the Bracket and Rotor :
Silver Bracket is the Aviator Bracket, Black one is the Explorer Bracket

Tools Needed for Conversion:
1) Standard metric socket set
2) Large metric sockets, specifically 22mm for aviator caliper bolts, and 24 mm for lower balljoint (I bought this set from Amazon
http://www.amazon.com/gp/product/B000NIKA4U/ref=ox_ya_os_product )
3) 30mm socket ( for the Axle Nut, I got mine on amazon for $8.74
http://www.amazon.com/gp/product/B000NPR36G/ref=ox_ya_os_product )
4) Some form of Spray Nut release stuff (PB Plaster, etc.)
5) Torque Wrench
6) Jack
7) Jack Stands
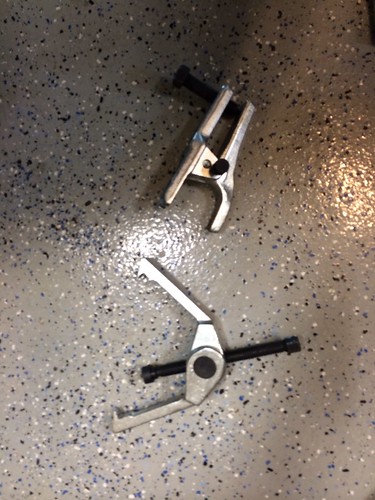
8) Ball Joint popping tools (two different styles) ( I got a set that included the ones I need from Harbour Freight, see pics below for the necessary tools)
9) Clamps for backing out caliper pistons (if using used calipers)
Parts needed for conversion:
1) 17" or larger wheels -> Your choice, I kept with my stock 17” wheels
2) Aviator Front Rotors -> I purchased Centric Premium Rotors with E-coating 120.65093 $56.54 each on Amazon
3) Aviator Front Left Brake Caliper -> $98.79 see note below list
4) Aviator Front Right Brake Caliper -> $98.79 see note below list
5) Aviator Front Left Brake Caliper Bracket -> mine came with caliper but if purchased separately A-1 CARDONE Part # 141057, $23.16
6) Aviator Front Right Brake Caliper Bracket-> mine came with caliper but if purchased separately A-1 CARDONE Part # 141056, $23.16
7) Aviator Front Brake Caliper Bracket to Knuckle Bolts (4x) 14mm X 45mm 2.0 thread pitch-> Mine came with my Aviator Motorcraft HUB-115 Front Wheel Bearings
8) Aviator Front Brake Pads -> Your choice, I went with EBC Greenstuff, and got a set with my calipers
9) Aviator Front Knuckles -> I purchased mine for $75 each at my local junkyard
10) Front End Alignment
11) Brake Grease
12) New Cotter Pins x 6
13) Brake Part Cleaner
14) Brake Fluid
I ended up purchasing all my parts on amazon since I have an amazon prime account (free 2 day shipping), The main reason for this taking so long to install is I never received the right caliper due to it being continually backordered on amazon. I ended up purchasing it through RockAuto.com. Just scroll to a 2003 Lincoln Aviator,
http://www.rockauto.com/catalog/x,carcode,1410691,parttype,1704 . I purchased the A-1 Cardone Part # 18B4865 for the Left and Part # 18B4864 for the right, these came with the Caliper brackets and brake pads (I ended up using the EBC Greenstuff pads on mine). Since you won’t have a core to return, each caliper assembly will cost $98.79. There are lots of other choices for calipers but my 2 bits are to get ones that come with the caliper bracket.
Cost:
Total cost for conversion with new/rebuilt parts and used knuckles is ~$460.66 + alignment. My total cost for everything I did was ~$800 (had a little Scope Creep). If you use all used stuff you could do it for around $200 + alignment
Other Items that are easy to replace while doing this conversion (ie Scope Creep)
1) Front Wheel Bearings/Hubs -> I purchased the Motorcraft ones which use Timken Bearings HUB-115 for $134 from Amazon, (The Aviator and Explorer parts are the same except the Motorcraft ones come with new bolts, which are different between the two)
2) Upper Balljoints
3) Lower Balljoints
4) Tie Rod Ends
5) Shocks/Springs
Time: Took myself 6 hours to swap everything out.
Procedures:
Disassembly:
Step 1: Jack up vehicle, remove wheels
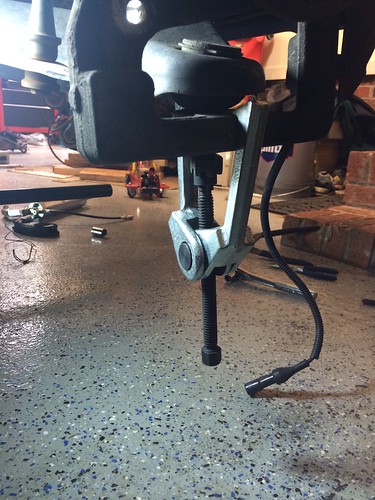
Step 2: (Note 4WD/AWD Only) Spray some PB Blaster on the Axle Nut for both sides, and let sit for a little bit. Using the 30mm socket loosen each Axle Nut in the center of the hub. If it is rotating, have a buddy apply the brakes. I used my impact gun and had no problems. Note: I have already removed caliper in the photo, do not remove caliper prior to removing the Axle Nut, or you will have a really tough time trying to loosen it. You will want to remove the Axle Nut for both sides prior to moving on to the next step.
Step 3: Disconnect the ABS Sensor Cable from inside the engine compartment. On the brake line there is also attached the abs sensor cable. You will need to follow this up into the engine compartment and disconnect it and unclip from the brake line.
Step 4: Remove Caliper from Caliper Bracket, there should be two small screws on the back. Do not disconnect the brake line yet, we will do that after the Aviator caliper is installed to minimize the amount of brake fluid you lose. Using a clothes hanger, bungee cord, etc. hang the caliper on the upper control arm.
Step 5: Remove the Caliper Bracket. There are two larger bolts going from the Caliper Bracket to the Knuckle. Remove these, and set the bracket and Bolts aside, these will no longer be used.
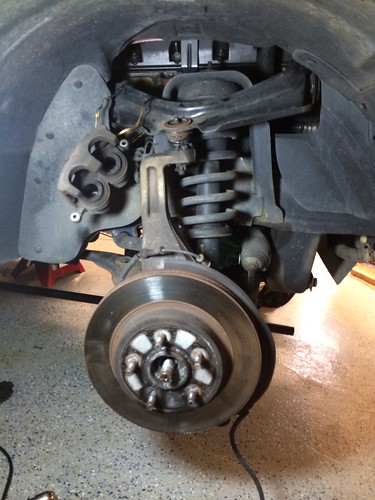
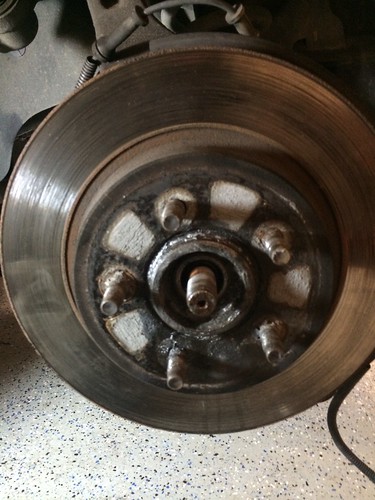
Step 6: Remove the Brake Rotor. On my rotors there were small retaining washers, I ended up cutting them off to remove them. Depending how rusty the car is, you might have to fight with the rotor to get it off.
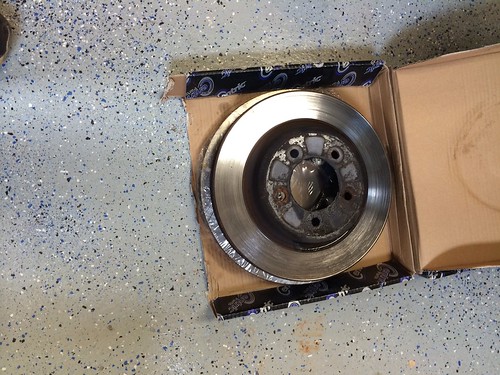
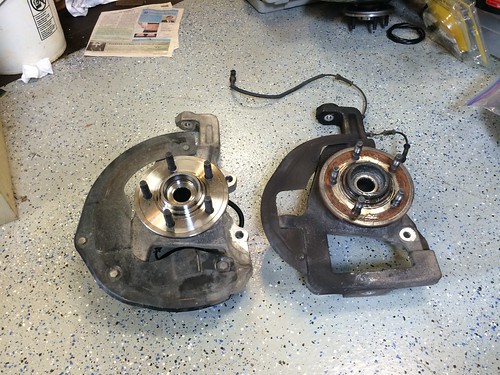
Comparison of the Old Explorer Rotor and New Aviator Rotor:
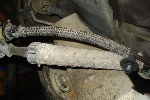
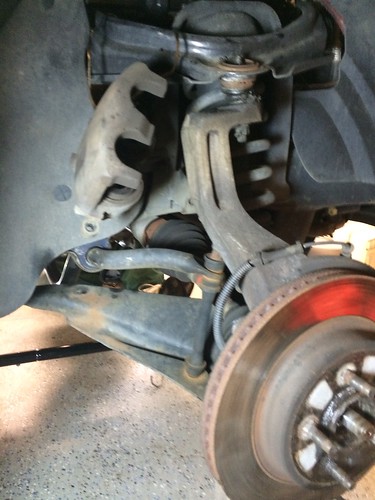
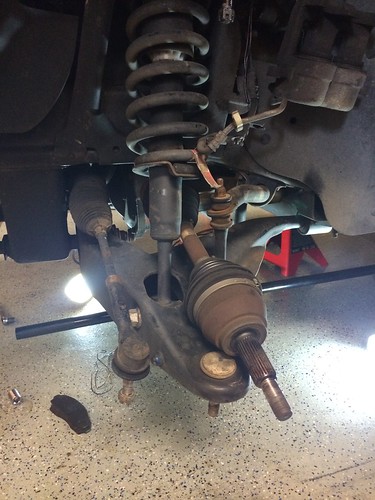
Step 7: Remove the Cotter Pins from the Upper Ball Joint, Lower Ball Joint, and Tie Rod End. These are the 3 linkages attached to the Knuckle. Loosen each one of the castle nuts for these pieces, and leave the nut at the end of the threaded portion. You will use this nut to apply pressure to pop them out.
Step 8: Pop out each ball joint and the tie rod ends. On the upper ball joint and tie rod end use the tool on the top, the lower ball joint use the tool on the bottom as shown in the next picture down. Be careful not to ruin the boots. If you ruin the boots you will have to replace these parts. You should still have the castle nuts attached to the threads
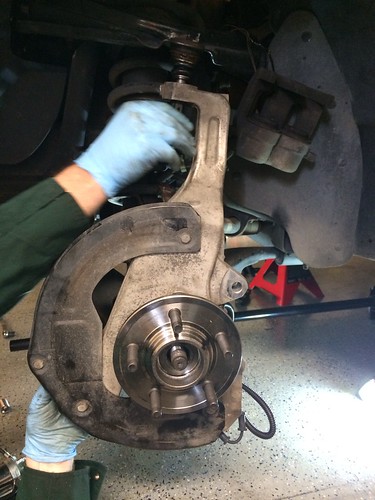
Step 9: Remove the Castle Nuts from the Upper Ball Joint and the Tie Rod End. While holding the Knuckle and Hub, carefully remove the Lower Ball Joint Castle Nut. At the same time you will need to slide the Hub off of the Axle and loop the knuckle off the Lower Ball Joint. Once you are done it should look like this:
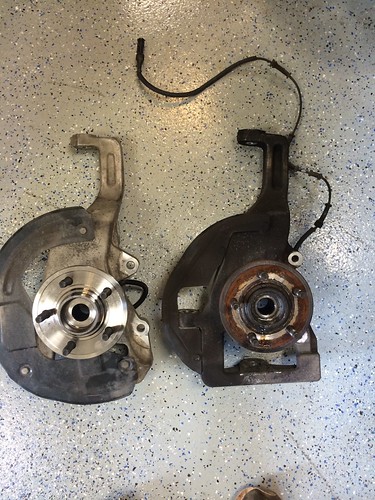
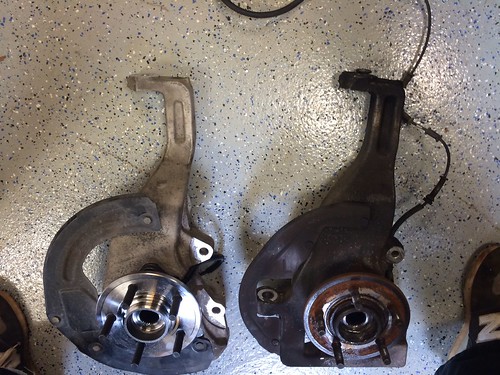
Aviator Knuckle on Left, Explorer Knuckle on Right
Reassembly:
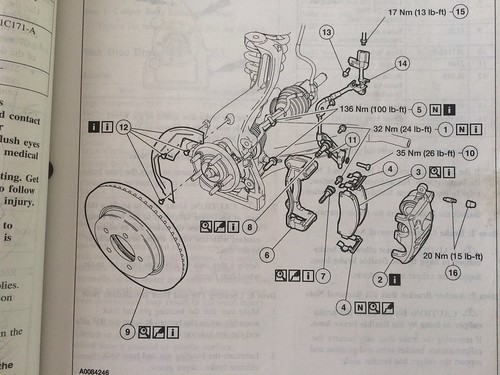
Below are the Pages out of the Explorer Manual for Bolt Torque Ratings which will be used during reassembly:
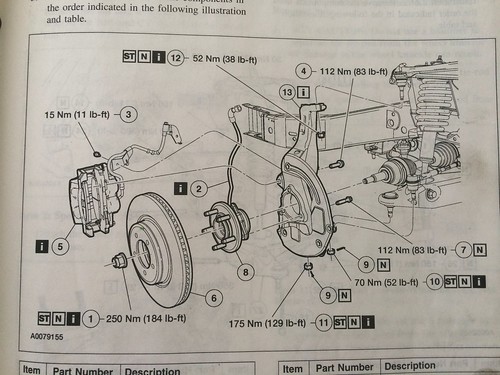
Step 10: At this point you can either reuse your old front wheel bearings/hub/abs sensor assembly or install new ones. Since I have 120K and the bearings are a common failure point, I decided to install new ones. FYI: it is super easy to replace these with the knuckle removed from the vehicle. There are 3 bolts holding the assembly to the knuckle. Make sure the mating surface is clean when installing on the Aviator Knuckle. Use Loctite when reinstalling the bolts. My new Motorcraft bearing/hub assembly came with new bolts with Loctite preapplied. Torque these 3 bolts to 83 ft-lbs.
Step 11: If you are installing new ball joints or tie rod ends, now is the time to do this.
Step 12: Place some Grease on the Axle Spines and the Hub. This eases installation and prevents rusting down the road.
Step 13: Install the Knuckle, Hub, Bearing, ABS Sensor Assembly on the Lower Ball Joint and Axle. You will want to install the Lower Ball Joint castle nut at the same time to prevent it from falling off. Install the Upper Ball Joint Castle Nut and the Tie Rod End Castle Nut.
Step 14: Torque the Castle Nuts for the Upper and Lower Ball Joint and Tie Rod End. Upper Ball Joint is torqued to 38 ft-lbs, Lower Ball Joint is torqued to 129 ft-lbs, and the tie rod end is torqued to 52 ft-lbs. Each Nut should then be turned until a slot in the castle lines up with the hole in the bolt and place a NEW cotter pin.
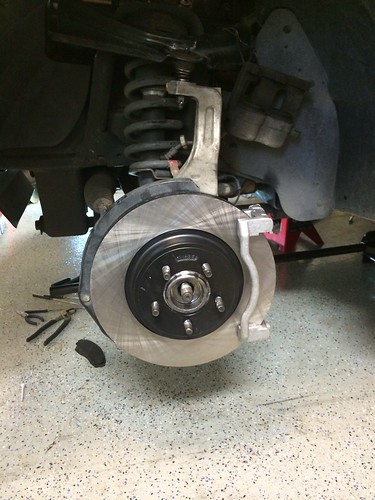
Step 15: Using Brake Part Cleaner, clean off the Aviator Brake Rotors. Install the Brake Rotor onto Hubs.
Step 16: Install Aviator Brake Caliper Bracket onto Knuckles. These use two 10.1 rated flanged bolts 14mm X 45mm 2.0 thread pitch. They need a 22mm socket to install. Torque to 83 ft-lbs. Mine came with my new Motorcraft Hub/Bearing Assembly. Make sure to use Loctite and to place the abs sensor cable into the recess.
Step 17: Install the Brake Pads and place Brake Pad Grease on the portions of the pads which touches the bracket and the caliper. Failure to do so will result in an endless symphony of squeaks. WARNING: Do not place any grease on the actual friction portion of the pad.
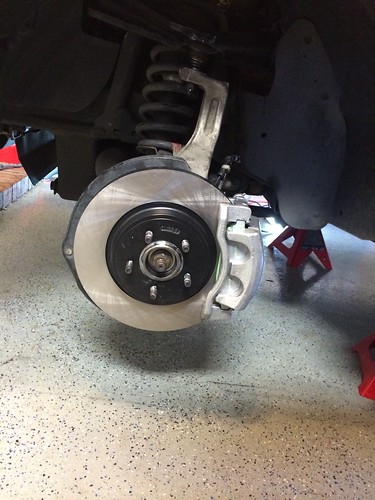
Step 18: Install the Calipers. There are two small bolts which hold the caliper to the caliper bracket, torque these to 24 ft-lbs.

Step 19: Remove the Brake Hose from the Explorer Caliper which you still have hanging. Quickly Reinstall the Brake Hose onto the Aviator Caliper. Make sure to create the correct sandwich of pieces. You should have 2 new copper crush washers. These washers should be on each side of the hose and will seal up the hose. If the washers don’t seal properly you will never be able to properly bleed your brakes properly.
Step 20: Plug in your abs sensor and clip back onto the brake line.
Step 21: Do all of these previous steps on the other side of the car.
Step 22: Bleed the Brakes. You will want to bleed all 4 brake calipers. It is much easier if you remove the 2 rear wheels. You will need a friend to help you with this part. Have your friend crank up the car and lower all the windows (make sure you are in a well-ventilated area). I have never had any success bleeding the brakes with any of the hand vacuum pumps on this vehicle. I believe it has something to do with the abs system. You will not be able to bleed the brakes with the car turned off, again something to do with the abs system. You and your friend need to come up with some system to make sure that you don't have the bleeder valve open without them pressing in on the brake pedal. My wife and I use the following system: I will yell Brake when I am ready for her to press the brake pedal, she will then yell Braking AFTER she has pressed the brake pedal and continues to hold down the pedal. I will then open up the bleeder valve and close it (watching for air bubbles). After I close the valve I will yell Release and she will yell Releasing. Repeat until satisfied all the air is out of the system. Start from the farthest portion from the Brake Master Cylinder and make sure to keep the Master Cylinder Reservoir Full of Brake Fluid. Note: Failure to get air out of your brakes will cause them to fail, also Brake Fluid is an excellent paint stripper so be careful and clean up ASAP)
Step 23: Right now your brakes are now bled. Congrats
Step 24: (4WD/AWD Only) Install your Axle Nut. It requires a 30mm socket and must be torqued to 184 ft-lbs. Do not use an impact hammer to install. Might need a friend to apply the brakes so you can tighten the nut.
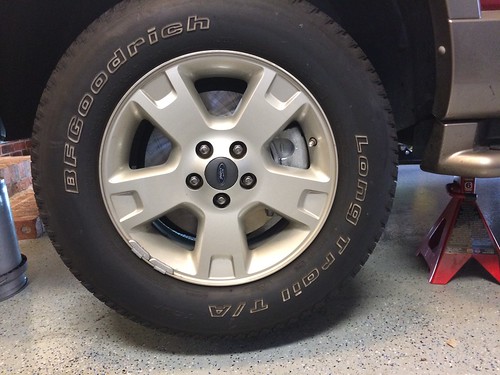
Step 25: Make sure no wheel weights are on the inside of the wheel if you are using 17” wheels. They will hit the caliper as there is very little room between inside of wheel and caliper.
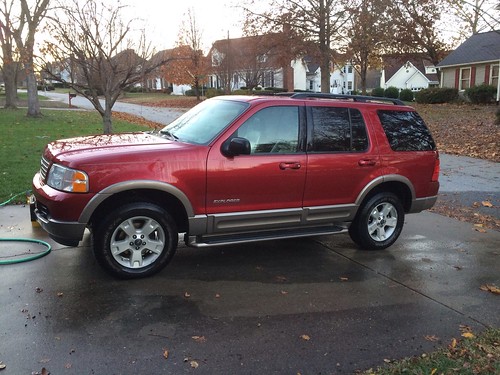
Step 26: Reinstall Wheels and lower vehicle.
Step 27: Need to take vehicle for a test drive and bed in your new brake pads. Make increasingly faster hard stops and verify your brakes are not spongy. If they are spongy you have air in your brakes and you need to repeat the brake bleeding process.
Step 28: Get an alignment completed on your vehicle as you have affected the toe due to the different knuckles.
Step 29:Enjoy your newfound better braking ability.
Thanks!
More pictures and larger resolutions are available on my Flickr Page:
https://www.flickr.com/photos/96263294@N08/sets/72157636780053594/
Scott

") That's what I plan on doing as soon as my hoses need changing.
That's what I plan on doing as soon as my hoses need changing.