Old member first time posting. My SAS. | Page 2 | Ford Explorer Forums - Serious Explorations

  • Register Today It's free!

Old member first time posting. My SAS.

Well I've been a member on here for a few years but have never posted. So for my first post I decided I would add my '95 to this SAS thread because I've done a couple of thing different than a lot of the others I've seen on here.

First, let me just say that I'm just an amateur and did all the fab work myself so go easy on me if there is something that you think should be changed. Second, everything has worked well. Besides already doing numerous runs also I've jumped the truck a few times now out at TDS and Lucernce Valley and everything has held up nicely.

So here it is. I used a high pinion D30 out of an '88 Cherokee but used leaf springs to keep it simple and low cost. For the leaf springs I used the main leaf from a front pack off a Wangler. I then took the rest of the front and rear leafs and made my own 7 leaf packs that keep the springs flat like they are on a Wrangler. This gives me enough room to clear 33's. I'd like to have customer packs made to give it about another 2 or 3 inches when I have the money but for now these are working well. For the rear I'm using the main and second leafs from the Explorer pack but then the rest are from an OME pack for an FJ40 with one additional leaf added. So they now have 8 thinner leafs.

Here is what I did for the front sprint mounts. The cross bar is 3 inch and the down bars are 3.5. All are .250 wall.

2.jpg


Here is how I did my shackle mount which is different than any of the others that I've seen on here. I wanted to keep the spring as level from front to rear as I could so the ride would be nice and the geometry would work well. So instead of having even longer mounts in the front I instead went through the frame for the rear and made a shackle that is 1.5 inches longer than a stock Wrangler shackle.


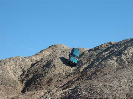
Here's some of it going through Crowbar.


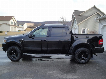
Here's an old one of it before the SAS when it had TT and rear shackles.


Join the Elite Explorers for $20 each year.
Elite Explorer members see no advertisements, no banner ads, no double underlined links,.
Add an avatar, upload photo attachments, and more!
.


how much DID YOU? move/rotate the radiator to clear the first gen steering box?

I didn't. I this picture it looks like I moved the AC condeser but I didn't. I smashed the lower mount wheelin so the passenger side sits a little higher than the drivers side. But that is only the AC condenser, the radiator is still in the stock location. I just had to make my own lower radiator hose that dropped down to go around the bottom of the box. It still ended up hitting the box so I taped a piece of aluminum to it to keep it from rubbing through. I can take some pictures of it if you want.


Join the Elite Explorers for $20 each year.
Elite Explorer members see no advertisements, no banner ads, no double underlined links,.
Add an avatar, upload photo attachments, and more!
.


Where did you get or did you make the offset leaf shackles?

I had these ones made. I first made a set using .125 that I could bend in my vice and then took them to a shop that my buddy works for and had them make copies out of .250. They didn't charge me because my buddy works there but I'm sure it wouldn't cost much to have them made.


Yes, it's the stock driveshaft but I had to have it lengthened.


dude good build.. i plan on doing the same thing soon


What did you do on the rear. I think I'm gonna copy this setup.great job. Super clean


Do you mean the rear of the front springs or rear as in lifting the rear of the truck?


Lifting of the rear of the truck.


I made my own springs. I used a combination of F150 and Toyota FJ40 leafs. I have a total of 9 leafs per pack and an 11.5 inch travel shock which I use all of. Actually, the shock is limiting the down travel by an inch. I also have Warrior shackles. I don't have any current pictures.


Here's one of my nephew's Explorer. We did a TT on it and then installed my old Explorer rear springs with lift shackles. These rears are made up of the main and second stock Explorer leafs and then the rest are from an FJ40 pack. It raised the back of his truck 4 inches over the stock springs.

35542_579606796877_70609488_33103726_166026_n.jpg


Hey, he's got my rims and taillights


I've been wanting to build a swing out spare tire carrier for the back of the Explorer for a while now. Ever since I did the SAS and moved up to 33s I've had to carry my full size spare in the back hatch because it is too big to fit under the truck in the factory spot.

There are a couple of companies that make kits to make your own that would swing from the bumper but they are about $100 and then I would still have to buy all the tubing and plate to make a carrier. Plus I don't have a tube bender. so I decided just to try and find a factory one that I could modify to work with my stock bumper.

I looked at a bunch of factory style swing out carriers at the wrecking yard but the issue with all of them is they bolt to the corner of the body. That won't work on the Explorer because the upper portion of the side is part of my hatch. I had to figure a way to mount it to the bumper without spending $100+.

What I came up with was to try to make it using an old hub from one of the broken D30 axles I had in my garage. What I did was cut the wheel mount surface off and then welded a piece of 1.75 x .120 mild (ERW) tube to the hub. It looked like it would work so I then went to the wrecking yard again to find a factory carrier that I thought would work. what I ended up with was one off a Nissan Pathfinder.

I started the install by bolting the hub to the bumper. However, I found out that the top surface of my bumper isn't flat and the hub point away from the truck so when the carrier would open it would open down. So I had to cut the corner of the bumper to make it level and then reinforced the bumper to hold the weight.

Once I had that done I started on the carrier. I had a couple things that I wanted with the install. For one, I wanted to keep my rear wiper. That meant that I had to have the carrier far enough away from the body to clear it. The other was that I wanted to be able to open the rear glass without having to swing the tire out. I was able to accomplish both but it took me th entire weekend and I'm still not finished. I still have to make a mount for my military style gas can, add an additional mount to the drivers side to equal out the load when closed and finally add a strap to limit the distance it opens.

Here are some pictures my nephew Eric took of it for me this weekend. There was a lot that I did to it that I didn't mention like I moved the latch from the bottom to the top, made the spacer for the latch out of two pieces od angle iron with end caps, etc.


Just picked up a Pathfinder tire carrier to experiment with, how do you like yours with the bumper mount? Any stability or strength issues?

Nice fab!


I moved the tire mount higher because I was afraid that it was going to drag. I also need to add another support to the drivers side because with the tire mounted higher it has more leverage and moves more. I going to try and make it work but I don't think the stock bumper is strong enough. I may have to remove it and add some more support to the inside. If I was to do it over again I'd ditch the stock bumper and make one from scratch which I still may have to do.


The stock bumper didn't hold up to the weight of the spare tire carrier and I ended up cutting it off. Last week I made a new one though using a 4x4x.250 square tube. I added a trailer hitch to it and cut out the license plate holder with lights from the stock bumper and used it on the new one so that the plate has a light. Then I rewired the wire harness and added a 4 pin trailer light connection.


Nice fab work as usual man. Glad to see you're still around.


Join the Elite Explorers for $20 each year.
Elite Explorer members see no advertisements, no banner ads, no double underlined links,.
Add an avatar, upload photo attachments, and more!
.


Back
Top