Mn Mountaineer V8 SAS | Ford Explorer Forums - Serious Explorations

  • Register Today It's free!

Mn Mountaineer V8 SAS

johnny499

Elite Explorer
Joined
February 6, 2007
Messages
250
Reaction score
47
City, State
brooklyn park,mn
Year, Model & Trim Level
98 Mountaineer 5.0 SAS
Callsign
W3JF
Last winter i bought a 98' mountaineer v8 awd for $600, repaired the pinched thermostat that caused the massive coolant leak. My plans are to do a SAS and SOA conversion. I have already done the BW4406 manual case conversion.
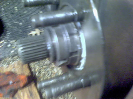
Here is the rig currently.
001.jpg

My plan is to do the following modifications.
HP Dana 44 narrowed from 78' bronco.(done)
4.56 gears. (done)
Detroit locker in the front. (done) Replaced with Auburn Ected selectable locker
4340 chromoly axle shafts in the front. (done)
Complete rebuild of front and rear axle. (done)
Custom long arm radius arms. (done)
Wild horses EB coil springs. (done)
Bronco 2 steering gear drilled for ram assist and rebuilt. (done)
Inverted tie rod with Chevy tie rod ends.(done)
78' Thunderbird calipers. (done)
BW4406 manual transfercase. (done)
Rear axle full rebuild, new truetrac and weld housing to tubes. (done)
33" or 35" tires leaning towards Cooper STT. Ordered 35" MT/R K's wound up with BFG KM2's (done)
64" chevy springs in the rear. (done)
Dutchman rear axle shafts. (done)
Solid diff cover for 8.8 rear. (done)
Rancho RS9000's (done)
1st gen front drive shaft. (done)
Ram assist steering.

Electronics upgrades.
Scangauge2 (done)
Yaesu FT-8900R ham radio (done)
Jensen vx7020 double din multimedia receiver with nav.(almost done)
Backup camera displayed in head unit.
EATC conversion. (i have all of the pieces and remade the harness just need time to install it)
Prewired to the rear for Aux battery.
Speed correction module.(done)

Exterior upgrades.
30% tint all the way around. (done)
Custom bumpers/spare tire carrier. (done still deciding on tire carrier)
Sliders. (done)
Winch/s. (done one winch up front)

Just picked up a new to me welder to help get this done. It's a Lincoln Powermig 350MP with the Tig and dual tank options.
002.jpg


Join the Elite Explorers for $20 each year.
Elite Explorer members see no advertisements, no banner ads, no double underlined links,.
Add an avatar, upload photo attachments, and more!
.


I will try to catch this thread up to where the project is at.
The first upgrade i did was install a Python remote start alarm.
011.jpg

Then i gathered the parts to do the BW4406 swap this spring.
012.jpg

I got it installed minus the shifter and front shaft the same day i picked it up from the JY.
013.jpg

I got the shifter and shaft installed the next day. the shifter boot came a few weeks later.
014.jpg

I also swapped out the trashed front seats with units from an 84' thunderbird, they bolted right to the rails.
I hunted around and found a new dash bezel, the coating was worn off really bad and i like the silver one. I also installed the control head for my Ft-8900r ham radio.
015.jpg

To the left of the steering column i mounted the Scangauge2 which i found the settings for to get it to display the transmission temp which is a great thing.

Here is the layout from the drivers perspective.
016.jpg

To power the sub amp, ham radio and future aux. battery i mounted a fuse block in the jack compartment and ran 1/0 cable to it from the front battery. I also mounted the transceiver for the ham radio in the jack pocket.
017.jpg
018.jpg


I stripped the front axle down to the housing. Then i ground the weld off of the passengers side inner "c" and wedge assembly. With that removed i cut six inches off the tube with the cut off saw.
021.jpg

Cleaned up the axle tube and squared up the end so i can pound the "c" assembly back on.
IMG_1992_zps45a6bb20.jpg

I did a starting alignment with the tape measure to the floor from the ball joint surfaces and pounded the end back on.
022.jpg

Then to get it as close as i could i slid round stock through the ball joint bosses and set an angle finder on it on both c's and tapped it around till they matched.
023.jpg

Finally i was able to weld the "c" on and i went around both sides of the center housing while i was at it. I used some high nickle and chrome content rod to burn it in. I made several short welds to avoid getting it too hot and cracking. Which made for some really ugly welds which i smoothed out with the grinder.
024.jpg

While i was at it i cut off the lower trac bar mount and ground it to clean things up.
IMG_2002_zps7498fd03.jpg

After that i pulled the gear set out and took the housing down to the car wash and cleaned it up inside and out.
026.jpg

Once it was dried i hung it up with the engine hoist.
IMG_2008_zpsed2e1b1e.jpg

Primed it.
028.jpg


fun project. that truck looks in pretty good shape for Minnesota!


fun project. that truck looks in pretty good shape for Minnesota!

I was just about to post the same observation!

Great job so far buddy. I'm looking forward to seeing your progress.


Two coats of semi gloss black.
031.jpg

While that was drying i used the Snap-on reamer on the Chevy passenger tie rod end and knuckles in preparation for the inverted t steering setup.
032.jpg

033.jpg

I am putting all new wear parts on this axle.
I was not ready to spend the money but Ballistic had there 20% off sale over the fourth of july and couldn't pass that up.
034.jpg

I ordered the joints, thread inserts, poly bushing end and spring perches for the project.
With the housing all cleaned and painted i put the axle seals in with a little silicone for good measure.
035.jpg

I found this 1330 yoke for it instead of the 1310 that was on it.
036.jpg

Then i took the pieces out to my dads to use his press to setup the gears and install the u-joints in the new axle set. I found a slightly used detroit locker for it locally for $300, put new 4.56 gears and master install kit in it.
037.jpg

Loaded it all back up and headed home.
038.jpg

Scored this 10' piece of 1.5" DOM for the tie rods and trac bar for $6 at an auction (how random was that).
039.jpg

Thanks guy's!!!
Yeah it's pretty good for having 210,000 miles on it in minnesnowta. It has pretty heavy rust on the rockers behind the running boards. I plan to remove the running boards, cut out the rusted rockers and weld in some rectangular tubing.
If i like how these modifications turn out i will eventually hunt down a nicer mountaineer and do a re-body. For now it feels good not caring if i scratch it working on it.
Last night i finished replacing the hinge pins on the front doors and readjusting them. I started cutting down the radius arms but haven't got the pics uploaded yet.


I started cutting up the radius arms so they can be extended with about three feet of 2" dia. 1/4" wall DOM tubing. I am trying to incorporate radius cuts in most of the components to cut down on stress cracks. I measured the arms as far away from the axle end as i could and still get 2" tube between the upper and lower flanges. Then i used a hole saw to create my desired radius cut.
041.jpg

The arms don't appear to be quite parallel with each other, i will fix that with the new tube.
042.jpg

Here i deviated from other radius arm extensions I have seen. I am leaving the upper and lower flanges longer than the web so they can extend the attachment farther down the length of the tubing. Creating two split joints 90 degrees from each other.
043.jpg

044.jpg

045.jpg

I cut out the web on the band saw and then started to size them with the flap disc.
046.jpg

While they were hot from grinding i bent the flanges to be parallel so they will fit over the tubing once i have them ground out a little more.


Nice. I love my SAS.

I just checked out your registry and am jealous that is one clean rig. I have been considering doing the chevy rear springs, do you think it was worth it? Did you notice more flex with them? What size tires are you running?


I was told that the Explorer springs tend to sag fast when done SOA.

It's hard to say if it flexes better because the SAS adds so much flex- I'd run out of traction before I ran out of flex (in the rear) with the IFS.

Running 33x12.50r15.


I was told that the Explorer springs tend to sag fast when done SOA.

It's hard to say if it flexes better because the SAS adds so much flex- I'd run out of traction before I ran out of flex (in the rear) with the IFS.

Running 33x12.50r15.

I have heard the same thing about the OEM springs. I have another thing pushing me towards the chevy springs, mine leans to the drivers side and i have the torsion key maxed out. Makes sense on the flex, the stock front is pretty limiting. The 33's look good on yours and that's what i was originally planning but been thinking about 35's for that little extra clearance.


I have been picking away at this slowly based on funds. I just ordered $400 worth of steel mostly for this project. It should be ready for pickup later this week. I have also been stripping out an old Bronco 2 which i will be using the power steering gear out of. I also got a set of lockouts from an 80' bronco along with a nicer hub assembly. One of the originals has a bunch of damage both where the inner bearing race sits and a ding/dent on the outer area round where the lockout seals against.
Now i just need to find some more money!!!!!
Gears and Misc. parts to freshen up rear end and do SOA $600
64" chevy springs $100
Front coils $200
Oil filter relocation kit $75
Tires and wheels $????
Speedometer correction module $140
My goal is to have all of the parts here and all of the prefabrication done so it will be off the street for as little time as possible.


Last night i beveled the ends of the tie rod tube fired up the new welder and tacked the threaded inserts into it.
051.jpg

I used 2 stands to hold it so i could rotate the material with one hand while welding it.
052.jpg

That worked fairly well, i got good penetration.
053.jpg

I got both ends done and threaded the tie rod ends on a little ways to let it cool. You can see the bronco tie rod on the floor for comparison. The camera angle makes it look much smaller than it is.
054.jpg


How was the alarm/remote start install? I have an Avital remote start (made by DEI) that I need to install before winter comes.


How was the alarm/remote start install? I have an Avital remote start (made by DEI) that I need to install before winter comes.

It was very straight forward, except this turned out to be the first one of these units that we have had fail and it was doing some really strange things. I replaced the brain and it was all better but i had to double check everything before condemning the unit. We are an authorized reseller and installation facility for the Python line from Directed so i have done a few remote starts over the years.:D


My explorer springs have sagged a lot since SOA, did it a year ago and the back has dropped 3 inches for sure


My explorer springs have sagged a lot since SOA, did it a year ago and the back has dropped 3 inches for sure

That sucks! Thanks for the heads up, i guess i will be doing the chevy springs for sure now.


I picked up my steel order Friday. It doesn't look like $400 worth to me.
061.jpg

The biggest expense was the 2" DOM for the radius arms at $135 for seven feet. the rest is tube for the rockers, cross member, bumpers and flat stock for skinning the frame and making brackets.
Saturday I finished scrapping the Bronco2 and brought the steering gear home. It feels tight so i will be disassembling it, drilling and taping it for ram assist and putting a rebuild kit in it.
062.jpg

Sunday i cleaned and rearranged the garage, that project is not done yet.


Now i have another decision to make. The mountaineer started making noise when making tight turns at low speed. I jacked it up and can spin the rear tires pretty easily, so the clutches are done in the LSD. Do i replace the clutches and keep the good road manners/tire wear or do i upgrade to a locker which will be more money?
If i decide to do a locker what is the best choice for a daily driver? They all have pro's and con's. I had a powertrax in my '02 ranger and never had a problem with how it drove year round but I did not like the rapid tire wear compared to the fronts. I like the idea of the ARB, OX and the Ected but the price sucks and good luck finding one used for an 8.8 in my area.
So that's my current dilemma/decision. So many choices, so little money.;)


Join the Elite Explorers for $20 each year.
Elite Explorer members see no advertisements, no banner ads, no double underlined links,.
Add an avatar, upload photo attachments, and more!
.


Eaton Trutrac.

Invisible on the street. Only locked when you need it. No compressors to buy, air lines to plumb, no engaging before you need it or hoping it'll get you out if you get stuck first.

And it's cheaper than an ARB.


Back
Top