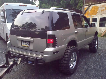
Well, after my Explorer got pounded by some ping pong/golf ball sized hail, the dented aluminum black window trim visually bothered me. I decided to attempt replacement with some advice from [MENTION=9927]MONMIX[/MENTION], and from some info from a post by [MENTION=40188]KillerB74[/MENTION], http://www.explorerforum.com/forums/showthread.php?t=151597
I pick up used pieces from a pick-a-part yard. Finding ones in good shape, on Explorers with the windows down, took a while. Two different Explorers donated pieces.
Click on images for larger views.
Here are the aluminum trim pieces being replaced on the front door. You can see some of the hail dings.

Tool list:


Roll window down, then open door and remove the 10MM and 11MM nuts.


Pull up the window belt molding starting from the end where you removed the 10MM nut. There are two clips holding that piece on. Keep pulling up, moving toward the end by the mirror, until the clips completely release. Remove piece and set aside.


Pull rubber window seal in on the right side, pull down on the top side, and then push loose rubber window seal through window opening to get it out of the way. Only pull and push enough to access the aluminum trim piece rivets.


Take the drill with 9/64 drill bit, drill each rivet head until the top falls off. KEEP ALL THE TOPS. Take hammer and punch and tap all the rivet bodies until they fall out. You might have to use the hammer and awl for removal for some, but be warned that it might start caving in the area around the hole while pounding the rivet body. Remove damaged aluminum trim piece, and put the replacement piece in it's place. Snug up the front edge by the mirror. Compare your old rivet tops with the tops on the replacement rivets. My replacement rivet tops were too small, but for some weird reason, the new rivet fit through the hole in the old rivet top. I did buy some stainless steel washers to use before I figured out they fit, and had to use one since I somehow lost one of the old rivet tops. Replace rivets starting from the left to the right.


Pull the rubber window seal back through the window opening and slide it back in place. Take the window belt molding and start replacement by the mirror. Make sure the clips, circled in red, go BEHIND the metal lip on the door. If you try to slip the longer part of the clip over the metal lip, it will just scratch and gouge the paint, as seen in the pic. Continue pushing down until it seats properly. Replace 10MM and 11MM nuts. Done.


The rear door instructions will be a bit abbreviated since rain was coming, and it's mostly the same as the front. First roll the window down. Remove the 10MM and 11MM nuts.


Open door. Remove the two screws by the interior door handle and the door handle surround trim piece. The backside of the surround trim piece is shown so you can see how it snaps in place. Open ashtray, and simply pull assembly straight up to remove it. Slide the door pull handle piece to the right, and slightly up, to release the clips underneath. Turn it over, remove the two screws holding the power window switch harness. Use the flat screwdriver, or whatever, to wedge between the black piece and the grey piece, to spread them apart until black piece will slide over the clips (one on both sides), then slide grey piece out from the black piece. Push that wire harness back into the door cavity. There are nine panel clips (circled in red) that need to be released with a panel popper, hands, or whatever. Once all of them are popped out. slide the whole door panel straight up for removal.


Pull back the plastic sheeting about half way across door. I used one of the door panel clip holes over the door lock pull to keep it out of the way. Remove the 11MM(?) bolt circled in red.

Pull up the window belt molding and remove. Pull rubber window seal in on the left side, pull down on the top side, and then push loose rubber window seal through window opening to get it out of the way. The rubber window seal containing the rear quarter window can be rotated somewhat to access the rivets. Only pull and push enough to access them. Take the drill with 9/64 drill bit, drill each rivet head until the top falls off. KEEP ALL THE TOPS. Be warned that ones around the quarter window are difficult to access. Take hammer and punch and tap all the rivet bodies until they fall out. You might have to use the hammer and awl for removal for some. Remove damaged aluminum trim piece, and put the replacement piece in its place. As with the front door, take the replacement rivets, insert them through the top of the old rivet. I started riveting on the top left, and continued around and down the opening. The area around the quarter window is where it becomes difficult to get the head of the pop rivet tool in place. Honestly, removing the quarter window is the best option, especially with the last bottom rivet. Continue to replace all the rivets. Put the quarter window back in the rubber window seal, if you removed it. Finesse the rubber window seal back into position. Take the window belt molding and start replacement on the left. Make sure the clips, circled in red, go BEHIND the metal lip on the door. Continue pushing down until it seats properly. Replace 10MM and 11MM nuts that hold the trim on. Replace the 11MM bolt on the inside of the door. Replace door panel. Snap the power window switch harness back into the switch and replace the screws. Slide the door pull handle piece back into place. Make sure it sets correctly back in place. I had to push to the left, and down, to get on the the clips to catch. Replace the two screws by the interior door handle and replace the door handle surround trim piece. Vacuum up all the aluminum particles from drilling, and make sure to vacuum the door drain holes located on the bottom edge of both doors hopefully to get the loose old headless rivet bodies. I used the rubbing alcohol to cleanup the black sealant/goop/tar from the quarter window removal.


Here are a couple hailed vs. used trim pieces.


I think it took longer to narrate and organize the pics than it did to actually replace the pieces
I pick up used pieces from a pick-a-part yard. Finding ones in good shape, on Explorers with the windows down, took a while. Two different Explorers donated pieces.
Click on images for larger views.
Here are the aluminum trim pieces being replaced on the front door. You can see some of the hail dings.
Tool list:
- drill with 9/64 drill bit
- ratchet with 10MM and 11MM sockets
- panel poppers (optional)
- philips screwdriver
- flat screwdriver
- awl
- punch with a flat tip larger than 1/8"
- hammer
- pop rivet tool
- 1/8" x 1/4" aluminum rivets
- rubbing alcohol for cleanup, if needed (not pictured)
- vacuum (not pictured)
Roll window down, then open door and remove the 10MM and 11MM nuts.
Pull up the window belt molding starting from the end where you removed the 10MM nut. There are two clips holding that piece on. Keep pulling up, moving toward the end by the mirror, until the clips completely release. Remove piece and set aside.
Pull rubber window seal in on the right side, pull down on the top side, and then push loose rubber window seal through window opening to get it out of the way. Only pull and push enough to access the aluminum trim piece rivets.
Take the drill with 9/64 drill bit, drill each rivet head until the top falls off. KEEP ALL THE TOPS. Take hammer and punch and tap all the rivet bodies until they fall out. You might have to use the hammer and awl for removal for some, but be warned that it might start caving in the area around the hole while pounding the rivet body. Remove damaged aluminum trim piece, and put the replacement piece in it's place. Snug up the front edge by the mirror. Compare your old rivet tops with the tops on the replacement rivets. My replacement rivet tops were too small, but for some weird reason, the new rivet fit through the hole in the old rivet top. I did buy some stainless steel washers to use before I figured out they fit, and had to use one since I somehow lost one of the old rivet tops. Replace rivets starting from the left to the right.
Pull the rubber window seal back through the window opening and slide it back in place. Take the window belt molding and start replacement by the mirror. Make sure the clips, circled in red, go BEHIND the metal lip on the door. If you try to slip the longer part of the clip over the metal lip, it will just scratch and gouge the paint, as seen in the pic. Continue pushing down until it seats properly. Replace 10MM and 11MM nuts. Done.
The rear door instructions will be a bit abbreviated since rain was coming, and it's mostly the same as the front. First roll the window down. Remove the 10MM and 11MM nuts.
Open door. Remove the two screws by the interior door handle and the door handle surround trim piece. The backside of the surround trim piece is shown so you can see how it snaps in place. Open ashtray, and simply pull assembly straight up to remove it. Slide the door pull handle piece to the right, and slightly up, to release the clips underneath. Turn it over, remove the two screws holding the power window switch harness. Use the flat screwdriver, or whatever, to wedge between the black piece and the grey piece, to spread them apart until black piece will slide over the clips (one on both sides), then slide grey piece out from the black piece. Push that wire harness back into the door cavity. There are nine panel clips (circled in red) that need to be released with a panel popper, hands, or whatever. Once all of them are popped out. slide the whole door panel straight up for removal.
Pull back the plastic sheeting about half way across door. I used one of the door panel clip holes over the door lock pull to keep it out of the way. Remove the 11MM(?) bolt circled in red.
Pull up the window belt molding and remove. Pull rubber window seal in on the left side, pull down on the top side, and then push loose rubber window seal through window opening to get it out of the way. The rubber window seal containing the rear quarter window can be rotated somewhat to access the rivets. Only pull and push enough to access them. Take the drill with 9/64 drill bit, drill each rivet head until the top falls off. KEEP ALL THE TOPS. Be warned that ones around the quarter window are difficult to access. Take hammer and punch and tap all the rivet bodies until they fall out. You might have to use the hammer and awl for removal for some. Remove damaged aluminum trim piece, and put the replacement piece in its place. As with the front door, take the replacement rivets, insert them through the top of the old rivet. I started riveting on the top left, and continued around and down the opening. The area around the quarter window is where it becomes difficult to get the head of the pop rivet tool in place. Honestly, removing the quarter window is the best option, especially with the last bottom rivet. Continue to replace all the rivets. Put the quarter window back in the rubber window seal, if you removed it. Finesse the rubber window seal back into position. Take the window belt molding and start replacement on the left. Make sure the clips, circled in red, go BEHIND the metal lip on the door. Continue pushing down until it seats properly. Replace 10MM and 11MM nuts that hold the trim on. Replace the 11MM bolt on the inside of the door. Replace door panel. Snap the power window switch harness back into the switch and replace the screws. Slide the door pull handle piece back into place. Make sure it sets correctly back in place. I had to push to the left, and down, to get on the the clips to catch. Replace the two screws by the interior door handle and replace the door handle surround trim piece. Vacuum up all the aluminum particles from drilling, and make sure to vacuum the door drain holes located on the bottom edge of both doors hopefully to get the loose old headless rivet bodies. I used the rubbing alcohol to cleanup the black sealant/goop/tar from the quarter window removal.
Here are a couple hailed vs. used trim pieces.
I think it took longer to narrate and organize the pics than it did to actually replace the pieces