-
Performance Upgrades - Maintenance - Modifications - Problem Solving - Off-Road - Street Trucks.
Covering the Explorer, ST, Sport, Lincoln Aviator, Sport Trac,
Mercury Mountaineer, Mazda Navajo, Ford Ranger, Mazda Pickups, and the Aerostar.
Featuring H.I. - Human Intelligence.
Register Today It's free!
- Forums
- Generation Specific Forums
- 1991 - 1994 Explorer Ranger Navajo 1st Generation
- Modified 1991-1994 Explorers
You are using an out of date browser. It may not display this or other websites correctly.
You should upgrade or use an alternative browser.
You should upgrade or use an alternative browser.
Josh's 4 door 1st gen explorer crawler (SGT Ex)
- Thread starter josh40601
- Start date
Elite Explorer members see no advertisements, no banner ads, no double underlined links,.
Add an avatar, upload photo attachments, and more!.
josh40601
Well-Known Member
- Joined
- January 17, 2011
- Messages
- 593
- Reaction score
- 173
- City, State
- La Mesa, CA
- Year, Model & Trim Level
- Ranger & Explorer
Wow, good work. You are more determined than myself. I would have started over lol.
Probably should have, but oh well. At least I am really familiar with this truck. lol
Got the driver side pillars all welded up and the back door back on. The body gaps from the fresh clean doors and the tan body really show how mangled this thing was/is. I still need to make a lower fender mount since I cut the old one off.
I'll post more updates as i get more done
josh40601
Well-Known Member
- Joined
- January 17, 2011
- Messages
- 593
- Reaction score
- 173
- City, State
- La Mesa, CA
- Year, Model & Trim Level
- Ranger & Explorer
finally got the body all welded up on Friday. The only thing that doesn't really work like it did when I blew this thing apart is the hatch isn't too fond of closing correctly. I think the actual mounts for the door of a 2nd gen is slightly different to the 1st gen because the window fits as should, and all the other doors are good, but the back door is hitting a little too low. I'll just make a little spacer to go at the mount and call it good enough.
Also put the tires back on. Gotta work on the interior to get it all finished up, then its time for a shakedown run. Doesn't look like the Explorer Forum run is gonna be my calling, so I'll likely try for a Corral Canyon day trip around the end of this month.


Also put the tires back on. Gotta work on the interior to get it all finished up, then its time for a shakedown run. Doesn't look like the Explorer Forum run is gonna be my calling, so I'll likely try for a Corral Canyon day trip around the end of this month.
- Joined
- November 29, 2000
- Messages
- 10,138
- Reaction score
- 4,100
- Location
- USA
- City, State
- San Diego, PRofK
- Year, Model & Trim Level
- 1994 XLT
Looks great. I especially like the color scheme. My hatch was never the same after I flopped it. It never lined back up, but its mostly pushed out at the top, and leans slightly driver side at the bottom. I think the reason is the thin sheet metal the mounts are bolted into gets warped / bent / buckled and is nearly impossible to line back up straight. The hatch is a heavy piece, and the mounts are weak. I have bent it back straight several times using a 2x4 on the bottom of the door, and it slowly goes back to being out of alignment. I am going to try the hatch off the donor and see if it lines up better, which would kill my theory listed above, but that will be after I am finished getting the Explorer back together.
josh40601
Well-Known Member
- Joined
- January 17, 2011
- Messages
- 593
- Reaction score
- 173
- City, State
- La Mesa, CA
- Year, Model & Trim Level
- Ranger & Explorer
mine has always been tweaked from pretty much after the first day I bought it. The only thing now is the latches won't line up, so that I have to fix. I don't need it perfect, i just need it to latch and lock.
and I wouldn't get too attached to seeing this color scheme... And I'll text you later about swinging by and grabbing those doors
and I wouldn't get too attached to seeing this color scheme... And I'll text you later about swinging by and grabbing those doors
josh40601
Well-Known Member
- Joined
- January 17, 2011
- Messages
- 593
- Reaction score
- 173
- City, State
- La Mesa, CA
- Year, Model & Trim Level
- Ranger & Explorer
I finally got back to working on this thing again. After the roof swap, I had a lot of Honey Do's and people visiting, just a lot of distractions and I really didn't feel like working on it.
I needed to get the A & B pillars tied into the frame so I could set in the seat pan, and I don't have a 2" die, so I decided to go with 1.75" .180 wall DOM to perform the attachments. The tube slides right into a 2" 120 wall HREW, which is what the cage is made from anyway. I'm not worried about loss in strength (if any) with it being so low and each attachment is less than 24" long.

The seat pan is made from 1.5", and I had some scrap 1.75 120 sitting around, so I extended the rear seat pan tube because after cutting it out of the other truck, it didn't line up. I ended up having to cut off the passenger side and reposition it as well to get it work with my truck.

The seat tabs were no where near where I needed them to be, so i had to cut all the tabs off for both the driver and passenger sides. It was dark by this time, so pics didn't come out, but I got back to work the next morning and got both seats in

With the front seats in, it was time to put the rear seat back in to see how she fits...

(disregard the mud stains from when there were no windows on this side. lol)
There are two harness mounts on the rear firewall that will need to be cut off for the seat to sit back all the way. Also have to add nuts to the C pillar for the rear seat belts as they were capped off with sheet metal. I'd be willing to bet if I cut the sheet metal out, the seat belt mounts will still be there, so I may do that. I also put the dash back together, but need to trim the trim panel at the bottom corner to fit the cage on the driver side.
Also got the doors from Brian on so its all 1st gen doors again. No more fighting with wiring and locks and crap that I was dealing with before.

and i finally attached the bottom part of the fender and tucked the inner fender liner in. I'm hoping the tire won't get into it now, but based on the damage on the passenger side, I'm not holding my breath.
That's all for last weekend. We have a long weekend coming up, so I'll be doing my best to get it ready. We are going to Superstition with a bunch of buddies over turkey day weekend, so I gotta get this thing done.
I needed to get the A & B pillars tied into the frame so I could set in the seat pan, and I don't have a 2" die, so I decided to go with 1.75" .180 wall DOM to perform the attachments. The tube slides right into a 2" 120 wall HREW, which is what the cage is made from anyway. I'm not worried about loss in strength (if any) with it being so low and each attachment is less than 24" long.
The seat pan is made from 1.5", and I had some scrap 1.75 120 sitting around, so I extended the rear seat pan tube because after cutting it out of the other truck, it didn't line up. I ended up having to cut off the passenger side and reposition it as well to get it work with my truck.
The seat tabs were no where near where I needed them to be, so i had to cut all the tabs off for both the driver and passenger sides. It was dark by this time, so pics didn't come out, but I got back to work the next morning and got both seats in
With the front seats in, it was time to put the rear seat back in to see how she fits...
(disregard the mud stains from when there were no windows on this side. lol)
There are two harness mounts on the rear firewall that will need to be cut off for the seat to sit back all the way. Also have to add nuts to the C pillar for the rear seat belts as they were capped off with sheet metal. I'd be willing to bet if I cut the sheet metal out, the seat belt mounts will still be there, so I may do that. I also put the dash back together, but need to trim the trim panel at the bottom corner to fit the cage on the driver side.
Also got the doors from Brian on so its all 1st gen doors again. No more fighting with wiring and locks and crap that I was dealing with before.
and i finally attached the bottom part of the fender and tucked the inner fender liner in. I'm hoping the tire won't get into it now, but based on the damage on the passenger side, I'm not holding my breath.
That's all for last weekend. We have a long weekend coming up, so I'll be doing my best to get it ready. We are going to Superstition with a bunch of buddies over turkey day weekend, so I gotta get this thing done.
WormsExplorer
Explorer Addict
- Joined
- February 14, 2015
- Messages
- 1,415
- Reaction score
- 568
- Location
- Colorado Springs, CO
- City, State
- Colorado Springs, co
- Year, Model & Trim Level
- 98 Durango
Looking good sir
josh40601
Well-Known Member
- Joined
- January 17, 2011
- Messages
- 593
- Reaction score
- 173
- City, State
- La Mesa, CA
- Year, Model & Trim Level
- Ranger & Explorer
One of the things about this cage that made life difficult was it had a custom dash, and came out of a truck that ran no inner door panels or anything. So when I put it in my truck, i struggled getting the dash to fit as I was trying to get the roof to line up. You would be surprised how rigid the cage was, even with just the roof and the pillars. I could probably pull another dash from a JY to clean up my hackery, but honestly, i don't see a need.
Here is what I got knocked out last night
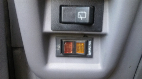
The headlight switch mount thing snapped off when I was cutting the dash, so it has just been flopping around, and I wanted to mount it solid, so I used some solid rod right off the cage with a pair of nutsert tabs and a pair of allen head screws to get it all mounted.

Next was the master door/window switch. Since I don't have an inner door panel, i had to make my own mount. I started with some copper welding rod, and bent it up to fit around the "teeth" at the front side of the switch, and wrap under the "clip" at the bottom side of the switch. Then bent up some scrap sheet metal to wrap around the side, and welded it directly to the inside of the door out of the way of everything.


Lastly, I cut the sheet metal out in the rear cabin portion to see if the seat belt were there, and sure enough, they were.

You can also see in the last picture how the inner structures of the sheet metal are not welded up. Since I have the cage now, I didn't need the structure of the sheet metal, so just welding the outside that faces the elements and is visual was all that I did.
Tonight I hope to get the truck turned around so I can finish out the cage tie-in in the cargo area, so I can take it to the base and get all the exhaust fixed.
Here is what I got knocked out last night
The headlight switch mount thing snapped off when I was cutting the dash, so it has just been flopping around, and I wanted to mount it solid, so I used some solid rod right off the cage with a pair of nutsert tabs and a pair of allen head screws to get it all mounted.
Next was the master door/window switch. Since I don't have an inner door panel, i had to make my own mount. I started with some copper welding rod, and bent it up to fit around the "teeth" at the front side of the switch, and wrap under the "clip" at the bottom side of the switch. Then bent up some scrap sheet metal to wrap around the side, and welded it directly to the inside of the door out of the way of everything.
Lastly, I cut the sheet metal out in the rear cabin portion to see if the seat belt were there, and sure enough, they were.
You can also see in the last picture how the inner structures of the sheet metal are not welded up. Since I have the cage now, I didn't need the structure of the sheet metal, so just welding the outside that faces the elements and is visual was all that I did.
Tonight I hope to get the truck turned around so I can finish out the cage tie-in in the cargo area, so I can take it to the base and get all the exhaust fixed.
josh40601
Well-Known Member
- Joined
- January 17, 2011
- Messages
- 593
- Reaction score
- 173
- City, State
- La Mesa, CA
- Year, Model & Trim Level
- Ranger & Explorer
What disc brake swap are you using for the 9”. Do you have the 3/8 or 1/2 T bolts. Thank you.
A hodge podge of parts. The plates were home made, the bearing retainer is one from Speedway if I remember correctly, the disks are for the front of a 4wd early 90s f150, and the rubber brake lines are from a falcon, but I don't remember the year. The calipers are 76 Caddy calipers. I think you could run f150 or bronco rubber lines in the rear and be fine.
josh40601
Well-Known Member
- Joined
- January 17, 2011
- Messages
- 593
- Reaction score
- 173
- City, State
- La Mesa, CA
- Year, Model & Trim Level
- Ranger & Explorer
Sounds good thank you for the information.
anytime
- Joined
- September 6, 2006
- Messages
- 719
- Reaction score
- 169
- City, State
- South Central PA
- Year, Model & Trim Level
- 1994 Explorer
- Callsign
- yosty
Excellent. I always look forward to reading updates on this. Are you going to put any rub rails tied into the cage to help protect the body? I ditched my door panels also. It feels so much roomier inside. The drivers side window controls, I mounted them where the rear defrost button used to be on the dash with some zip ties. That allowed me to run just 2 wires to the door for the window. If I remove the door it makes it so much simpler.
josh40601
Well-Known Member
- Joined
- January 17, 2011
- Messages
- 593
- Reaction score
- 173
- City, State
- La Mesa, CA
- Year, Model & Trim Level
- Ranger & Explorer
Excellent. I always look forward to reading updates on this. Are you going to put any rub rails tied into the cage to help protect the body? I ditched my door panels also. It feels so much roomier inside. The drivers side window controls, I mounted them where the rear defrost button used to be on the dash with some zip ties. That allowed me to run just 2 wires to the door for the window. If I remove the door it makes it so much simpler.
Nice job on moving the switch panel. If I ever decide to go removable doors I'll definitely do something like that.
As for rub rails, i never really thought about adding any since the sides are already all beat up. I know i won't be putting anything in before the next trip out.
josh40601
Well-Known Member
- Joined
- January 17, 2011
- Messages
- 593
- Reaction score
- 173
- City, State
- La Mesa, CA
- Year, Model & Trim Level
- Ranger & Explorer
This weekend I was able to get the cargo area all wrapped up before this trip out. Will I continue to modify this area over time, probably. Its ok for now though.
I did the same 1.75 tubing from the 2" to the frame. My welds look like ****, I know. This is why I am not a fabricator for a living. lol

Then I used some scrap 16ish gauge sheet metal that the previous owner of the red body used to hold the carpet down to patch the holes in the floor.

I only took a picture of 1 up close, because the other 3 basically have the same thing sheet metal and booger welds attached to some tubes.

As I was going through everything, I happened to notice the passenger side of the body has begun the divorce with the floor pan of the body. I'll probably just run a sheet metal screw through the body and if i can, try and tack the two back together.

I also got the spacers made to line the hatch up so it would latch. I'm not sure if my hardtop to convertible to hardtop conversion caused for the hatch to sit a little lower where it wouldn't hit the striker, but a pair of 1/8" spacers between the mounts and roof seam area did the trick. The roof seam also had different sized holes for the electrical wires to pass through, so it may be different. I'm just glad it latches now.

and because I was happy to have the truck turned around, I took this picture.

I forgot I still needed to hook the rear caliper back up from KOH (don't judge me) so i'll take care of that while I have the truck facing this way. I doubt the exhaust leak will be fixed before Thanksgiving, but hopefully everything else will be done.
I did the same 1.75 tubing from the 2" to the frame. My welds look like ****, I know. This is why I am not a fabricator for a living. lol
Then I used some scrap 16ish gauge sheet metal that the previous owner of the red body used to hold the carpet down to patch the holes in the floor.
I only took a picture of 1 up close, because the other 3 basically have the same thing sheet metal and booger welds attached to some tubes.
As I was going through everything, I happened to notice the passenger side of the body has begun the divorce with the floor pan of the body. I'll probably just run a sheet metal screw through the body and if i can, try and tack the two back together.
I also got the spacers made to line the hatch up so it would latch. I'm not sure if my hardtop to convertible to hardtop conversion caused for the hatch to sit a little lower where it wouldn't hit the striker, but a pair of 1/8" spacers between the mounts and roof seam area did the trick. The roof seam also had different sized holes for the electrical wires to pass through, so it may be different. I'm just glad it latches now.
and because I was happy to have the truck turned around, I took this picture.
I forgot I still needed to hook the rear caliper back up from KOH (don't judge me) so i'll take care of that while I have the truck facing this way. I doubt the exhaust leak will be fixed before Thanksgiving, but hopefully everything else will be done.
josh40601
Well-Known Member
- Joined
- January 17, 2011
- Messages
- 593
- Reaction score
- 173
- City, State
- La Mesa, CA
- Year, Model & Trim Level
- Ranger & Explorer
windshield is in, brakes are done (but still squishy, so going to bleed them again), mounted the hi-lift, seat is relocated (but needs final welding), but I found the hydroboost fittings are leaking  Not sure why as they have the teflon seals in there, but they are. I'll tear into that after the trip. Drove the truck around the neighborhood yesterday. Other than it being obnoxiously loud from the exhaust leak, it did awesome. Steering seems much faster and the cooling system seems to be working really well as I never topped 190. I'll finish up the items above this afternoon, then give it a once over bolt and fluid check. Loading up Thursday to head out Friday at ass crack o dawn.
Not sure why as they have the teflon seals in there, but they are. I'll tear into that after the trip. Drove the truck around the neighborhood yesterday. Other than it being obnoxiously loud from the exhaust leak, it did awesome. Steering seems much faster and the cooling system seems to be working really well as I never topped 190. I'll finish up the items above this afternoon, then give it a once over bolt and fluid check. Loading up Thursday to head out Friday at ass crack o dawn.Elite Explorer members see no advertisements, no banner ads, no double underlined links,.
Add an avatar, upload photo attachments, and more!.
josh40601
Well-Known Member
- Joined
- January 17, 2011
- Messages
- 593
- Reaction score
- 173
- City, State
- La Mesa, CA
- Year, Model & Trim Level
- Ranger & Explorer
I wish I had my rig finished, I would come out with you for at least a day run.
As long as the truck holds together this trip, I'm planning on a day run to corral canyon to hit sidewinder, gunslinger, and bronco peak (pre-connector) on 12/16 with a good friend in a very capable LJ. If you can get yours done by then, you are very welcome to join us. If the truck breaks, I likely won't be able to afford a trip. I hate this being broke ****.
Featured images


Featured images
Similar Threads
- Replies
- 2
- Views
- 831
- Replies
- 2
- Views
- 527
- Replies
- 20
- Views
- 2,608
- Replies
- 14
- Views
- 5,425