Bkennedy's SAS and Rebuild Thread | Page 100 | Ford Explorer Forums - Serious Explorations

  • Register Today It's free!

Bkennedy's SAS and Rebuild Thread

As some of you know, I am working on building a parts list for a shortened Dana 44, long radius arm with coil overs SAS. 5:13 gears to match my rear axle and an ARB, maybe an electric locker. I have a pretty good list so far. At the same time, I am going to swap out the rear drum brakes for discs off of a 99 Explorer.

Please note: The plan is to keep this project as simple as possible with mostly off the shelf parts. I am not a fabricator, just a decent welder with a what I would consider the minimum required tools (chop saw, cut off wheels, air tools, welder, etc.), who likes doing his own work. Your opinions are welcome, but what I really need is technical advice. I have been thinking about this for several years and now have the time and cash to make it happen. Please keep on topic with your advice and don't go off on a side track about how you would do it as a four-link, or caged arms, or leave the axle full-width because that is not what I want. I want a simple-ish set up that works.


Join the Elite Explorers for $20 each year.
Elite Explorer members see no advertisements, no banner ads, no double underlined links,.
Add an avatar, upload photo attachments, and more!
.


I know on my engine there's two temp sensors. One for the guage and one for the ecu. But I don't think mine is right there on the 2.9. But maybe it is on yours? Is this picture taken from the front of the engine?


Join the Elite Explorers for $20 each year.
Elite Explorer members see no advertisements, no banner ads, no double underlined links,.
Add an avatar, upload photo attachments, and more!
.


Yes, from the front under the front of the intake. If it was for the PCM, and was fried, wouldn't it run bad or get a check engine light?


I cut 3/4" off the outside edge of the tables and now I like them better. The side with the gas cans looked alright before, but it was the tire side that stood out too much.

Before
20180221_161708.jpg

20180221_165745.jpg


After
20180313_142927.jpg
20180313_142944.jpg


I am thinking about painting them white so they blend in with the hatch.

I cleaned up the Explorer after cutting down the tables. The only post-trip item I still have to do is check the fluid in both diffs to see if any water got in. I pulled a bunch of water weeds off the undercarriage from the Mojave River.


The wife and I took a 120 or so mile drive around the back country in the Explorer last week. Going through Ramona, the transmission pressure started jumping all over the place, with no rhyme or reason. I am thinking, great, just great. I pull into a parking lot and start looking over everything. Crawl under the Explorer, and there it is; the wire for the pressure gauge sender is missing the retention nut. I stop by Tractor Supply and purchase a four pack of M4 nylon lock nuts. The pressures have been fine ever since. I think the pressure variations I saw on the Mojave Road trip were from a loose wire nut. All that worry due to a 25 cent nut.

The Explorer has had a slight driveline vibration at freeway speeds for a few years now, but I just figured it was the price paid for having a awesome off-road Explorer. I noticed the vibration I felt on the way home from the Mojave Road trip was there. Much more pronounced than before. Starts at 60 MPH on the dot, on up to about 75 MPH, which is as fast as I went. I put the rear axle on jack stands and pulled the rear drive shaft so I could see if I could feel any movement in the pinyon or transfer case output shaft. They are solid. I pulled the slip-yoke off the drive shaft and it was full of water. Must have been from crossing the Mojave River. The U-joints looked and felt okay. I had that drive shaft built several years ago when the transmission/transfer case went in, and I did not realize the builder used grease-able U-joints. I never use them because they are weaker, usually very difficult to service, and don't seem to last as long. The double cardan centering ball was completely dried out. Ordered three Spicer 1310X U-joints and centering ball rebuild kit. Parts arrived on Thursday, I put it back together same day. I drilled a small hole in the slip-yoke boot to allow it to drain if it gets water in there again and greased the heck out of the yoke with synthetic grease. I did not have time to take it for a test drive.

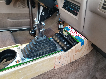
Today I went out to SMOG it and pay my outrageous registration fee through AAA. When the guy was driving it into the bay to test it, I noticed the brake lights were not working. The wiring for the brake lights is not OEM, I had to modify it for towing behind the RV, and for the transmission torque converter lockout relay. I pulled the side off the center console for access and messed with everything I could think of; relays, fuses, wiring, etc., before realizing it was not my doing but the brake light switch itself that was not functioning. Replaced it in the Autozone parking lot in about five minutes, after I put all the stuff I pulled apart back together, works great.

Finally got on the freeway and the driveline vibration is completely gone. I am very relieved, because all I could think about was TurboExplorer chasing his driveline vibration for a long, frustrating time.

If you are in the market for driveline parts, check out drivetrainamerica.com. I am not affiliated with them in any way, but their customer service is outstanding. I purchased the U-joints from Rock Auto, they were the best price on-line. I located the centering ball rebuild kit at Drivetrain America. It was a $12 part with a total order amount of $20. The next day, I realized I needed the rubber boot that goes over the ball. I emailed their customer service asking if they could add it to my order and I could pay the difference, or cancel my order so I could reorder with all the parts I needed to avoid extra shipping. I got a reply the same day telling me the boot was added to my order at no charge and thanking me for my business. It was only a $5 part, but it was 25% of the entire cost of the order. That is great customer service. I am planning on rebuilding my front driveshaft just because its been a long time, and am going to order all the parts from them.


I think I bought my double cardan rebuild kist from Amazon. It was a Moog part that I got the part number off of this site.


I noticed the other day that the foam around the AC condenser is gone. I think it fell apart and fell out, leaving a small gap between radiator/AC condenser and core support. I know it helps direct air flow through the radiator, but is that a big deal, or should I fill that space with some type of expanding foam?


Having 100% airflow through the radiator for cooling is important. Air will always take the path of least resistance. Air through one radiator is not bad, but when you have 2 or 3 cooling units in the path of the air, makes it hard for the air to 'push' through and want to divert its path.

Even the fan shroud should have minimal clearance around the fan (as they come from the factory) to ensure max air flow is being pulled in. I learned over the years from having my Rod Shop, gaps and shrouds were important when building Hot Rods w/ Modern/Bigger ci. motors. Big Blocks in 57' Chevys, etc. Having bigger radiators or high flow water pumps weren't always the 'fix it' to overheating engines. You start throwing AC, Trans and oil coolers in there...You get the picture. Sometimes the simplest of things are overlooked.

On my V8 Ex, they had these small rubber flaps attached to a pinch welt they put in the gap that 'snapped' on the radiator opening on the sides. Genius! A good JY find if you can get them. Rubber seems solid I have a tripped planned tomorrow and I can see if I can pull a couple for you. I can post a picture of them tonight if interested.

The flaps were about 1" thick and pressed on AC condenser to fill void.

or maybe make something like this:
deflector.jpg

on 2011-2014 F150 w/ EcoBoost


The rubber looks like a cheap, easy solution. I have sheet metal flaps in place of the OEM plastic units to guide the air into the radiator and can add rubber flaps to those to cover the gaps on the sides of the radiator. I was thinking of spraying some expanding foam in there, but this is much cleaner. Thanks.

Yesterday I went on a day drive and it entailed some long grades, which my Explorer doesn't like. The transmission temps get up to a little under max recommended for the 700R4, but the engine temps don't get past the "M" in normal.


I used a piece of rubber sheet I had to block the air from going around the passenger side of the radiator and direct it towards the cooling fins. The driver side still has the OEM foam stuff in place.

Yesterday I crawled under the Explorer to see about putting some holes in the skid plate under the catalytic converter to help move heat away from the transmission. The cat is alongside the transmission pan, with only a few inches clearance and I think its transferring some heat into the transmission fluid. While under there I noticed transmission fluid on the cross member. I pulled the skid plates and the trans pan appeared to have developed a leak at the driver side rear. When I went to re-torque the pan bolts, the threads for that corner bolt stripped. I am guessing that is why it was leaking. The bolt also has a brace for the transfer shifter cable mounted to it. I never liked the way it was mounted because I don't think any pressure should be put on the pan. I noticed the bolt in that hole appears to be one of those oblong "helper" bolts lazy people use after they strip out aluminum threads. Never noticed it before, just put it back whenever I dropped the pan because it was longer for the mount bracket. I opened the pan drain plug and went to pick up a thread repair kit. While I was at the hardware store, I got a new set of flange head bolts to take place of the washers and bolts for the pan.

While I was repairing he threads with a coil insert, I noticed the two bolt holes that the transmission shifter cable brace attaches onto were trashed, with only about the top half of the threads intact. This was due to having too short of bolts in those locations for the several years. So, I repaired those as well.

After all that, I decided to modify the transfer case shift cable brace. It is mounted to the Advanced Adaptor between the trans and transfer case, that also acts as the transmission cross member mount, like before. I used one of the unused transmission mount bolts above the AA mount for the brace. Its shorter than before, but at more of an angle, so should be about as strong. The cable is aligned better than before as well. Here is a pic of it while the paint is drying.
20180418_193454.jpg


I should have a few more pictures of the brace when I get it bolted in place. I also drilled five, 1" diameter holes in the skid plate below the catalytic converter, and welded on a heat shield. The shield is just some thinner steel plate I had, about 6" tall and 10" wide. Its booger welded along the top of the skid plate and bent so it curves around between the cat and transmission. It should help pull some of the heat coming off the cat down into the skid plate and out the holes, and away from the transmission. I will get a couple of pictures of that tomorrow too.


Its back together and doesn't seem to be leaking. The transfer case shifter cable mount is very solid and I did not have to adjust the cable. The heat shield fits nicely between the cat and trans.

Cable shifter mount
20180419_125312.jpg


20180419_125338.jpg


20180419_125405.jpg


Tight squeeze
20180419_125456.jpg


Modified skid plate
20180419_133509.jpg


Heat shield. You can see in these pictures how tight everything is under there. Not much room to work with. The heat shield is farther away from the cat than it looks in the pictures.
20180419_145702.jpg


20180419_145900.jpg


Yes. I have had this Explorer since 1995 and its always had problems with getting hot. I have made great strides with the engine temps, as it rarely gets above the "M" in NORMAL, but the transmission gets hot. I have also made strides with the trans temps, but it still gets warm. Usually on a long, steep grade on the highway when the ambient temperature is hot, or when going up long, steep grades at slow speeds off road. I know the skid plates hold the heat in, so I am trying to do things to cool the temps and still protect the drivetrain.

I am still contemplating changing the transfer case shift cable mount to increase the angle to the shift lever. It would make it easier to move the lever inside the cab. Its not bad, but could be better. The only reason I haven't is because having it take a little bit more positive pressure to move the shifter makes it harder to accidently put it into 4 Hi. It moves easily from 4 Hi to Neutral to 4 Low to 2 Low.

I was also thinking of seeing if I could modify the shift lever to pull instead of push. My NP231 shifter is the opposite of nearly every one I have seen because it was originally for a S-10. It was the only cable system we could find when the transmission/transfer case was being installed. The shifter lever pushes; 2H, 4H, N, 4L, 2L, instead of most Jeeps which pull towards the driver; 2H, 4H, N, 4L, 2L. If I could get the shift lever at the transfer case mounted so it would pull instead of push, it would work. I was thinking of that when I was putting it back together. There appears to be enough space but I would have to figure out where and how to mount the cable. I might mess around with that when I get around to rebuilding the front driveshaft.


I put an electric pusher fan in front to boost the a/c performance which also helped with trans temps, but in your case I realize you are just out of room up there. Hopefully your heat shield will do the trick.

Maybe time to cut a hole in the hood to push more air through the engine bay. I can picture a nice gaudy hood scoop on it. :afro:


'pimp-tackular' ... Awesome!

Some things shouldn't be done. Logical idea though


I dropped the front skid plate today to check the transmission for leaks. None found, so that's good. While I had it out, I drilled four 3/4" holes, 2-1/2" apart where the skid plate covers the "Y" pipe. Its in a area of the plate where it has a welded bend and two welded on supports, and is near the front end so it shouldn't take away too much strength. I think it will draw air up at slower speeds. No more holes in the plate or it will be too weak to bother with having it there. I also did a pan drop fluid change when I had the pan out to repair the stripped threads (six quarts), drove it around for about an hour, and then drained and added four more quarts today. During the drive, the temps stayed around 140, and went up to 165 up a steep two mile grade in 3rd gear with my foot nearly to the floor at 45-55MPH. That is at the bottom of the recommended operating range for the GM 700R4. I am just going to drive it for a while without messing with anything.


Join the Elite Explorers for $20 each year.
Elite Explorer members see no advertisements, no banner ads, no double underlined links,.
Add an avatar, upload photo attachments, and more!
.


Just a thought.....What about adding a small 'scoop' under that plate to direct air upward? I did this on a VW bug years ago for an oil cooler I had under the car because I turbo charged the engine...not alot of space, but extremely effective.


Back
Top