How to: - 1.5" body lift for less than $50 | Page 9 | Ford Explorer Forums - Serious Explorations

  • Register Today It's free!

Prefix for threads which are instructional.
whered you get stuck at? just keep posting up your snags and we (will, ronin, myself, etc) should be able to walk you through them

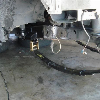
i could not separate the body from the frame i got b,c,d,e all unbolted i got the nut on a off but cant figure out how to take the old block off. how does the new block fit on the nut thing that the bolt turns onto.on b,d,e the nut thing is too big for the hole on the new block


Join the Elite Explorers for $20 each year.
Elite Explorer members see no advertisements, no banner ads, no double underlined links,.
Add an avatar, upload photo attachments, and more!
.


i thought the a mount was flipped(opposite all the other mounts). i ended up soaking the mount in liquid wrench, heating it till the rubber melted, then proceeded to beat the hell out of it with a BFH.....although...this is my usual solution to everything.. so i could be mistaken

unrelated, but did you remember only remove the bolts on one side and only loosen them on the other?


okay so u flip them that makes more sense. and yes i did remove all of them on one side and loosen most of it on the other


Wait....what? What I was trying to say is that I believe the front body mount is flipped from the factory. Gahh, I can't remember, ill look tomorrow. Having a tough time recalling since its been awhile


Wait....what? What I was trying to say is that I believe the front body mount is flipped from the factory. Gahh, I can't remember, ill look tomorrow. Having a tough time recalling since its been awhile

okay so should i flip them, and okay that would help out a lot


No, don't flip them. I don't know why the front is upside down compared to the rest but put it back that same way after you install the lift blocks.

For the "A" bolts the nut is only half the misery. The lower "puck" on the "A" mounts is threaded, and so is the entire bolt, so the lower puck is acting like another nut you have to loosen the bolt thru. Like Kazer said use tons of liquid wrench. Hold the lower puck with vice grips or a pipe wrench or whatever and loosen/remove the bolt.


The lift is done

Hey all, just finished doing the body lift . Was going to do the 1.5 lift but ended up getting 2 inch blocks in alloy.Followed all the same steps and found it not to hard to do.As mentioned mounts are hard to undo, but i found a good pair or stilsens and a socket with a long bit of pipe on the end the best way to crack nuts.My 18 volt milwake impact driver wouldn't move them at all. I also think that alloy blocks would eliminate the body roll compared to the rubber mounts.Only just got back together so will post pics tomorrow.Did the complete strip as in seats and front and rear bars.Found a wrecked ex not far from where i live and scored the leather interior out of it,so changed my ut to a limited. Looks great in all leather now too.The car colour is black and also put some new dark tint on.I bought the ex only last month for my girl and came with 275 wide tyres at standard height. No bad rubbing, but very close.Thanks for the idae and will post pics asap.


No, don't flip them. I don't know why the front is upside down compared to the rest but put it back that same way after you install the lift blocks.

For the "A" bolts the nut is only half the misery. The lower "puck" on the "A" mounts is threaded, and so is the entire bolt, so the lower puck is acting like another nut you have to loosen the bolt thru. Like Kazer said use tons of liquid wrench. Hold the lower puck with vice grips or a pipe wrench or whatever and loosen/remove the bolt.

okay this mite be a stupid question is liquid wrench better then WD40


okay this mite be a stupid question is liquid wrench better then WD40

should both do the same job. nothing beats a bit of leverage though eg grab a hollow pipe and put over socket end and turn.


nuts

Good idea to clean out the thread of the pucks with a tap die set as will thread back on nice and easy.Also use locktight on nuts and tighten with impact driver, the combination of locktight and the impact driver will be plenty tight enough.


i read all of the 3inch body lift trend and i read that some of the ground down the threads on the front threaded puck did yall do this. and would it make it easier to blot it down


Bluebaboy, very interested in seeing the finished pics of your truck. Were you able to get the front bumper cover back on without lifting the bumper? I know mine was real tight with just the 1.5"...didn't look like enough clearance for another .5". also what did you do for your back bumper?


i read all of the 3inch body lift trend and i read that some of the ground down the threads on the front threaded puck did yall do this. and would it make it easier to blot it down

I didn't do that to my front puck, just re threaded the bolt all the way through like factory


The point of grinding the threads out of the front bolt is with the 3" lift kit the new bolts aren't threaded down the whole length like the factory front bolts or the longer 1.5" bl replacement "a" bolts. Hardest part is getting them out the first time....reinstall is easy so no need to grind the threads out of the pucks.


The installation steps are otherwise very similar as the 3" body lift, which is in 2 parts in these two threads:
http://www.explorerforum.com/forums/showpost.php?p=2395137&postcount=342

http://www.explorerforum.com/forums/showpost.php?p=2395138&postcount=343

With the following exceptions:

-No steering extension or bumper brackets are needed.

-For the rear bumper cover, the metal part of the bumper will touch the bumper once the lift is in, so you need to trim some of the plastic on the underside of the bumper to allow the metal part to clear

-For the fan shroud, the lower fan shroud will need to be trimmed a bit (about an inch or so) on the inside curve so the fan doesn't rub on it.

Does anyone know if this also holds true for the 2nd Gens?


The point of grinding the threads out of the front bolt is with the 3" lift kit the new bolts aren't threaded down the whole length like the factory front bolts or the longer 1.5" bl replacement "a" bolts. Hardest part is getting them out the first time....reinstall is easy so no need to grind the threads out of the pucks.

okay thanks for clearing that up for me
yall are the best


when i try the body lift again i will be asking lots of questions. with the metal puck and the rubber bushing do u keep that on the bottom of the frame bracket then put the new block on the top of the frame bracket


After removing the bolts and jacking up the body, the lift block goes on top of the bushing that sits on the frame....so it will sit in between that and the body. So in other words if you were to look at it as a stack from top to bottom it would be:

Bolt head
Body
Lift block
Body mount bushing
Body mount bracket
Puck

With the bolt going thru the hole in all of them. In the front two mounts its more like

Nut
Washer
Body
Bushing
Puck
Bolt head


so u move the bushing from under the bracket to the top of the bracket. b/c on my ex it goes this is stock
bolt head
body
block
bracket
bushing
metal puck
on b,c,d,e


Join the Elite Explorers for $20 each year.
Elite Explorer members see no advertisements, no banner ads, no double underlined links,.
Add an avatar, upload photo attachments, and more!
.


Back
Top