'86 Bronco II Eddie Bauer Restoration.... | Page 2 | Ford Explorer Forums - Serious Explorations

  • Register Today It's free!

'86 Bronco II Eddie Bauer Restoration....

I hit a junk yard up Saturday looking for my buddies '89 a new bumper. We found an '85 with a nice brush guard on it so I got it for $30. It needed cleaning up and paint, but that was easy. Luckly the bolts holdign it on broke lose without a problem. It was a tight fit under the BII to get the bolts off since it had no wheels and was sitting on the ground.

Before Cleaning:
100_3677.jpg

100_3678.jpg

100_3679.jpg


After Cleaning (wire wheel on angle grinder):
100_3680.jpg

100_3681.jpg


Back Side painted: (1 can of rust-o-leum)
100_3682.jpg

100_3683.jpg

100_3684.jpg


Front Side painted: (1 more can of rust-o-leum)
100_3685.jpg

100_3686.jpg


I hope to have it installed in a couple days...


Join the Elite Explorers for $20 each year.
Elite Explorer members see no advertisements, no banner ads, no double underlined links,.
Add an avatar, upload photo attachments, and more!
.


Nice find on a B2 with that little rust. Looking good. You might want to drop the gas tank and check for rust. Mine was paper thin even though the body hardly had any rust.
Most of the rust was between the tank supports and tank. I replaced with a new tank and sending unit.
yea i already checked there too.....clean as a wistle!


I had the front end aligned today. It was surprising how close I had it just by sighten it.

I also got my brush guard installed. Below is those pictures. Before anyone ask, I am NOT going to be running lights on it for right now. I am going to install my blue LED's on it sometime here soon. I am still deciding if I like it or not; either way, it will stay on there till after the Dunes trip so I will have something to attach my flag to.

100_3734.jpg

100_3735.jpg

100_3736.jpg

100_3737.jpg

100_3738.jpg

100_3739.jpg


I got the rear done for now. I installed Ranger factory lift blocks I got from Zach (zabeard). They were easy. You wouldn't know it, but the front is only 1/2" higher than the rear!

When I started today:
100_3761.jpg


During:
100_3762.jpg

100_3763.jpg

100_3764.jpg

100_3765.jpg


After:
100_3766.jpg

100_3767.jpg

100_3768.jpg

100_3769.jpg

100_3771.jpg

100_3772.jpg


This is my new switch panel. Thought it turned out quite nice. This is for my "new" items (those will find out later). These pictures also show the stock warning lights. One for each exterior light, low fuel, and low washer fluid.
100_3775.jpg

100_3776.jpg

100_3780.jpg

100_3781.jpg

100_3784.jpg


And some pictures of my new electrical console. This will house a 12 circuit fuse panel. I am going to finish wiring it tomorrow.
100_3786.jpg

Interior.jpg


And this is some random shots of my interior....
Interior2.jpg

100_3785.jpg

100_3779.jpg

100_3777.jpg


looks nice keep up the good work


Nice

Dude looks nice i didn't know bronco II had that kinda of center console, i like the brush guard btw it matches the tires and the roof rack completeing the truck in my opinon


Well I got my new light bar installed today. Thanks to Fusion for swapping me lights. I have been looking for one of these lights bars for about 7 years. Fusion had one brand new that he sold to me. These were discontinued in the mid '90s. I love these things.

It has 8 55w lights in the front, 4 55w lights in the rear, and 1 55w light on each side.

I also upgraded my alternator to run this light bar to a 200A PowerMaster alternator. I had to make a custom upper bracket for it to fit correctly. I will post pictures of it tomorrow.

Hopefully I will have light up shots of the light bar tomorrow night!


Before Lightbar:
100_3796.jpg


After!
100_3803.jpg

100_3804.jpg

100_3805.jpg


I got my spare tire carrier and spare tire mounted last night. Here are those pictures:
100_3806.jpg

100_3807.jpg

100_3808.jpg

100_3809.jpg


Here is my new PowerMaster 200A alternator. The testing tag on this says it makes 140A at 1,200 rpm and 200A at 4,000 rpm. It powers ALL the lights without question. As you can see in the pictures, I had to make an upper bracket extention. The case is larger so the mounting ear was moved to the top. I ran 2AWG power wire to the battery side of the starter soleinoid. At idel she produces 14.65v.
100_3816.jpg

100_3817.jpg

100_3818.jpg

100_3819.jpg

100_3820.jpg


I got the relay's and the wiring done for the light bar. This center console makes a nice little electrical box. I supplied the aux fuse block with a 150A circuit breaker.
100_3821.jpg

100_3810.jpg

100_3811.jpg

100_3812.jpg

100_3813.jpg

100_3814.jpg

100_3815.jpg

100_3846.jpg


I got the TrailBlazer wiring into the cab the best way I knew how without cutting a hold in the cab. It doesn't look bad IMO.
100_3824.jpg

100_3825.jpg


Here is some random pictures I took after I was done today. This was in the side yard of my house.
100_3847.jpg

100_3848.jpg

100_3849.jpg

100_3850.jpg

100_3851.jpg

100_3852.jpg


This is the cover that came with all the TrailBlazer light bars. I think it looks good on and off. I will probably leave it off until I go to a show.
100_3853.jpg

100_3854.jpg

100_3856.jpg

100_3855.jpg

100_3857.jpg


I will post up some pictures later tonight or tomorrow with the lights on at night.


Here is the night pictures of the light bar. The first one is with flash on. The second 2 are without. My camera sucks at night pictures.

100_3862.jpg

100_3861.jpg

100_3860.jpg


Here is the 2 video's I have. I need to replace the belts before I make a complete walk around video. Hopefully tomorrow night.

Front:
http://www.youtube.com/watch?v=m63PDuliD-g

Rear:
http://www.youtube.com/watch?v=VeLBiZ1Nfag


This thing shines its lights just above my high beams. I am going to adjust them down slightly when it stops raining.


Looks great! Just FYI on the bolts in your Superrunner steering, the ones on the pivot arm (bushings) you should put the bolt going DOWN into the bushings so the nut is on bottom... that way if it ever comes loose the bolt wont fall out leaving you without steering...


Looks great! Just FYI on the bolts in your Superrunner steering, the ones on the pivot arm (bushings) you should put the bolt going DOWN into the bushings so th enut is on top... that way if it ever comes loose the bolt wont fall out leaving you without steering...
Yea I had planned on changing that. I was waiting to see if the sway bar was staying or not. Now I just haven't had the chance to change it:confused:


Well last night I had a little scare. I was driving from my house to my fiance's house (about 1 mile) and the truck just up and quit running. There was no warning, no lights, no nothing. The tach was rolled all the way over to max RPM. I was almost to my fiance house. I pulled the truck into the elementary school parking lot and called my step-dad. He brought his truck and we chained the BII by the brush guard to pull it home since I haven't got any tow hooks on the front yet. The brush guard took a couple good hits from chain slack and it held up extremely well.

I took off work today since traffic in Louisville is crazy on Oaks Day (day before the Kentucky Derby) and all the other office staff were taking off to go to Oaks. I got up early to work on it this morning since it was susposed to start raining around 2pm today and my drivers window was down (power windows). I figured it out in no time. It was a supply wire off the starter solenoid had broke; age finally got to it. I replaced it and everything works wonderful again.

I figured I would finish up waxing the beast and do a few minor little other things to her. Here are a few pictures from today.


Passanger side Eddie Bauer emblem was gone so I replaced it.
100_3864.jpg

100_3865.jpg

100_3867.jpg

100_3869.jpg

100_3870.jpg


Both V6 emblems were gone off the truck when I got it. I bought one off eBay that was a new old stock emblem. I figured I would put it on and find another one.
100_3871.jpg

100_3872.jpg

100_3873.jpg


And here is a few walk around pictures after I got done waxing it. Meguirs 3 step wax (Clean, Polish, Wax) is amazing stuff. The paint was really faded before I used this stuff. It looks almost good as new now. Has a very deep shine.
100_3876.jpg

100_3874.jpg

100_3875.jpg

100_3877.jpg

100_3878.jpg

100_3880.jpg

100_3881.jpg

100_3882.jpg

100_3883.jpg

100_3884.jpg

100_3885.jpg


Needless to say it started raining as soon as I got done.


Here is a little comparison as to what the BII looked like when I got it a month ago and what it looks like now. Hard to believe it is the same vehicle.

Then:
100_3563.jpg

100_3564.jpg


Now:
100_3876.jpg

100_3877.jpg


Figure I should update this. I picked up an Explorer 8.8 with 4.56 gears after my trip to Silver Lake Sand Dunes the first of June.

Well I figure I should update this.

About a month ago I got the rear end installed with Explorer leaf springs. I love the 4.56 gears! Here are some pictures of the rear end install:
I got poly bushings because I couldn't find rubber ones anywhere for an Explorer.
100_4415.jpg

100_4417.jpg


With the poly bushings, you have to remove the factory metal sleeve.
100_4418.jpg


Saturday mornings work...
100_4419.jpg

100_4420.jpg

100_4421.jpg

100_4422.jpg

100_4423.jpg


New James Duff brake lines:eek:hyeah:
100_4425.jpg

100_4426.jpg


New u-joint flange...
100_4427.jpg

100_4428.jpg


Yesterday after work I got her on the ground and driving...The u-bolts are 5/8" diameter rod because the shop didn't have any 1/2" rods. I had to drill out the spring plates to accept the bigger u-bolt. When I drilled them out, they were not the right spacing, so I had to turn them 90* from what they are susposed to be. I will be ordering a set soon.
100_4429.jpg

100_4430.jpg

100_4431.jpg


She is setting pretty level now. I love the ride and the driving with the 4.56 gears and 31's:cool:
100_4432.jpg

100_4435.jpg


My rear end right now sticks out about 3/4"-1" more than the front with the Explorer 8.8 installed. By the end of next month I will have a Ranger Dana 35 up front, so that will help.
100_4433.jpg

100_4434.jpg


The ride/drive without the sway bars isn't as bad as everyone says it is. I like it without them.


Last week I started cleaning up my Dana 35 for the swap. Here are some pictures of the clean up:

What they looked like before:
100_4671.jpg


After wire wheel:
100_4669.jpg

100_4670.jpg


After some paint:
100_4672.jpg


I got the Dana 28 out by myself in about an hour. Here it is laying out in the yard. It is going in my buddies '89 2wd Bronco II in a couple weeks.
100_4673.jpg

100_4675.jpg

100_4676.jpg


Driver side beam bolted in with the "new to me" Skyjacker Class II brackets.
100_4678.jpg


Passanger side beam installed. You can see the Class II driver side beam in this picture.
100_4680.jpg


How I left it today.
100_4680.jpg

100_4679.jpg


New brake rotors, wheel bearings, and brake pads. I picked up a set of almost new Warn hubs off eBay for $30 shipped! Here is a couple pictures:
100_4682.jpg

100_4681.jpg


I got the Dana 35 under her on Thursday. I love the Skyjacker 6" coils. I picked up a set of F-250 2wd coil spring retainers so the upper part of the spring wouldn't pop out under extreme flex. I need to get a set of longer brake lines for the front. Here is a couple pictures:
New to me Skyjacker 6" coil spring:
IMG_0328.jpg

IMG_0336.jpg


I picked up a set of F-250 2wd upper coil spring retainers to hold the springs in under extreme droop:
IMG_0329.jpg


Skyjacker Class II bracket:
IMG_0330.jpg

IMG_0332.jpg


Whole axle in (minus the diff):
IMG_0331.jpg

IMG_0333.jpg


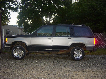
This is how it sits as of today (8-17-08).
I am back to riding Cali again. I need to find a set of 4" lift blocks for the rear for a temp fix. I am going to order a set of Alcan springs to lift it 4" in the rear.
IMG_0334.jpg

IMG_0335.jpg


I got me a set of Explorer sun visors to replace the flappy stock ones. They are real nice. I need to find a power source to hook up the lighted mirror.
IMG_0346.jpg

IMG_0345.jpg

IMG_0350.jpg


I also painted the stock stainless door seals. They were dirty beyond cleaning so I sanded them a bit and painted them black. They look much better than the raw stainless IMO.
IMG_0348.jpg

IMG_0347.jpg

IMG_0349.jpg


I also took off the light bar. I sold it to a guy who is like a TrailBlazer broker (www.ronbarthelt.com/trailblazer_lightbar.html). I took it off today. I can't decide if I want to get some KC's to put up there or leave it off.
IMG_0342.jpg

IMG_0343.jpg

IMG_0344.jpg


I finally got my James duff dual shock hoops installed. I need to measure for longer shocks, so for now the shocks will stay in their stock location. I hope to measure tomorrow and order on Monday.

This is my dad cutting off the flange on the coils bucket (this is temporary until I can get a set of '79 F-150 coil buckets to install).
100_4968.jpg

100_4969.jpg


FIRE!!!!
100_4970.jpg


After cut:
100_4971.jpg

100_4972.jpg

100_4973.jpg


Hoop Installed (Like I said, I need longer shocks):
100_4974.jpg

100_4975.jpg


I did a little flexing before we started on the shock hoops. I like how the rear flexes, but the front still needs some more. Currently it has the 6" Skyjacker RBV coils in the front. I am going to save some money and get a pair of '79 F-150 coil buckets and a set of EB coils.
100_4976.jpg

100_4977.jpg

100_4978.jpg

100_4979.jpg

100_4980.jpg


I got my dual shocks installed last night. I had to order them based on length since the shock hoop is considerably longer than the stock mount. They are '96 F-150 w/ 6" lift shocks. I like these because the bodies are about 1/4" narrower in diameter than the stock shocks; since the front mount is close to the spring, stock diameter shocks wouldn't have fit.

100_4985.jpg

100_4986.jpg


Did a little more flexing yesterday (9-16-08) after cleaning up some downed trees from Ike in the in-laws yard. This was in the front of my fiance's grandparents house. I wanted to see if it would be any different with the dual shocks; I think it did better.

100_4996.jpg

100_4997.jpg

100_4998.jpg

100_4999.jpg

100_5000.jpg

100_5001.jpg

100_5002.jpg

100_5003.jpg

100_5004.jpg

100_5005.jpg

100_5006.jpg

100_5007.jpg

100_5008.jpg

100_5009.jpg


I also installed a set of BellTech 6400 shackles today (9-17-08) to level my rear end out today. It was about a 45 minute job, and that included getting out and putting up the tools. I didn't need power tools, so no electric was nice (glad the electric finally came on so I could post up some pictures). I need to change my pinion angle now to accommodate for the shackles.

100_5010.jpg

100_5011.jpg

100_5012.jpg

100_5013.jpg

100_5017.jpg

100_5018.jpg

100_5019.jpg


WOW nice work
Be careful driving around with no front diff!!! You can easily bend your drivers side beam
I would bolt one in there even if its not functional

truck looks amazing in a short time

Did you build those spring perches on the explorer axle?
You could likely replace your 2" blocks with some tappered 2" blocks and then run a shim underneath to correct your pinion angle... this would get you bye until you can get the alcan springs.

Very nice truck!!

You are the first person I have seen put shackles on a BII, do the shackles hit the bumper?????????????????????????????

I need shackles me thinks, I may be able to ditch my 2" block and go with shackles instead. I am running Skyjacker 4" leafs....worn out but they ride and flex awesome!

I have not had sway bars for years, it drives better without them IMO


again nice work


Join the Elite Explorers for $20 each year.
Elite Explorer members see no advertisements, no banner ads, no double underlined links,.
Add an avatar, upload photo attachments, and more!
.


WOW nice work
Be careful driving around with no front diff!!! You can easily bend your drivers side beam
I would bolt one in there even if its not functional
Thanks for the heads up, I was told it wouldn't hurt anything. I will bolt in my empty case tomorrow after work.


truck looks amazing in a short time
Thanks!


Did you build those spring perches on the explorer axle?
No, the person I got the Explorer axle from got them from Ballistic Fab (www.ballisticfabrication.com). He had this axle in Ranger before upgrading to a Dana 60 rear. I just relocated them for the Bronco II.


You could likely replace your 2" blocks with some tappered 2" blocks and then run a shim underneath to correct your pinion angle... this would get you bye until you can get the alcan springs.
I have had a horrible time finding a tapered 2" block for cheap. Reworking the spring perches would be easier since it is already on the truck, just grind and re-weld.


You are the first person I have seen put shackles on a BII, do the shackles hit the bumper?????????????????????????????
I haven't flexed it out yet, but I don't think they will hit the bumper. The only time they MIGHT is when the spring is compressed up and then it might serve as a bump stop:D.


I need shackles me thinks, I may be able to ditch my 2" block and go with shackles instead. I am running Skyjacker 4" leafs....worn out but they ride and flex awesome!
I want some Skyjacker 6" springs so I can go back to my stock shackle and no block:D


I have not had sway bars for years, it drives better without them IMO
Yes it does drive better without them. It is amazingly better without them and the dual shocks up front. It is smooth and turns amazing.


I would love to get a set of Alcan's, but for now this will have to do as it rides amazingly better since I put the shackle on it. Before it was rough and bounced but flexed well, now it is smooth and doesn't bounce; hopefully it flexes well with the shackle.


Back
Top