As promised to a few people, I finally installed a Homelink transmitter in my Explorer.
Thanks to Joe Dirt for supplying me with the transmitter!!:notworthy
NOTICE!!! This install is not an easy one due to fitment into the headliner. If you're not VERY confident in your abilities, I highly suggest you don't try it.
Having said that, here goes:
I chose the flat angled panel behind my overhead lights to do the install. I did a similar install on my Focus in the same spot. I would also suggest you test your homelink device before starting the install by hooking it directly to your battery and programming it to make sure it works before the install.
To start, I pulled the lighting/sunglasses holder out of the roof of the vehicle. It's just clipped in, so if you pull straight down on it, it pops out.
Next, make a template of the homelink faceplate for the hole you want to cut.
Then choose a position to put the homelink device in your vehicle. If you choose the same spot I did, you need to mount it as high as possible so the electronics package doesn't impact the lighting module. I put a pin through my headliner to make sure that things lined up before I marked and cut the headliner.
After marking the headliner, I took the leap of faith and cut a hole in it using my template.
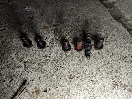
Next I modified my homelink electronics box to help with fitment. Because of the white plastic bracket in the ceiling (seen in the previous picture), the connector end of the homelink is a little too long.
So I removed the connector, trimmed of the tabs and hardwired to the transmitter.
I then positioned the homelink transmitter behind the hole to make sure everything fit and lined up.
Now for the fun part, and I don't have pix

. Since the headliner is thicker than the clamping distance on the homelink, it has to be glued and clamped into place. I used a two part epoxy to glue the transmitter box to the back of the headliner and then put the same epoxy on the pins in the faceplate that lock into the transmitter box. I then installed the faceplate onto the transmitter box through the hole and clamped it in place overnight to make sure it held in place. If you're lucky and you get a homelink faceplate that's never been installed before, you might be able to get it to work with just the faceplate locking pins, but in both of the units I've installed, that hasn't been the case.
After letting the glue set up overnight, I said a prayer and removed the clamp. Here's what it looked like:
You can see that the faceplate is slightly depressed into the headliner, but the install was successful.
Now for the wiring. You need to wire this to a power source that isn't purely triggered by the ignition if you want to use it with the car off. I chose using the power for the overhead lights. There are 3 wires in the overhead lights, one is ground, one is ignition controlled, and one is for the map lights. I chose the map light wire, which is yellow and green. The ground is black.
Because I hardwired to the homelink, I wanted to have a disconnect somewhere, so I chose disconnect "T" adapters and installed them on the wires. You need to make sure that they are far enough away from the lighting connector so they don't jam into the housing when it's plugged in. I removed about 2" of the black wire covering to do this.
I then installed spade connectors on my homelink wires and plugged it into the "T" connectors. Green from the homelink to the yellow/green wire in the vehicle,and black to black.
I then installed the lighting housing back in the vehicle and programmed the homelink...and it works!!
I just have to touch up the paint a little on the cover. The cover I got was tan, and I painted it over. However, during the clamping process, I dinged it, even though I had protected it with heavy paper...oh well...
So, there's my homelink install. If you want to do it yourself, I cannot be held responsible for any and all goofups. Good Luck!!