V8BoatBuilder
Transplanted Bostonian
- Joined
- November 4, 2002
- Messages
- 3,411
- Reaction score
- 8
- City, State
- East Brunswick, NJ
- Year, Model & Trim Level
- 97 Mountaineer V8 4x4
I haven't done a "how-to" thead with photos in a while, mostly because I've been at work or in school and unable to wrench on the truck. I've wanted to install the Baumann Engineering shift kit for a while, and finally ordered it and put it in. In addition to the shift kit, I ordered their torque converter application valve update for the extra $30. While I was in the valve body, it made sense to do it. http://www.baumannengineering.com/
Based on a few threads on here, I decided to set my 1-2 shift to stage "2" and the rest of the shifts to stage "3." I spend a lot of time in stop and go traffic, and also in the snow and ice. I didn't want to spill my morning coffee or break traction on the often used 1-2 shift. More on shift selection later.
I started by draining the transmission fluid and removing the pan and filter. Last year, I had installed a transmission pan drain plug, came in handy this time around:


I took out about 9 quarts of ATF, and refilled about the same. Only 5 came down in the pan, the rest came slowly dribbling out as I dropped the valve body. I disconnected the electronics, and then removed the 25 8mm bolts that hold the valve body to the trans body. Two of them also hold brackets for the shift selector. I removed all but 4 bolts, and then let the valve body hang on those bolts while I held it in position. It's very heavy! If the valve body doesn't drop onto the loose bolts, you most likely missed one. The gasket's don't have enough pressure to hold this thing on. There are no linkages holding on.
Here is a photo of the underside of the 4R70W without the valve body:

The valve body removed from the truck and on my workbench:


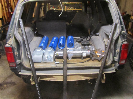
I've found borrowed dining hall trays invaluable for work on the truck! Once the valve body was on my bench, I removed the sperator plate.
Valve Body Disassembled, seperator plate removed:

Seperator plate gaskets:

Included in the kit is an awesome instruction manual, some Baumann parts, and the Sonnax parts I ordered.
Sonnax and Baumann transmission parts:

Baumann supplied drill bits:

Keeping the drillbits in order is very important. We're working with super close tolerances here. Once I selected which shift levels I wanted, I cleaned off the ATF from the sperator plate with brake cleaner, then marked the seperator plate with Sharpie. I didn't want to drill the wrong hole! The drillpress was invaluable here.
Marking the seperator plate with Sharpie:

Drilling the seperator plate:

In addition to drilling the seperator plate, part of firming up the 1-2 shift lies in the 1-2 accumulator. It's in the transmission body, but accessed from below. It's held it with a pretty beefy snap ring, so use real snap ring pliers and wear saftey gogles. A spring is replaced, and some shims are added. Pay attention to the late model 4R70W instructions here, things have changed since the AOD-E.
Ford original 1-2 Accumulator assembly:

Baumann vs. Ford upper accumulator spring comparison:

(The Baumann spring is the silver one)
Compressing the 1-2 accumulator to re-install the snap ring was proving to be a challenge, untill I put my bottle jack on a milk-crate to hold it in place while I reinstalled the ring.
Re-installing the spring loaded 1-2 Accumulator:

After that, there were some valves replaced or shimmed in the valve body, and then the body was re-installed into the truck. The torque converter control valve from Sonnax also detialed drilling another hole in the sperator plate.
I cleaned everything with brake cleaner, then pre-lubed it with ATF before reassembly. It was hard to keep it all clean.
On my first test drive I was impressed, but the shifts weren't as firm as I would have imagined. The transmission seemed crisper, and more solid. Downshifts were improved also. If I had to do it over again, I might have gone stage 4, but time will tell. In the explorer 4R70W, many of the passages are already enlarged from what Baumann says that they should be. Since the seperator plate holes are a mater of relative size, I think our stage "3" is a stang AOD-E stage "2." I could be wrong here.
I think it was a good, worthwile mod. Took about 6 hours to complete, including a lunch break. It ended up costing close to $200, the kit and extra parts were $150, and 10 quarts of Mercon V isn't cheap.
More to follow.....
Based on a few threads on here, I decided to set my 1-2 shift to stage "2" and the rest of the shifts to stage "3." I spend a lot of time in stop and go traffic, and also in the snow and ice. I didn't want to spill my morning coffee or break traction on the often used 1-2 shift. More on shift selection later.
I started by draining the transmission fluid and removing the pan and filter. Last year, I had installed a transmission pan drain plug, came in handy this time around:
I took out about 9 quarts of ATF, and refilled about the same. Only 5 came down in the pan, the rest came slowly dribbling out as I dropped the valve body. I disconnected the electronics, and then removed the 25 8mm bolts that hold the valve body to the trans body. Two of them also hold brackets for the shift selector. I removed all but 4 bolts, and then let the valve body hang on those bolts while I held it in position. It's very heavy! If the valve body doesn't drop onto the loose bolts, you most likely missed one. The gasket's don't have enough pressure to hold this thing on. There are no linkages holding on.
Here is a photo of the underside of the 4R70W without the valve body:
The valve body removed from the truck and on my workbench:
I've found borrowed dining hall trays invaluable for work on the truck! Once the valve body was on my bench, I removed the sperator plate.
Valve Body Disassembled, seperator plate removed:
Seperator plate gaskets:
Included in the kit is an awesome instruction manual, some Baumann parts, and the Sonnax parts I ordered.
Sonnax and Baumann transmission parts:
Baumann supplied drill bits:
Keeping the drillbits in order is very important. We're working with super close tolerances here. Once I selected which shift levels I wanted, I cleaned off the ATF from the sperator plate with brake cleaner, then marked the seperator plate with Sharpie. I didn't want to drill the wrong hole! The drillpress was invaluable here.
Marking the seperator plate with Sharpie:
Drilling the seperator plate:
In addition to drilling the seperator plate, part of firming up the 1-2 shift lies in the 1-2 accumulator. It's in the transmission body, but accessed from below. It's held it with a pretty beefy snap ring, so use real snap ring pliers and wear saftey gogles. A spring is replaced, and some shims are added. Pay attention to the late model 4R70W instructions here, things have changed since the AOD-E.
Ford original 1-2 Accumulator assembly:
Baumann vs. Ford upper accumulator spring comparison:
(The Baumann spring is the silver one)
Compressing the 1-2 accumulator to re-install the snap ring was proving to be a challenge, untill I put my bottle jack on a milk-crate to hold it in place while I reinstalled the ring.
Re-installing the spring loaded 1-2 Accumulator:
After that, there were some valves replaced or shimmed in the valve body, and then the body was re-installed into the truck. The torque converter control valve from Sonnax also detialed drilling another hole in the sperator plate.
I cleaned everything with brake cleaner, then pre-lubed it with ATF before reassembly. It was hard to keep it all clean.
On my first test drive I was impressed, but the shifts weren't as firm as I would have imagined. The transmission seemed crisper, and more solid. Downshifts were improved also. If I had to do it over again, I might have gone stage 4, but time will tell. In the explorer 4R70W, many of the passages are already enlarged from what Baumann says that they should be. Since the seperator plate holes are a mater of relative size, I think our stage "3" is a stang AOD-E stage "2." I could be wrong here.
I think it was a good, worthwile mod. Took about 6 hours to complete, including a lunch break. It ended up costing close to $200, the kit and extra parts were $150, and 10 quarts of Mercon V isn't cheap.
More to follow.....