“Captain Morgan”
1995 Explorer Sport
Engine:
4.0 OHV
Transmission:
M5oD manual transmission
Cooling:
Summit Racing aluminum 2.5” radiator, driver drop outlet
Summit Racing aluminum power steering cooler
Summit Racing flex hose & 90* elbow
Drivetrain:
Manual 1354 Borg Warner
Steel Tube front driveshaft
Extended, reinforced rear driveshaft
Front Axle:
‘84 Jeep Grand Wagoneer Widetrac Dana 44 low pinion
OX locker & Cover
5.13 Yukon Ring & Pinion
All Spicer U-joints, bearings & races
Kevlar braided stainless 32” long brakelines
Stock Waggy shafts (until I break one!)
Warn manual locking hubs
Rear Axle:
Explorer 8.8 31 spline
Dutchman hardened shafts, 6x5.5 pattern, screw-in studs
Aussie Locker
5.13 Yukon Ring & Pinion
Currie 6x5.5 rotors
All Ford bearings & races
Trailmaster 2” tapered rear lift blocks
Superlift spring-over perches
RuffStuff 1/4" steel 8.8 metal cover
Suspension:
Explorer ProComp MX6 nitro front shocks
Regular Monroe stock height (go figure!) rear shocks
JC Whitney stock Waggy 7 leaf front packs
Rear leaf packs out of XLT v8 w/ tow package
Tires:
35x13.5r16 Mickey Baja Claws
37x12.5r15 Goodyear Wrangler Mtr's Couldn't flex. Gone
36x12.5r15 Super Swamper TSL Bias Ply Best for mud! Gone
315x70r17 Mickey Baja MTZ radials Original setup. Gone
Rims:
16x8 Black painted aluminum triangle holes
15x10 Black round-holed aluminum something or anothers Gone
17x10 Black steel Rock Crawler round holes Gone
Body Mods:
Originally Willow Green
Premium Sport flares
Maaco semi-gloss dark Charcoal paint. black vinyl racing stripes
Black herculiner on lower doors and rock sliders
Shaved 4" from each side of bumper for tire clearance
Removed roof rack and rails
Body Armor:
DraperBuilt rock sliders
Steel rear bumper w/ swing out carrier, from sn0border88's late Emily Rose (Had to remove tire carrier section in 2011,
the swing rod bent and the trailer bearings built into the bumper seized)
Sound System:
Pioneer DEH-X7800BHS head unit
4 6x8 Kenwood 3 way 220w speakers
Pair Kenwood 1" front door tweets w/ bass blockers (installed in panels by rearview mirror control)
Pair Pioneer 1" rear tweets w/ bass blockers (installed above flip out ashtrays)
10” Kicker VR Comp dual voice coil
Kenwood 729S Amplifier
Cobra 19 CB in center console, w/ external speaker (removed 2019, no one uses CB's for wheeling anymore)
Lights:
2 Hella 500's on front bumper
Dual driving fogs. White fog/blue smurf lights
Anamorphic Equalizer
LED strips around inside of rear hatch glass w/ dedicated rear switch
Billet Automotive custom RGB LED switch panel
Sylvania amber blue 3157 turn bulbs
Euro Diamond headlights & corners
OPT7 LED headlight bulb upgrade
Black Altezza tail lights w/ LED brake & reverse bulbs, amber blue turn signals
Miscellaneous modifications:
Doofy looking Skull knob for T-case shifter (thanks Rook )
Fire Extinguisher & LED Maglite hard mounted to D-Pillars
Sport Trac rear power outlet installed in right rear panel behind rear seats
02-05 Explorer IRS breather tube neck for front axle breather tube
Shaved 8.8 Center pin
Shaved inside fin off of Dana 44 housing to clear OX shift fork
Royal Purple full synthetic Mercon III trans fluid
Interior light kill switch (95's interior lights do not turn off via dimmer)
Boxed & reinforced trans cross member to pass over front driveshaft
Custom front sway bar
2wd explorer radio bezel
‘95 F350 Front shock towers
Removed stock air filter fender duct
1.5" Steel front driverside leaf block (to make him sit level again)
Leather power seats and rear bench seat from Blackjack
2019: Installed Blackjack's passenger door & Skunk's driver door in tribute. He is now FrankenMorgan.
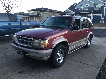
Started out looking like this:
.JPG")
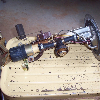
Did a little bit of this:

And a little bit of that:

To get this:


Had some fun breaking him in:


And then realized a little too late that I have a serious center of gravity issue:

But clean it all up and throw some paint on and things will look a lot better


...And then when your nice matte finish dark charcoal grey paint fades to powdered donut finish,
(Yes that's me, posing with my truck)

......have your truck painted again!

And put stripes on it, for Pete's sake


Over a decade later and still kicking despite everything we've been through:


Full write up can be found here: How to waste a ton of $$. Much thanks to Rookie, Wolf, Micah, 95Exploderboy and IZwack for the design/build, and Skunk for the inspiration
EDIT: Morgan wouldn't be the beast that he is today were it not for the two horribly abused first gens who came before him and taught me what it means to have a wheelable Explorer (lots of patience, time and money!). Here's to Shelby and Tank May they rest in pieces wherever they are!
1995 Explorer Sport
Engine:
4.0 OHV
Transmission:
M5oD manual transmission
Cooling:
Summit Racing aluminum 2.5” radiator, driver drop outlet
Summit Racing aluminum power steering cooler
Summit Racing flex hose & 90* elbow
Drivetrain:
Manual 1354 Borg Warner
Steel Tube front driveshaft
Extended, reinforced rear driveshaft
Front Axle:
‘84 Jeep Grand Wagoneer Widetrac Dana 44 low pinion
OX locker & Cover
5.13 Yukon Ring & Pinion
All Spicer U-joints, bearings & races
Kevlar braided stainless 32” long brakelines
Stock Waggy shafts (until I break one!)
Warn manual locking hubs
Rear Axle:
Explorer 8.8 31 spline
Dutchman hardened shafts, 6x5.5 pattern, screw-in studs
Aussie Locker
5.13 Yukon Ring & Pinion
Currie 6x5.5 rotors
All Ford bearings & races
Trailmaster 2” tapered rear lift blocks
Superlift spring-over perches
RuffStuff 1/4" steel 8.8 metal cover
Suspension:
Explorer ProComp MX6 nitro front shocks
Regular Monroe stock height (go figure!) rear shocks
JC Whitney stock Waggy 7 leaf front packs
Rear leaf packs out of XLT v8 w/ tow package
Tires:
35x13.5r16 Mickey Baja Claws
37x12.5r15 Goodyear Wrangler Mtr's Couldn't flex. Gone
36x12.5r15 Super Swamper TSL Bias Ply Best for mud! Gone
315x70r17 Mickey Baja MTZ radials Original setup. Gone
Rims:
16x8 Black painted aluminum triangle holes
15x10 Black round-holed aluminum something or anothers Gone
17x10 Black steel Rock Crawler round holes Gone
Body Mods:
Originally Willow Green
Premium Sport flares
Maaco semi-gloss dark Charcoal paint. black vinyl racing stripes
Black herculiner on lower doors and rock sliders
Shaved 4" from each side of bumper for tire clearance
Removed roof rack and rails
Body Armor:
DraperBuilt rock sliders
Steel rear bumper w/ swing out carrier, from sn0border88's late Emily Rose (Had to remove tire carrier section in 2011,
the swing rod bent and the trailer bearings built into the bumper seized)
Sound System:
Pioneer DEH-X7800BHS head unit
4 6x8 Kenwood 3 way 220w speakers
Pair Kenwood 1" front door tweets w/ bass blockers (installed in panels by rearview mirror control)
Pair Pioneer 1" rear tweets w/ bass blockers (installed above flip out ashtrays)
10” Kicker VR Comp dual voice coil
Kenwood 729S Amplifier
Cobra 19 CB in center console, w/ external speaker (removed 2019, no one uses CB's for wheeling anymore)
Lights:
2 Hella 500's on front bumper
Dual driving fogs. White fog/blue smurf lights
Anamorphic Equalizer
LED strips around inside of rear hatch glass w/ dedicated rear switch
Billet Automotive custom RGB LED switch panel
Sylvania amber blue 3157 turn bulbs
Euro Diamond headlights & corners
OPT7 LED headlight bulb upgrade
Black Altezza tail lights w/ LED brake & reverse bulbs, amber blue turn signals
Miscellaneous modifications:
Doofy looking Skull knob for T-case shifter (thanks Rook
)Fire Extinguisher & LED Maglite hard mounted to D-Pillars
Sport Trac rear power outlet installed in right rear panel behind rear seats
02-05 Explorer IRS breather tube neck for front axle breather tube
Shaved 8.8 Center pin
Shaved inside fin off of Dana 44 housing to clear OX shift fork
Royal Purple full synthetic Mercon III trans fluid
Interior light kill switch (95's interior lights do not turn off via dimmer)
Boxed & reinforced trans cross member to pass over front driveshaft
Custom front sway bar
2wd explorer radio bezel
‘95 F350 Front shock towers
Removed stock air filter fender duct
1.5" Steel front driverside leaf block (to make him sit level again)
Leather power seats and rear bench seat from Blackjack
2019: Installed Blackjack's passenger door & Skunk's driver door in tribute. He is now FrankenMorgan.
Started out looking like this:
Did a little bit of this:
And a little bit of that:
To get this:
Had some fun breaking him in:
And then realized a little too late that I have a serious center of gravity issue:
But clean it all up and throw some paint on and things will look a lot better
...And then when your nice matte finish dark charcoal grey paint fades to powdered donut finish,
(Yes that's me, posing with my truck)
......have your truck painted again!
And put stripes on it, for Pete's sake
Over a decade later and still kicking despite everything we've been through:
Full write up can be found here: How to waste a ton of $$. Much thanks to Rookie, Wolf, Micah, 95Exploderboy and IZwack for the design/build, and Skunk for the inspiration
EDIT: Morgan wouldn't be the beast that he is today were it not for the two horribly abused first gens who came before him and taught me what it means to have a wheelable Explorer (lots of patience, time and money!). Here's to Shelby and Tank
May they rest in pieces wherever they are!