Chop, Cut, Rebuild: DB_1's Ranger...again | Page 7 | Ford Explorer Forums - Serious Explorations

  • Register Today It's free!

Chop, Cut, Rebuild: DB_1's Ranger...again

Ok kiddies, time for my bi-annual rebuild thread:p:
This time I won't be messing with the suspension...well, maybe the coilovers.
I may need new coils so I don't have so much uptravel but I'll deal with that much later.

Since i'm barely working progress will be slow since I'll need a few parts and whatnot to get my rig functional again. Main things I need to purchase are new leaf springs. They are totally shot and to have them rebuilt I can buy a new set of Toy springs which i'm gonna try out.

In the mean time, i've been removing stuff that either is damaged and won't be used again or just removing to get it out of the way while I work on stuff.

Here's my list so far:

Front bumper tubework: This will get reworked to accommodate the winch.
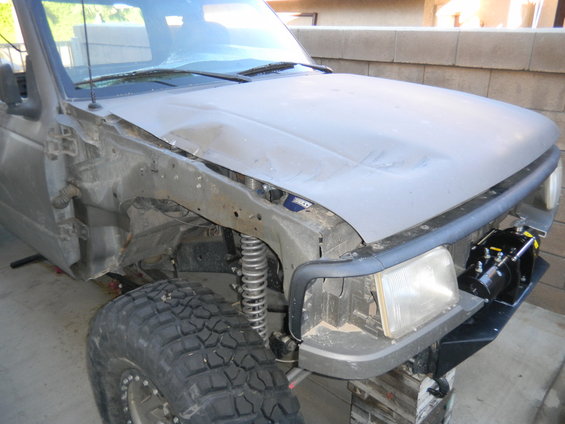
Front fenders: Thrashed beyond repair
Rocksliders: Been wanting to build new ones anyways so good as time as any to cut them off.
Rocker panels: Want to get the sliders up higher so they had to go.
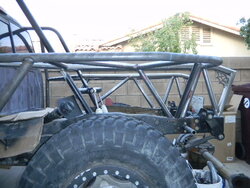
Bed: Also trashed beyond repair, tubework will go in it's place
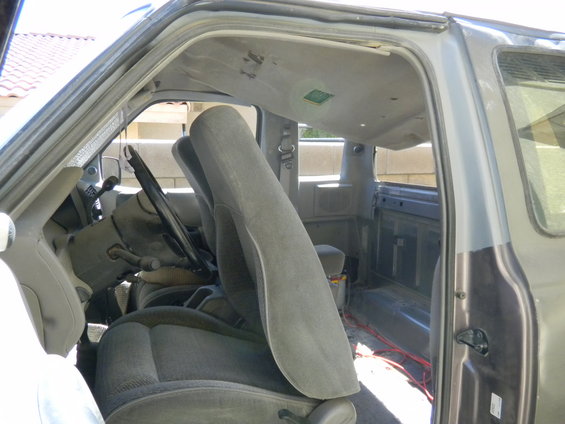
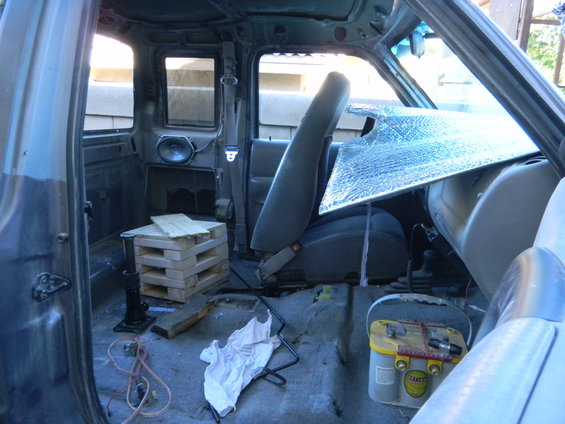
Gutted supercab area: Needed to remove for roof repair but may leave it that way and spray it with undercoating.

That's what i've done so far to the rig and I got my winch mounted today as well. I bought this winch early last summer before the roll and it's a SuperWinch Rock 9.5 short drum with synthetic rope.
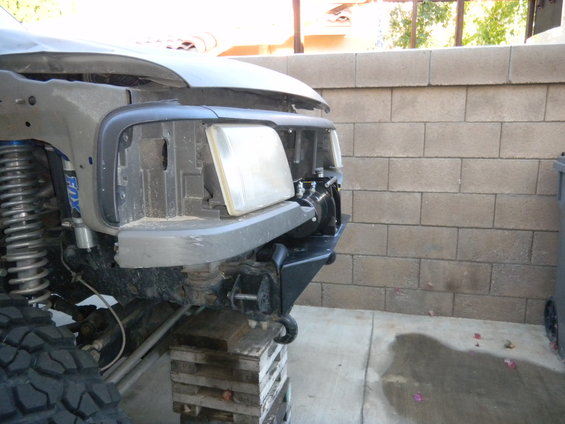
I was pondering how i'd fit the grill back on since it sits behind it but i'd still need to access the freespool lever. My plan is to have it on hinges so I can flip it up, i'll just need a way to lock it in place at the bottom...maybe with Dzus fastners.

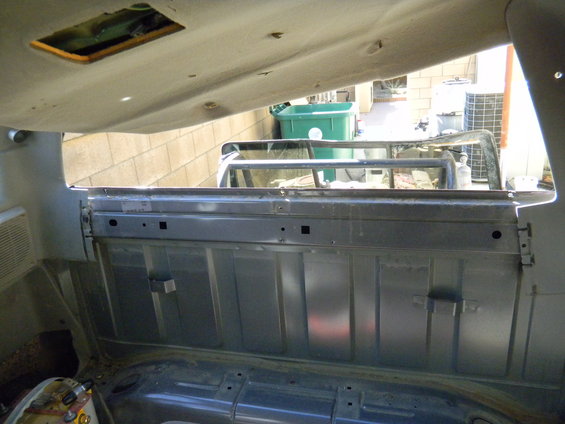
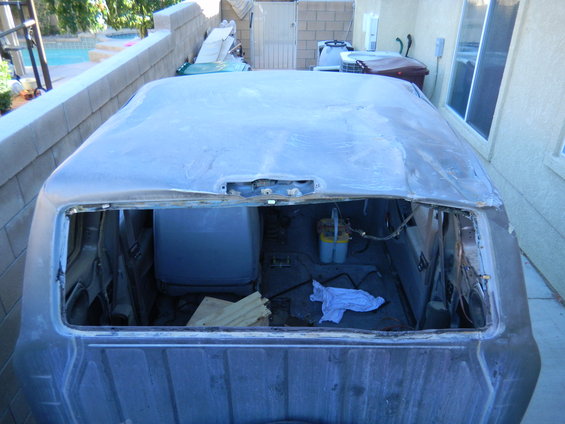
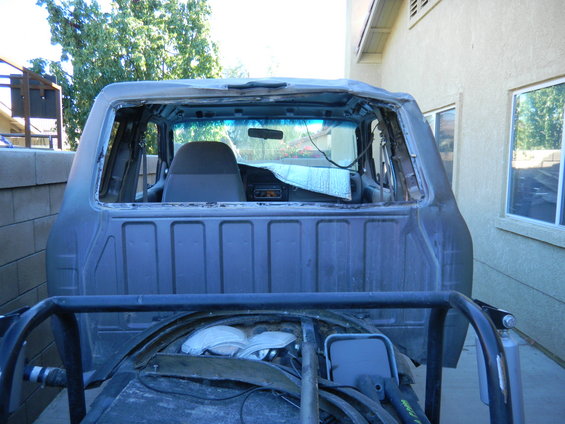
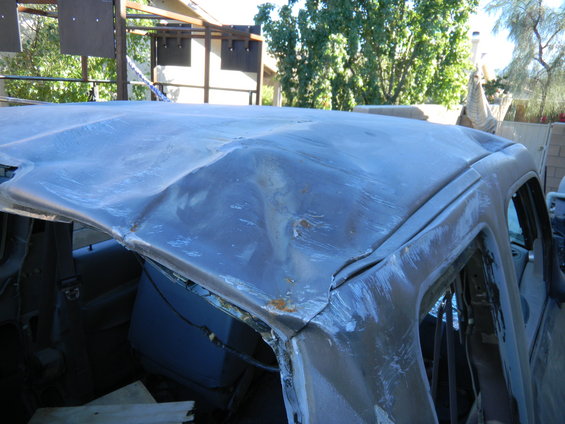
So on with the pics, i'll start with some before pics of the roof caved in and then with some of the roof almost where I want it. Still needs work obviously.
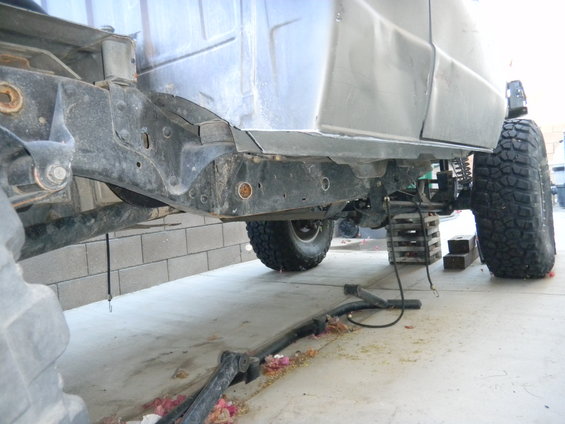
Other pics show the rockers cut and some general shots of the truck in its current condition. Last set of shots is of the winch install and grill mock up.

dscn0711.jpg


dscn0712.jpg


dscn0725.jpg


dscn0726.jpg


dscn0727.jpg


dscn0723.jpg


dscn0728.jpg


dscn0729.jpg


dscn0735.jpg


dscn0736.jpg


dscn0730.jpg


dscn0733.jpg


dscn0734.jpg


dscn0737.jpg


dscn0738.jpg


dscn0739.jpg


Join the Elite Explorers for $20 each year.
Elite Explorer members see no advertisements, no banner ads, no double underlined links,.
Add an avatar, upload photo attachments, and more!
.


Looking good! I like the rear mitered tubes. I think it will look good with some DA'd aluminum pannels. I think it would be really nice with some fiberglass ranger bed sides hung on the tubes though. Removed for hard wheeling of course


Join the Elite Explorers for $20 each year.
Elite Explorer members see no advertisements, no banner ads, no double underlined links,.
Add an avatar, upload photo attachments, and more!
.


Thanks guys, I thought about fiberglass fenders but not sure I want to disassemble my truck at camp to go wheelin'. If I was going that route I would've dovetailed the outer tubes in the rear. I haven't ruled it out completely but ultimately I guess the po-po will be deciding for me.


guess I best get busy designing "Spidy" light and winch covers!


do you want to go this extreme?
spiderman-3.jpg


I'm thinking just webbing...OCC and Poison Spyder Customs have the market on the web themed stuff so I don't want to get too crazy.


I'll se what I can come up with. Something special, maybe include an umbrella! just kidding!!:D


Thanks...yes there's a lot of support tubes that will be going in. These are just the main tubes made from 1.75". I'll be using 1.5" tube for all the supports.
Will that include some side to side triangulation on the main hoop behind the cab?


Attachments

  • 20100221123804_DSC04106.jpg
    20100221123804_DSC04106.jpg
    134.2 KB · Views: 414


Got a little more progress done since last post. Most of the support tubes for the bed and fenders are done and tacked in, need to redo a couple of tubes.
After they are all welded in, i'll work on the skins. I decided against the aluminum sheet because of sticker shock. I went with 16 gauge cold rolled since it was more than half of the aluminum I was looking at.

This will be a good stopping point for now so I can go get it smogged and finally drive it again. When that's over with i'll work on the bed floor, rear hoop "X", spare tire holder, tailgate, frame boxing w/crossmembers and anything else I decide to accessorize it with.
 

Attachments

  • DSCN1411.JPG
    DSCN1411.JPG
    121.7 KB · Views: 373
  • DSCN1412.JPG
    DSCN1412.JPG
    120.6 KB · Views: 390
  • DSCN1413.JPG
    DSCN1413.JPG
    120.2 KB · Views: 379
  • DSCN1414.JPG
    DSCN1414.JPG
    134 KB · Views: 374


Thanks...been following your build thread. One the most thorough and thought out SAS's i've seen so far:thumbsup:


Thanks! Ive tried very hard to do it right the first time! I'm nervous though only have 8 days left to finish it. :rolleyes: I need it at least rolling so I can trailer it home. (Fingers crossed)

And the coilovers are very tight in there! But should work out good.


Yeah, it was tight getting mine in too with the A/C stuff and brake M/C in the way. Ideally it would fit better if I moved the front axle forward a few more inches plus a wider axle wouldn't hurt either but it does the job.


I'm at 7" compression but i'd like to be at 6". The way it's set up now it probably bumps at 5" or 6" because my diff would smack the engine crossmember if it went the full 7". I'm gonna have to get springs with lighter rates to bring it down an inch.


Took some pics of the tubework painted and skinned. This is as far as i'll take it for now, just wanted it roadworthy and get it registered/smogged next week.

Also got some tail lights wired up, they are LED Jeep style lights which I modified. The tail lights had standard bulbs for reverse lights and downfacing LED's to light up a license plate which I'm not going to use. I ditched the reverse bulbs in favor of the license plate LED's so now they are true LED tail lights. Also wired up some small amber running lights on the side to keep the po-po happy.
I used a tail light convertor so I can use them as tail/stop/turn lights instead of having a separate turn light.

I had the gas filler tube mounted in close by the frame out of harms way but thought twice about it and moved it back to it's general stock location, you can see the old bracket in the pic. For the current bracket I used the stock mount from the old bed which was just spot welded on.
 

Attachments

  • DSCN1419.JPG
    DSCN1419.JPG
    123.1 KB · Views: 332
  • DSCN1418.JPG
    DSCN1418.JPG
    124.1 KB · Views: 330
  • DSCN1417.JPG
    DSCN1417.JPG
    122.6 KB · Views: 327
  • DSCN1416.JPG
    DSCN1416.JPG
    123.7 KB · Views: 332


Pics cont'd
 

Attachments

  • DSCN1421.JPG
    DSCN1421.JPG
    121.7 KB · Views: 325
  • DSCN1423.JPG
    DSCN1423.JPG
    122 KB · Views: 328
  • DSCN1424.JPG
    DSCN1424.JPG
    124.6 KB · Views: 320
  • DSCN1425.JPG
    DSCN1425.JPG
    124.5 KB · Views: 329


that thing is amazing, from the pictures it looks like your missing one thing...a fifth wheel hitch


Join the Elite Explorers for $20 each year.
Elite Explorer members see no advertisements, no banner ads, no double underlined links,.
Add an avatar, upload photo attachments, and more!
.


Thanks, not getting a fifth wheel hitch but eventually a bed floor:D


Back
Top