Explorer Junky
Well-Known Member
- Joined
- March 15, 2010
- Messages
- 441
- Reaction score
- 0
- City, State
- Grand Rapids, Mi
- Year, Model & Trim Level
- 1997 XLT 4 dr 5.0
I had to replace my camshaft syncro yesterday.
1.
After disconnecting the negative battery cable from the battery, I removed the coil pack assembly. Please remember to number the wires with masking tape and a marker.
2.
I then removed the Camshaft Syncro Sensor from the top of shaft. It
has 2 very small screws holding it on. 6 or 7 mm i think.
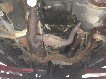
3. A helper is nice here, I crawled under the truck and turned the crankshaft
with a 1/2" drive ratchet and I think a 15/16 socket, while my beautiful assistant (my wife) watched the "C" shaped thing in the top of the shaft turn.
Having the tool here is imperative. She put the tool on while i turned the crank until it fit in. She told me to stop. Its important to turn the crank slow as to have a perfect alignment. The tool has an arrow on the top. Another important step here,is to mark the intake with paintmarker where the arrow is pointing...BEFORE you pull the old one out! THIS IS VERY IMPORTANT!!!This goes to the front. Now that the Engine is whatever degrees past TDC it needs to be...
4.
Pull out the old Camshaft syncro. Once this is removed, take the tool off the old syncro.Take the sensor off the new syncro, with the new bolts, finger tighten the tool onto the new syncro. This may take a few attempts, but, now you need to drop the new syncro in until the arrow on the tool points to the paint marker on the intake. When you drop it in, it will want to rotate clockwise, so, start with the arrow on the tool at about the 4 or 5 o'clock position. It takes a few attempts, but, you will get it. Because of the slop from the old syncro, it may be a "SMIDGE" off. but you want it almost dead on.
Good luck. I just thought that this is easier than trying to get a certain amount of degrees ATDC. Chilton's says 10 degrees and Haynes says 26. So after taiking to my Ford Nut mechanic, he said this is how he does it. The tool only fits when the Engine is at whatever degrees after TDC!!
1.
After disconnecting the negative battery cable from the battery, I removed the coil pack assembly. Please remember to number the wires with masking tape and a marker.
2.
I then removed the Camshaft Syncro Sensor from the top of shaft. It
has 2 very small screws holding it on. 6 or 7 mm i think.
3. A helper is nice here, I crawled under the truck and turned the crankshaft
with a 1/2" drive ratchet and I think a 15/16 socket, while my beautiful assistant (my wife) watched the "C" shaped thing in the top of the shaft turn.
Having the tool here is imperative. She put the tool on while i turned the crank until it fit in. She told me to stop. Its important to turn the crank slow as to have a perfect alignment. The tool has an arrow on the top. Another important step here,is to mark the intake with paintmarker where the arrow is pointing...BEFORE you pull the old one out! THIS IS VERY IMPORTANT!!!This goes to the front. Now that the Engine is whatever degrees past TDC it needs to be...
4.
Pull out the old Camshaft syncro. Once this is removed, take the tool off the old syncro.Take the sensor off the new syncro, with the new bolts, finger tighten the tool onto the new syncro. This may take a few attempts, but, now you need to drop the new syncro in until the arrow on the tool points to the paint marker on the intake. When you drop it in, it will want to rotate clockwise, so, start with the arrow on the tool at about the 4 or 5 o'clock position. It takes a few attempts, but, you will get it. Because of the slop from the old syncro, it may be a "SMIDGE" off. but you want it almost dead on.
Good luck. I just thought that this is easier than trying to get a certain amount of degrees ATDC. Chilton's says 10 degrees and Haynes says 26. So after taiking to my Ford Nut mechanic, he said this is how he does it. The tool only fits when the Engine is at whatever degrees after TDC!!