How to: - Ethan's 1990 eec-iv ranger - 99 SOHC Swap + A4LD to M5OD | Ford Explorer Forums - Serious Explorations

  • Register Today It's free!

How to: Ethan's 1990 eec-iv ranger - 99 SOHC Swap + A4LD to M5OD

Prefix for threads which are instructional.
Hello explorer forum! I hate to have started this thread a bit late in the season but I feel like this could help others that may decide to do a OHV - SOHC engine swap. I have already completed my swap and put 1250 miles to this date on ranger and im looking back on all these pics that I cant help but think may be useful to you all. So im rounding up my pictures and soon im going to start a detailed write out of all the modifications made to make this swap work for my daily driven situation. I stayed up all night putting the pics in a pile from all the friends I had sent them to in the past and tomorrow I will start posting on this thread how it all came together.

The chassis I started with was a 1990 ford ranger XLT 4x4 4.0 OHV auto A4LD

The donor vehicle was a 1999 ford explorer 4.0 sohc with a newer auto trans, 4r55/5r55???

Pics the day I bought the pickup assuming I was only in for a head gasket replacement

13342272_1052998034776537_615393932_n.jpg


13321242_1052998054776535_1169312210_o.jpg


Join the Elite Explorers for $20 each year.
Elite Explorer members see no advertisements, no banner ads, no double underlined links,.
Add an avatar, upload photo attachments, and more!
.


Once I had taken the heads off and found the cracks and sunken valve seats here was the old motor in the chassis

13332732_1056955271047480_7919060908445488656_n.jpg
13417506_1056955251047482_8840014423434845281_n.jpg


Motor out and on the ground, even though its a bad motor I still greased the cylinders,pistons and machined surfaces to deter rust just in case this block gets a new life.
13410362_1059515670791440_1240284492_o.jpg

image (1).jpeg
image (2).jpeg
image.jpeg

Next step is to buy a SOHC motor. :D


So I found a 1999 explorer 4.0 SOHC awd in washington that had been rolled several times, the driver and passengers survived and the motor reportedly had run before the crash. 187,000 miles on the SOHC in the explorer chassis. Either way it was posted for $200 on craigslist for the vehicle and I had talked them down to $150 after I paid my buddy for gas money. We drove to washington to pickup what was supposed to be an engine pulled from the explorer the previous night. When I made it to there house I had found these wreckers were quite lazy.

I had only brought an 03 dodge ram 1500 to pickup the motor and throw it in the bed, come to find out they had clipped it with a torch. The transmission was still bolted to the sohc and I shouldve taken it but due to the bed size I decided to leave the transmission. even without it the pickup had nearly maxed out its weight limit with the front clip alone.

So with how I received the motor you can see how im going to remove all the new 1999 bullshit, its beautiful actually. haha

13393906_1056955234380817_2168032648547792196_n.jpg


Now with the motor out of the explorer front clip, simply unplugged all the wires and disconnected all hoses. My plan was to use the OHV sensors, wiring, and computer to run the new motor since their nearly identical, sure missing a cam sensor, whatever. That cam will reliably stay in the same orientation due to the timing chain and there not being any sort of variable valve or cam timing. Almost every sensor from the old motor bolted right onto the new motor with no modification.

So heres the SOHC as I was finishing cleaning it up and preparing myself for not only my first engine swap, but also done entirely alone at the age of 19.
13383465_1057516020991405_1826060357_o.jpg
13396949_1057516057658068_1125889662_o.jpg
13405277_1057516064324734_29226992_o.jpg
13460917_1060153970727610_902632694_o.jpg

Plus I had to get the front clip out of my driveway, moved it and took pics just in case anyone was wondering what their 99 explorer's IFS w/ torsion bars looked like bare.
image (1).jpeg
image (2).jpeg
image (3).jpeg
image (4).jpeg
image (5).jpeg

Im also pretty sure theres nothing else I can really use from this front clip on my project so if theres anyone in the forums that could use a front clip and you live in Oregon then feel free to contact me.


Now at this point lets talk about the chassis half of this swap.

The old motor was pulled with the trans. the skid plate was removed and the transmission mount and cross member was removed. The transfer case was held up from a ratchet strap through the cross-member mounting holes. The exhaust stayed mounted to the chassis, the Y pipe stayed, the exhaust manifolds unbolted from the heads, only snapping 1 bolt in a head, but the manifold to Y pipe bolts were rusted solid. manifolds stayed on the pipes for now.

Don't trust a ratchet strap!!!

later on, while mating the transfer case to the trans, trying to lift it, it snapped and the transfer case dropped on my left cheek below the eye. it didnt entirely drop all its weight on me because the front driveshaft wouldn't let it drop too far, but I got a nice bump for a couple days.

In the engine bay, I neglect to have any pictures of my truck with no motor, it only sat for 2 days with no motor and I was just wanting to get through it as fast as possible. The radiator was removed, heater/ac housing removed, battery cables removed, bottom half of the air box stayed. There was an odd shock/brace/strut maybe for the side to side movement of the motor that needs to be discarded, later on there was no possible way to attach it to the SOHC.

I wish at that point I had removed the restrictive intake duct to the headlight but I happened to do that much later. I currently have the mouth being the factory hole in the bottom of the air box until I have the money for a DIY intake and filter.

The front grill, grill upper shroud, transmission cooler and headlights were removed. Carbon filter stayed.

Now, ive had two past jobs working with diesel semi-trucks and one thing ive found is pressure washing can be your best friend most of the time. I put the entire wiring loom in a trash bag, then draped it over the outside of the fender, and moved it to the front when I was cleaning in different areas. Pressure washed the truck top to bottom, as much of the front suspension and chassis as possible.

After that, pushed it into the garage and I had 4 things to do on my list before I dropped the motor in.

#1
Hop inside and cut the exhaust manifold to Y pipe bolts with an angle grinder.
#2
Zip tie my new, positive cable route from the original battery spot, to the original starter spot. The old cable was torn in several spots so I made the new one loose, but tied down in key areas.
#3
Ensure a good contact between the main chassis ground cable to the battery, good contact from the firewall ground cable, and I added another ground cable from the battery terminal to the closest radiator mounting bolt.
#4
Wire in the cable for the block heater installed in the 99 SOHC motor. I tested the block heater and it works fine, I have no idea if it was factory or aftermarket but the explorer was from north west of longview washington so thats far enough north to include one.
This ended up being as simple as a plug on both ends, strung through the inside of a chassis channel on the passenger side with zip ties. It comes out perfectly out the front bumper.
the block heater, if any of you dont know where its installed, its basically a replacement for a freeze plug on the side of a bare block. Im sure seasoned members know about em'.

Those 4 steps only took me, maybe an hour and a half at most, but I was taking my time.


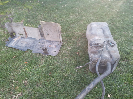
Now we will talk about the 1999 ford 4.0l SOHC Long Block before it was mated to the chassis.

I refer to long block as the point it was stripped to with the exception of the exhaust manifolds staying bolted to the heads.
https://en.wikipedia.org/wiki/Long_block

The 99 had the rear cam position sensor blocked off so there was no removal. looked like a freeze plug actually and the 1990 motor worked solely off the crank position sensor. The EGR was removed down to the nut on the exhaust manifold along with its vacuum lines for valve actuation. When removing the EGR tube, cut the tube in half and slip the nut off the cut end because the other end has a flange.

What I did for the EGR delete was I took some 5/8" OR 3/4" rebar and spun it on a bench grinder until it was somewhat round and tapered to fit 1/10" in the end of the nut before it stuck. Then I used a band saw to remove a .4" thick slice of that rebar. Put it in a vice and press fit the plug until 1/10" was left sticking out of the pressed side, Then used a 110 wire fed welder without shielding to weld a solid bead around the circle.

The oil was drained and filter replaced. The old block had a low oil level sensor. There was in-fact a cast indent where you could have drilled a hole and tapped it, except my friends father is a machinist, I tried to find the right sized tap with him, didnt have it, called everywhere I could think of and I could only find it in a large tap set that was a couple hundred dollars. So I just plugged the sensor into the wire and zip tied it in a safe spot of the engine bay, out of the way.

Now remember, the new motor was OBD2, and the chassis is currently OBD1. so no original sensor on the SOHC will swap over. I left the cam position sensor on the valve cover simply because a block off plate would not engage the oil seal on the sensor properly.

In the valley between the heads, between the intake holes and injectors to each head, there was a couple freeze plugs, and one freeze plug was factory replaced with a positive crank case vent or valley/jackshaft case vent. This I vented directly to atmosphere, but the black box was cleaned out with hot water. It has some kind of porous synthetic sponge looking filter inside of it and mine was quite clogged with oil.

The following were direct bolt on replacements from the old OHV block, directly bolted onto the SOHC block and parts.
Front Crank Position Sensor
The oil OR coolant temp sender on the drivers side of the block, on the front end of the motor mount

The OHV motor mounts fit the ranger chassis, SOHC fit the newer torsion suspension chassis so the OHV motor mounts were directly bolted into the SOHC, using different mounting holes than the SOHC had used previously, but there was several tapped holes in both blocks, so I referred to the other block for what holes were used.

The OHV Idle Air Control valve took the new ones location on the upper plenum

The knock sensor was removed, no block off required, it just bolted inside the valley of the heads.

Then the engine was dropped into the hole and mated to the transfer case with the motor and transmission mated outside the chassis.

13493303_1062823373794003_294664476_o.jpg


Then after all the mounts were secured, I dropped the upper plenum on for fitment....

13493159_1062824303793910_1179044735_o.jpg


Do you see that? what? No it totally fits right? NOPE. it may be secured, mounts torqued, bolted in place. But do you see that?

13467832_1062823867127287_866865267_o.jpg


The above pic shows how tight it would fit against not only the hood and firewall, but the A4LD dipstick was stuck, squished between the block and firewall. nope nope nope.... the upper plenum wasnt even bolted to the bottom half, couldnt sit far enough back so I had to grind off a few plastic nubs for plastic pretty plate mounting bulls**t.


While I thought of a plan for the dipstick and uncomfortably tight spaces, I went to the local pick n pull and grabbed a few parts. You know, 2 handfulls of fuses, some spare injectors, and the non a/c heater housing off an older ranger. may have been 87 or 89, 91-94, I cant remember, but it definently wasnt newer than 94. I picked up a return style fuel rail from a 97 SOHC because the 99 had a returnless and the 1990 had a return style. Bought the fuel line key at a local parts store for $5, seriously theres no other possible way without that key, you must buy it or use one. So now I could keep my factory fuel pump, factory fuel lines all the way up to the fuel rail I just pulled that went straight to the stock SOHC injectors.

13453448_1062821267127547_168877594_o.jpg

13460955_1062820600460947_698029636_o.jpg


Well my thoughts brought me to a body lift, bed and cab. For the lift I bought new grade 8 bolts in the proper lengths for the lift after removing one from each pair of different lengths. It cost me nearly $70 for 12, grade 8 bolts, nuts and washers alone.

I also neglect to have pictures of the 6 cab lift blocks, but I paid a buddy $15 that works at a welding shop to take some left over 2" diameter solid stock steel, slice it on a band saw in 2" sections and drill a half inch hole through the middle. So much more solid than the plastic pucks you buy at parts stores although I feel like ill have increased wear on the rubber bushings. I was pretty broke so I left the bushing replacement for later.

The rear 6 bed lift blocks were made from 2" steel square trailer hitch stock. used a drill press, 1/2 drill bit after a few passes with several smaller bits.

13569810_1069965123079828_561240324_o.jpg


Now the wiring loom was unwrapped, all the electrical tape torn off. I even removed crank position sensor shielding I feel like I should get back to and add more of. My Throttle position sensor from the OHV bolted right onto the SOHC throttle body BUT with the wires tucked into the valley pan like I wanted them, the plug was about 8-12" too short. So I cut some explorer wiring loom wires, clamped them on with butt connectors and that was the length I needed. I was fighting all these wires, they had all worn to a shape and I wanted them in different shapes, It really was a fight. it took a good 2-3 nights of rewrapping the wires with electrical tape to the shape I wanted them for the wire tuck and used plastic wire insulators to cover them back up. The lower plastic intake manifold had valleys cut with a band saw and bench grinder in between every cylinder intake tube for the injector wiring to be tucked.

The wiring for the alternator was too complex to make the new alternator work so I stuck with the old one, but the SOHC idler pulley and tensioner were continued to being used, along with the newer power steering pump. I repeat, the only belt run parts taken from the OHV and put onto the SOHC front end was simply the alternator.

The only problem with the OHV alternator is the bolt pattern was different for one single bolt. Well, ive made it 1200 miles on only 2 bolts so what the hell!?

If you dropped the alternator in its place, youll obviously see which bolt wasnt used.

I used the 5r55 dipstick and added new cross hatch marks on the 5R dipstick about an inch and a half higher up the dipstick than indicated.

One of the water temp sensors or senders would not fit the SOHC thermostat housing so I spliced it to the new sensor.
THIS WAS A MISTAKE!

To this day I still need to go back and fix that mistake, my engine coolant temperature has never been online, but I recieve no CEL codes, KOER, KOEO codes. none indicating anything to do with the temp sensor, senders or gauges.

The correct fix at that point should have been an adapter for pipe threading, a reducer. I didnt know at the time that they were widely available, if I knew that at the time I wouldve went the correct route.

The coil pack was unbolted, fliped 180 degrees and then very carefully, 1 by 1 the spark plug wires were unplugged and re routed to fit correctly.

Some vacuum lines in the plenum were plugged and only the basic essential vacuum lines plugged in to get her to run. The body was lifted 2" bringing the radiator shroud up 2" making contact with the fan. I used a bench grinder to cut out what was in the way and make it fit with loads of clearance.

It really was a mix n match of basic parts like the coolant hoses and vacuum lines, I just threw both motor's hoses in a pile to sort through later in the project to see what really fit the best. I got it all wrapped up and here was how the truck sat.

13548948_1072057999537207_248026914_o.jpg


With the body lift as you can see above, theres a space between the front bumper and the grill and theres also enough space between the engine and firewall because the firewall had a taper on it like this " ENG \ CAB" so the higher it was lifted, the farther away from the firewall the engine would be.

So I hopped in the truck, tried to fire it up several times to no avail. it kept popping then seemed like the engine would roll backwards.

A freakin month later one of my buddies realized my problem was simply, my coil pack plug was broken and it would go on upside down quite easily. He flipped the plug over, and she started the first time!


Now we get to the heater housing, I bet you couldve never thought a bucket, of all things would have a good shape with the right kind of material. Someone suggested a bucket, I only fabricated and sealed it.

14469319_1140523309357342_1055079201_n.jpg


Thats really the end to the saved pictures, ill have to get out there in the next few days and capture some more key elements to this swap. I really want this to be as near to a list of directions as I can to make this dirt simple and appealing to more people. ;)
Ill have more uploaded pictures soon.


Now at 350 miles my a4ld transmission had stopped working. so I pulled it out and figured out the problem.

14341570_1131711003571906_829546829_n.jpg


Turns out I was using the wrong torque converter and I had over tightened the bell housing bolts. The torque converter I had went with had came from the original 1990 4.0 OHV motor. It definitely had too high of a stall rate and the pilot was very short. The front pump gear was also fried.

13866878_1091231187619888_249527528_n.jpg
13871682_1091231184286555_1188116592_n.jpg
13874688_1091231190953221_160126163_n.jpg


So I went to Pick N Pull again and picked a new A4LD, Right? yoohoo

I get home, bolt it all in, fill it up. Wont go into any gear. Yupp I took a broken a4ld from a junkyard and I still had a 30 day warranty to replace it so I went and found another A4LD.

At this point this is my 3rd a4ld, she gets me started again after 350 miles from the swap with the torque converter that was strapped to the SOHC when I got the front clip. She took me to where I stand today. 1,200 miles on the ODO and as you can tell by my attitude, the a4ld is dead again.

About 200 miles before the transmission quit, the brand new starter I had bought exploded so I got a replacement. Check this out.

15322601_1201804536562552_1855279097_o.jpg


My transmission just stopped shifting into drive. Ive got a very solid reverse, I had a very solid drive when it would engage but then it started having shifting problems from every cold start and then eventually wouldn't go into any forward gears.

So this winter my truck sits dead in the water with no drive. Im thinking soon an M5OD swap, maybe followed by a sway bar quick detach, and if im really lucky I want to fabricate a suspension lift. the last 2 are really really high hopes but theirs a good chance on an M5OD swap coming from me soon.


Stopped by the junkyard again and pulled myself an M5OD from a 1997 4.0 4x4 explorer. Bought it with the throw out bearing, 10" clutch assembly with some life left on the clutch, the trans to block shim plate and the entire shifter and knob for $180. It was a late christmas present, but I hope it ends up being just a weekend project.

15697967_1233536133389392_7159464007102455539_n.jpg


Now I know im missing a couple parts but im working on it. Since I need an 8 bolt flywheel to match my 8 bolt crank on the SOHC motor, ill just pay the $70 for a new flywheel rather than divorcing another motor and transmission at a junkyard just for the flywheel. Clutch kit was $130 new but I already got a clutch assembly for free. (Junkyard quotes $160 for any standard or automatic transmission plus environmental fees). I also need the clutch master cyl, hydraulic line, clutch pedal, pre-94 M5OD transmission wires, pre 94 manual computer. Soon ill have to update the A4LD removal.


Nice job! On your truck, the A4LD to M5OD swap is fairly easy. Just grab the brake/clutch pedal assembly, transmission wiring harness, shifter boot stuff, computer, and anything else you want off a first gen explorer! It'll all bolt right in to your ranger, and the plug for the clutch pedal sensor should already be there in your truck! Good luck with it!


I did the same swap from a a4ld to an m5od on my explorer. It only took me 2 smoked autos to decide. I recommend that you don't skimp on the clutch parts. Buy a new flywheel, a new LUK clutch (you can use the sohc clutch for more clamping power- see my ranger build for details), new hydro lines and a new motorcraft (yes the high dollar one) slave and master.

The clutches on these are finicky. There is some good threads on bench bleeding the slave/ master. Do not underestimate the importance of this! Do not use a machined flywheel.

I did the swap and wrestled with a tranny that would never go into gear from a stop unless you turned the truck off or jammed the gears in. Then after trying everything I finally replaced my machined flywheel with new and slave and master with motorcraft and bench bled. On my ranger I did the sohc clutch swap last fall but I skipped the frustrating middle part and did it right the first time. It shifts like butter.


On the flywheel I ordered one for a 1999 explorer 4.0 sohc XLS

http://www.oreillyauto.com/site/c/d...Search_flywheel_5014790_4412&keyword=flywheel

Which is the exact chassis the motor was taken from. $70 + a five dollar off coupon.

I was also able to exchange my brand new, under 1 yr warranty auto starter for a manual starter, for another $15. Plus I got freeze plugs and deleted the rubber plugs behind the shifter on the M5od

image (1).jpeg

image.jpeg

image (2).jpeg

image (3).jpeg
image (4).jpeg
image (5).jpeg
image (6).jpeg


Next ill be cleaning out the dusty grooves on the clutch disk I removed with the transmission from a 97 explorer. It really looks fine enough to re-use.

My main concern right now is the transmission wiring and the computer.
Lets say I pulled a manual computer from a junkyard, im looking for a 1990-1994 "EEC-IV" that is a manual and a V6 4.0. Would it also have to be a 4x4 or would a rwd EEC-IV computer be exactly the same?

Would there be a big difference between the fuel injector pulses in a 2.9 compared to a 4.0? I would assume so, which is why im looking for 4.0's for the ecm.

Next concern

Is splicing the auto harness into the manual. I cant really find the right thread or article to explain how to splice the auto wires into manual. I see theres only 1 plug on my M5OD, how much input is really going into my EEC-IV? I think my mechanical speed sensor is in the tail end of my mechanical shifting transfer case.


I had 1 wiring harness when I did mine and it plugged right in. On the computer, I ran mine with an auto computer for a year or two until I found a manual computer. The only noticeable difference was the idle was higher on the manual computer until I stopped- helped with shifting. I could dig through my explorer build thread- it seems like there was a lot of swap details in it.


Thanks for your write up, sounds like a huge bummer the tranny went out. 5 speed will be more fun anyways, I am dropping a sohc into my 93 tomorrow to replace the blown ohv got inspired by this post
Got the heater box off and I like the bucket mod will probably be fashioning something like that myself.
Anyways thanks for the writeup saved me a lot of time and frustration assuming mine drops in smooth as well.


Well I hope it goes well for you, I don't know about your application but it may be a bit harder since a lot changed in 92. But you could get it to work out, id just be worried about the crank position sensor in the back of the valley of the motor.


Well I haven't got er started yet but I bolted on the crank position sensor from the ohv...


Join the Elite Explorers for $20 each year.
Elite Explorer members see no advertisements, no banner ads, no double underlined links,.
Add an avatar, upload photo attachments, and more!
.


Well I have a lot of miles on her now, to this date 4/8/2017 I have 3,700 miles on the truck which 3,200 of those miles is with the new M5OD. Going to be updating this thread a bunch tonight so here we go. Shortly after I got the motor swapped in before I had put a single mile on it I took this video.....


Now after aprox. 500 miles and the 3rd transmission had failed, I took this video with the last auto transmission that was in the truck still bolted up, it ran but when put into drive, the auto trans would not shift into any forward gears. For a couple days I was able to "Tranny drop it" some people said thats what its called but technically I put it into 1st gear on the automatic shifter, then held the brake and revved up the motor until it dropped into gear and torqued the chassis, then I knew it would be in gear and could drive off, but it still had shift problems. Here is the last video with an auto in it right before I swapped to a manual...


Back
Top