gsmaclean
Well-Known Member
- Joined
- February 11, 2007
- Messages
- 397
- Reaction score
- 2
- City, State
- Strongsville, OH
- Year, Model & Trim Level
- 03 Limited
is it the same spot on 2 and a 4 door?
No, it's different in the 2-door.
is it the same spot on 2 and a 4 door?
") at Henson Perf.
at Henson Perf.I used an air chisel to do mine, and it cut it right open like using a butter knife, with no sparks or fear of fire.

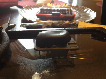
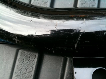
Here is my pic for how I cut open, with grinder and tonnes of sparks, the access door on my 99 sport. The hardest part was removing the fuel line.
Here is my pic for how I cut open, with grinder and tonnes of sparks, the access door on my 99 sport. The hardest part was removing the fuel line.

I gave up on my PLASTIC connector kit after about 3 hours, and used a tiny tiny tiny screwdriver to push the leg barbs back inside the fuel connector.
I recommend the metal connector tool, because the plastic one only worked once for me (when I removed my fuel filter) and then is probably now just slightly too "squished" to work properly.
There was a murky dark clouds in my fuel tank
I was really worried about a fire, but after doing this, the top of the gas tank appeared airtight and bone dry. As long as you have no fuel leaks, I would do it this way again in a heartbeat.
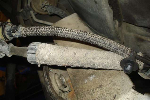
Now my GS340 fuel pump is in! See pic I took just before I made the swap. I bought the pump from James