How to: Building a rotiserrie | Page 2 | Ford Explorer Forums - Serious Explorations

  • Register Today It's free!

How to: Building a rotiserrie

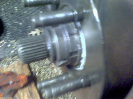
The "axle" bracket that is mounted on the upright in my photo is cinched in place with bolts protruding from the side. Once the proper height is determined, I will drill a hole all the way through the upright, just below the bracket to act as a safety stop.


Join the Elite Explorers for $20 each year.
Elite Explorer members see no advertisements, no banner ads, no double underlined links,.
Add an avatar, upload photo attachments, and more!
.


So do you just jack and pin, jack and pin, to get it up to height? Or.. whats the trick once the body is bolted to it?

You just use a little muscle and pick it up! :rolleyes:


More progress. I'm hoping to finish it tomorrow:D

LOL Nice re-use of the Super Hitch, Rick! Its looking good.


I was wondering if anyone was going to comment about my reuse of the hitch:D


Looks good, Rick. Once you've got it done, give me a shout if you want some help getting it mounted up.


Thanks. I may have to take you up on that;)

I'm not as close to being done as I thought. I found some more rotisserrie plans and want to add something to this one:

RotisserieAssyRevAStraightLegsstora.jpg


I like the wheel that allows the car to be locked in position at multiple angles. I'm going to cut the ring with my plasma cutter. I knew that thing would come in handy:D


You could use a pair of those Harbor Freight geared winches to raise and lower the shell.


rotisserie_straight1.jpg
rotisserie_straight2.jpg
rotisserie_angle1.jpg
rotisserie_angle2.jpg
Woo hoo!!! She's a rotatin'!!!


..

rotisserie_angle3.jpg


Wow!!!

That turned out great!!! I guess your back will never see the floor or the creeper ever again :)


I have to remove the jig in the back with the wheels on it for the car to fully rotate around.

That jig is bolted in, but it has a small strut on it which is welded in place. Since I still need to work on the car on the jig for awhile longer, I'm not going to remove it yet. The car rotates much easier than I thought. I just stuck a torsion bar in the end of the cross bar and gave twisted. No problem at all!

I used my floor jack with the extension I use to raise the Explorer high enough for jack stands. I think the extension is about 18-24". I need to make another identical extension so I can use both my floor jacks at once instead of having to jack, pin, go to the other side, jack, pin, and so on...

I'm really happy with the way it turned out. I still plan on adding the locking ring, but that can wait.

For now I'm :D:bounce: This was my biggest fabrication project yet.


Oh... almost forgot to mention that this thing ended up longer than I had hoped:( I had to turn the car sideways in the three car garage for it to work:eek:


Wow, looks great, Rick! How do you keep the doors closed since your latches have been removed?

PS. Very nice lines there, bud. Just thought I would say it again... :D


I only rotated the car towards the side without a door:D That door will be coming off soon.


Ah, that's right!!!


rotisserie_fulltilt2.jpg
rotisserie_fulltilt3.jpg
rotisserie_fulltilt1.jpg
Full tilt boogie

..


Time to put casters on the ol' rotiserrie..

Looking good!


Probably a foot too long.

I have casters for it. There are 6x6x1/8 pads welded to each corner already drilled for the casters. I left them off to provide more stability while working on it.


Join the Elite Explorers for $20 each year.
Elite Explorer members see no advertisements, no banner ads, no double underlined links,.
Add an avatar, upload photo attachments, and more!
.


Those are some serious welding skills...


Back
Top