How to replace upper intake manifold gaskets | Page 6 | Ford Explorer Forums - Serious Explorations

  • Register Today It's free!

How to replace upper intake manifold gaskets

Shoulda Woulda Coulda

I definitely wish I had seen this thread before I went all in. In the process i decided to take off my egr valve and do some cleaning and maintenance to other components as well and twisted my egr valve tube. I am going to repair it myself before i buy a new one cause i cant seem to find anyone that carries that tube other than ford and i am pretty sure i can weld a new 90 and that will be it. Any sites out there worth checkin out? Again this thread was awesome. Very detailed and great pics.


Join the Elite Explorers for $20 each year.
Elite Explorer members see no advertisements, no banner ads, no double underlined links,.
Add an avatar, upload photo attachments, and more!
.


intake gaskets

Iwas just wondering I have a 2002 explorer with a 4.0 motor my mechanic said that i have a vacuum leak coming from the lower intake so i went to ford parts department to buy the gaskets i need and was told that the 2002 did not have a lower gasket that there were 6 o rings on the plenum the plastic intake and that was it does anyone know if this is true


o rings under plenum

As far as I know(haven't dealt with 2002 model) there should be 6 orings under the plenum and a gasket under the fuel rail. When I bought my gasket set it came with the gasket for under the fuel rail and i went ahead and replaced that as well. It definitely helps to look at the forums some more and get a manual as well. If you can afford it buy the ford service manual on amazon or ebay as well as the hayes.


Iwas just wondering I have a 2002 explorer with a 4.0 motor my mechanic said that i have a vacuum leak coming from the lower intake so i went to ford parts department to buy the gaskets i need and was told that the 2002 did not have a lower gasket that there were 6 o rings on the plenum the plastic intake and that was it does anyone know if this is true

correct the 02 only has 1 intake then heads, prior years had a 2 pieces intake.


Just wanted to post that I read this the weak before New Years, and had been enduring a rough idle for quite some time, as well as looking at the check engine light for the past 2 years. $25 and a few hours later on New Years Eve, I changed my upper intake gasket and the light has not come on since. My 2000 explorer runs like a dream again.

Thanks to all those that contributed to this thread.


intake gasket

iam thinking now that iam that far into it so i should change the fuel rail gasket also . Do you need to drain the antifreeze for that and is there anything else i should look for while in there? Or anything I should be careful with. thanks for all the help you guys.


2000 Explorer code P171

I had to replace my upper intake manifold gaskets to fix a vacuum leak that was giving me two engine error codes (P0171 Bank 1 lean and P0174 Bank 2 lean). I have a 2000 Ranger with a 4.0L OHV V6 with the plastic upper intake manifold. I was able to diagnose it as a vacuum leak with help from an engine computer scanner, a few other on vehicle checks and help from other forum members (of course!!). A vacuum leak in this location is a common ailment for these engines.
Here are the supplies / tools that I used:

Fel-Pro plenum gasket kit
--Part No: MS90732, $21.99 at O’Reilly Auto Parts
Blue shop towels
In-lb torque wrench
External torx socket set
Silicone grease
O-ring pick
Various wrenches sockets, extensions, etc.
Channel lock pliers
Flat blade screwdriver

Things to remember:
-Disconnect the battery. Several electrical connectors will be disconnected and reconnected throughout this procedure. In addition, your computer will need to be reset so it can recalibrate without the vacuum leak.
-Don’t force electrical connectors when you disconnect or reconnect them. Most have a catch on them that has to be depressed or slightly pried up to get the connector apart. You don’t want to have to add replacing electrical connectors on your to-do list ;)

The next three steps can be performed in any order, but this is the order I did them in.

Next, from left to right in the picture below, disconnect the vacuum line to the throttle body, the connector to the throttle position sensor (TPS), the connector to the idle air controller (IAC), the vacuum line from the PCV valve, the accessory vacuum line and then the vacuum line to the brake booster (you will have to use the pliers to squeeze the hose clamp together to remove the hose). Remove the wiring harness plug from the support attached to the intake (blue circle) and remove the wiring harness support (green circle).
disconnects.jpg


Remove the plastic cover over the throttle body connection to the throttle and cruise control cables. The throttle cable is shown with the red spring and connector. The cruise control cable is black with the red cap. Next, loosen the hose clamp from the intake air tube to the throttle body and disconnect the tube. The cables attach using a ball and socket type setup (green circle in the pic). Use a flat blade screwdriver to gently pry the cables (socket) off of the throttle body (ball). Remove the cruise control cable from the upper intake (blue circle) and then from the throttle cable. To remove it from the throttle cable, pry it up and then off of the pin on the end of the throttle cable (red circle). Remove the throttle cable from the intake. Route both cables out of the way.
throttle_cable.jpg


I removed the spark plug wires going to cylinders 4-6 (driver’s side) as the wires are threaded through the intake. I disconnected the wire at the spark plug first, then at the coil pack (circled in the photo below) and pulled the spark plug end through the manifold. Remove the four screws that attach the coil pack to the upper intake. Remove the wiring support for the coil pack from the intake (green circle). Go easy on it, I broke mine in the process :(. Lift off the coil pack and set it aside. I set mine on the passenger side valve cover (refer to the next pic).
plug_wires.jpg


Remove the six nuts that hold down the upper intake. Lift the upper intake up and off of the six studs attached to the fuel rail / lower intake. At this point any connections you forgot will become obvious J.
upper_off.jpg


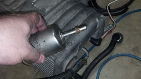
I set the intake on my work bench upside down to replace the gaskets. I am pointing at one of them with my pocket screwdriver. I used a pick to pull the old ones out.
intake_out.jpg


The old gaskets had hardened considerably and were flush with the sealing surface of the upper intake. I can see how this would cause a vacuum leak.
old.jpg


The new gaskets were significantly more pliable and you can see that they protrude below the sealing surface.
new.jpg


I stuffed shop towels in the intake runners of the lower intake (to keep crud from falling in) and cleaned the sealing surface of the fuel rail / lower intake.
clean.jpg


I checked the torque on the intake studs using the Ford manual. This is where you need the external Torx sockets and the torque wrench.
intake_studs.jpg


Remove the shop towels and lower the intake down over the studs. Tighten the nuts in the order shown below. I used the e-Torx socket to hold the stud and a crow’s foot to tighten the nut.
intake_nuts.jpg


From here on reassembly is the reverse of disassembly. I used the silicone grease on the connectors for the spark plug wires as well as the socket where the throttle cable connects to the throttle body. Double check all of your wiring and vacuum hose connections, reconnect the battery and then start ‘er up!!


thanks for the reply
the reason i needed to do this job on my wife's ford was because she was up for inspection and the service engine light was on in NY car wont pass if on. My mechanic told me the car had a vacuum leak in the lower head fuel rail well he got the light off my daughter took to car to the city and drove it all week bought it back here the light has not come back on so i took it down and had it
inspected i have been driving it now for a month and no light which is a good thing if it comes back on then i will need to do the job thanks again for all the info


Does anyone know of a guide to do this but on a 5.0 engine


Hello everybody
i have a po174 code
i fix everything couple years years ago
i put three new oxygen sensor
i change fuel filter
i put a k&n cold air intae gen 2
i change o-rings on my and fuel rail gasket
i gave it a full tune up
i change the three egr sensors
it runs great about 200miles then when i get 200miles the check engine light on i reset with scanners i have 155,000miles i did all the work around 137,000mles now i have 155,000miles


Dear teddy B.

I also have a 2000 explorer that runs awful when cold.. have to keep it going by pressing on the gas. I have the two codes that its running lean. once its warm it runs ok but idles at 500 rpm. Can I ask if the intake manifold solved your problem? I think my oxygen sensors might be at fault but am not sure if its just my intake gasket.


Hi all, I'm fairly new to Serious Explorations but I've found it helpful on everything so far on my 99 Explorer Sport (OHV) but now I'm stumped and need help.

I followed this write-up and it was perfect with the exception of the missing EGR stuff. However, it didn't fix my problems. I still get the po171 and po174 codes, and about 10 mpg. This hurts when I'm in between jobs and can't afford gas, let alone tools. My truck would absolutely rock and rumble at red lights and when it would gear up and the rpms dropped to around 1500. I replaced the PCV valve which certainly helped, but didn't fix the problem entirely. My mileage is up to around 13 now, but I know she can get around 20.

My question comes in several parts.
1. These are indicative of a vacuum leak, right?
2. I didn't use a torque wrench to tighten down the studs because I didn't have an E7 ext. socket, but I did crank down on them all pretty hard (dumb idea, I know.) What are the odds that this is the source of such a bad leak?
3. I used the felpro gasket set from Autozone and after I replaced everything that I took off, there is still a big fat green o-ring about an inch wide left over. I never took one out, so can anybody tell me where that bad boy goes? (Pictures would be good)

Thanks in advance.


OK. My 99 Explorer 4.0 OHV was thowing the po171 code... which is an o2 sensor. I didnt have the money to replace it that day, so I waited til I had some money and then came back to the parts store when I did. I got them to read the code again... just in case... and it was throwing both codes this time. The po171 and the po174. Since it was saying both was bad, I bought both, went home, changed them and then returned to have my codes cleared. The next morning, the check engine light was back. I went back to the parts store and they told me that I now needed the two back o2 sensors. I could only find one, so I replaced that. The next morning.... yet again, I had a check engine light on. I went back to the parts place again and they said it was the po171 code again. Being that I just replaced the o2 sensors, I knew I had problems else where. I seen on here where people were saying these engines have the intake manifold problems... and that it was pretty common. I took starter fluid and sprayed around the upper gasket and it started idling a little differently. So Im assuming this IS my problem. If not, Im at a loss... as for I am only getting 200 miles to a tank and can not keep affording gas like this. I did buy a whole gasket kit... should I go ahead and replace the lower gasket just because I have it? Or is there anything else you can tell me that might would help me out? Thanks! And sorry for the long story... Im a woman... and we tend to rant. LOL


Ok, so I got the studs and nuts all torqued down to spec without breaking one of them. It certainly helped, but didn't fix my problem. I still don't have the power I used to, especially going up hill.

While I was under the hood, I noticed a tiny red vacuum line that went from my fuel injectors to the globe under my air filter box that had been cut in two. I repaired it, but I was wondering exactly what it was?

If anybody else can help me with this problem, it would be much appreciated, otherwise, I gotta take her to the shop.


Deathscort - replace both upper and lower gaskets. I tried to do just the uppers at first, because I'd never pulled a fuel rail before, but that didn't solve the problem. When I got the lower off I could tell that the seal at one port wasn't sealing anymore. I think I posted in this thread a couple yrs ago about reinstalling the rail. Don't try to do this without all the tools you'll need, and if you find you're short, stop and go get it/them.


SwampFox - the green O-ring is for the EGR tube.


Thanks CaymanGreen! I have someone that is just going to replace the lower, upper and also the valve cover gaskets tomorrow.


SwampFox - the green O-ring is for the EGR tube.

I got that much, but which part of the EGR tube? Because there's a diamond shaped gasket on the valve end, and the other end (where it meets the plastic) doesn't come out.

Since I'm still having problems with this vacuum leak, should I put forth the effort to replace this one too? If so, can you send me a link to a thread that shows me what to do? Thanks Cayman


Join the Elite Explorers for $20 each year.
Elite Explorer members see no advertisements, no banner ads, no double underlined links,.
Add an avatar, upload photo attachments, and more!
.


Weird. I found the turn you're talking about, but mine doesn't have an angle. It looks like it got blown up right before the elbow. Like there's the metal tube going into the intake plenum, then it just splays out. Is it worth the effort to take the manifold off for the fifth time, just to replace that gasket? Just pull that plenum off and twist and yank til that bad boy comes out?

Thanks for your help again!


Back
Top