-
Performance Upgrades - Maintenance - Modifications - Problem Solving - Off-Road - Street Trucks.
Covering the Explorer, ST, Sport, Lincoln Aviator, Sport Trac,
Mercury Mountaineer, Mazda Navajo, Ford Ranger, Mazda Pickups, and the Aerostar.
Featuring H.I. - Human Intelligence.
Register Today It's free!
- Forums
- Generation Specific Forums
- 1991 - 1994 Explorer Ranger Navajo 1st Generation
- Modified 1991-1994 Explorers
You are using an out of date browser. It may not display this or other websites correctly.
You should upgrade or use an alternative browser.
You should upgrade or use an alternative browser.
My 93' Explorer Restoration Project
- Thread starter Suicide77
- Start date
Elite Explorer members see no advertisements, no banner ads, no double underlined links,.
Add an avatar, upload photo attachments, and more!.
- Joined
- April 1, 2012
- Messages
- 391
- Reaction score
- 42
- City, State
- Salt Lake City, Utah
- Year, Model & Trim Level
- 1993 Explorer
Good point Anime! I'll have to remember that for the next set of rims...  On the flip side though, the spare does spend all of its time under the truck. Hopefully a good tire repair kit can keep it that way Lol!
On the flip side though, the spare does spend all of its time under the truck. Hopefully a good tire repair kit can keep it that way Lol!- Joined
- April 1, 2012
- Messages
- 391
- Reaction score
- 42
- City, State
- Salt Lake City, Utah
- Year, Model & Trim Level
- 1993 Explorer
I have been working on and off this past week, due mostly to overtime at the place of business. I think I finally have some progress worth posting! For starters, I got the two beam brackets on and bolted down. I noticed with the James Duff Kit, there is an extra hole that needs to be drilled on the passenger side of the frame, so I have included a picture of that. Not a big deal, just something I didn't expect.


...And the other project has been rust related. I know, you guys probably could have guessed. On the flip side I think it is going to turn out well, although, I'm looking forward to taking the whole thing apart in the future and doing it inside and out")


The same went for the other axle half


The end is nigh! Probably going to paint some sort of red design on the front diff, any suggestions? Thanks Again!
...And the other project has been rust related. I know, you guys probably could have guessed. On the flip side I think it is going to turn out well, although, I'm looking forward to taking the whole thing apart in the future and doing it inside and out
The same went for the other axle half
The end is nigh! Probably going to paint some sort of red design on the front diff, any suggestions? Thanks Again!
NHarris
Explorer Addict
- Joined
- May 31, 2010
- Messages
- 3,338
- Reaction score
- 7
- City, State
- Gillette, Wyoming
- Year, Model & Trim Level
- 04 Wrangler, 08 Ranger
Looks good! I need to come down to your place one weekend and we need to get my frame down to bare metal and get it bed lined.
As for a design, I'd say go simple and do all the bolts red.
As for a design, I'd say go simple and do all the bolts red.
- Joined
- April 1, 2012
- Messages
- 391
- Reaction score
- 42
- City, State
- Salt Lake City, Utah
- Year, Model & Trim Level
- 1993 Explorer
Good call! I didn't even think of that! Secondly, yes! Bring your truck down and I will help you strip off any rust and bed-liner that bad boy to preserve it! Plus I'm sure I will need help bleeding the brakes, cough *Adamsbro* cough, and if you know a thing or two I would love another visit from your V8 XLT
NHarris
Explorer Addict
- Joined
- May 31, 2010
- Messages
- 3,338
- Reaction score
- 7
- City, State
- Gillette, Wyoming
- Year, Model & Trim Level
- 04 Wrangler, 08 Ranger
My truck has mostly road grime underneath. I need to get the axle cleaned up and some frame.
And I'm hoping my Explorer won't look too small next to your truck. lol: I'll keep my distance from Adamsbro's truck when I see the hulk. That may make me go and impulse buy a Superlift.
And I'm hoping my Explorer won't look too small next to your truck. lol
: I'll keep my distance from Adamsbro's truck when I see the hulk. That may make me go and impulse buy a Superlift.Bruces expo
Explorer Addict
- Joined
- January 19, 2005
- Messages
- 2,133
- Reaction score
- 3
- City, State
- Middle GA
- Year, Model & Trim Level
- 91 Mazda Navajo
Looking Good , Makes Me Want To lift mine With a Bigger Suspension lift , If i do I'd Like to chop my BL in half , Great Pics Very good For Write Ups !
- Joined
- April 1, 2012
- Messages
- 391
- Reaction score
- 42
- City, State
- Salt Lake City, Utah
- Year, Model & Trim Level
- 1993 Explorer
I have the parts for the C-clip eliminator, and want to do the U-joints (with the full circle clip for the middle one), however, I should be honest. I want to drive this thing ASAP!!! For a more sensible reason, it is also my only means of transportation other than a bicycle, and that has gotten real old real fast. Getting milk from the store via bike sucks. My last supporting argument, I will be in school spring semester (in other words) no longer commuting to another city to work everyday so it will be the next point in time in which I take the front axle apart again and do everything right. I do appreciate the push though Wood, it isn't ideal to go so far so good and then half A$$ something...
- Joined
- January 30, 2002
- Messages
- 618
- Reaction score
- 11
- City, State
- Twin falls, ID
- Year, Model & Trim Level
- 93 XLT
Let me know when you need it and ill do my best to get there to help ya! The job your doing is putting mine to shame lol! Fantastic work! I have been looking at mine a lot lately and really thinking of doing a sas just not sure when! I also have a small update that ill post tonight or tomorrow!
wood1
Explorer Addict
- Joined
- May 3, 2007
- Messages
- 2,917
- Reaction score
- 5
- City, State
- North of Edmonton
- Year, Model & Trim Level
- '93 XLT, Cayman Green RIP
I have the parts for the C-clip eliminator, and want to do the U-joints (with the full circle clip for the middle one), however, I should be honest. I want to drive this thing ASAP!!! For a more sensible reason, it is also my only means of transportation other than a bicycle, and that has gotten real old real fast. Getting milk from the store via bike sucks. My last supporting argument, I will be in school spring semester (in other words) no longer commuting to another city to work everyday so it will be the next point in time in which I take the front axle apart again and do everything right. I do appreciate the push though Wood, it isn't ideal to go so far so good and then half A$$ something...
I hear you, you will get that stuff done eventually. Do all that when you regear!!
- Joined
- April 1, 2012
- Messages
- 391
- Reaction score
- 42
- City, State
- Salt Lake City, Utah
- Year, Model & Trim Level
- 1993 Explorer
Do all that when you regear!!
T-shirt Worthy!!!
- Joined
- April 1, 2012
- Messages
- 391
- Reaction score
- 42
- City, State
- Salt Lake City, Utah
- Year, Model & Trim Level
- 1993 Explorer
Ok, so I plan on putting the front axle back on today. I just finished torquing down everything and got the upper shock mounts all squared away!

My only question is how far do I thread the coil into the bucket? 90 degrees past the front tab? Any ideas?
My only question is how far do I thread the coil into the bucket? 90 degrees past the front tab? Any ideas?
 .... that looks so good...
- Joined
- April 1, 2012
- Messages
- 391
- Reaction score
- 42
- City, State
- Salt Lake City, Utah
- Year, Model & Trim Level
- 1993 Explorer
Hey Naasau, I wish I had the style of bucket you have! It seems much more straight forward (in other words) bone head proof! With these I'm really not too sure... It would seem as though it only 'fits' or 'seats' well after passing the retaining tab by an inch or two. I also found this picture while searching the forum of the James Duff Lift as they were developing the lift. (as seen in this link http://www.explorerforum.com/forums/showthread.php?t=265477)

What do you think? I'm leaning towards maybe just driving it a little with the coil seated similar to ThatFabGuy's arrangement and modifying as need be. Weird huh? What are your thoughts?
What do you think? I'm leaning towards maybe just driving it a little with the coil seated similar to ThatFabGuy's arrangement and modifying as need be. Weird huh? What are your thoughts?
Naasau
Well-Known Member
- Joined
- January 2, 2007
- Messages
- 806
- Reaction score
- 4
- City, State
- Denver Colorado
- Year, Model & Trim Level
- '93 Explorer XLT
I looked through Fab Guy's pics again and it looks like you've got it right. I would say rotate the upper spring so that the top coil loop lays flush with that flat inner piece (to see if you can maximize the grip of the retainer clip).
Looking good!
Looking good!
Elite Explorer members see no advertisements, no banner ads, no double underlined links,.
Add an avatar, upload photo attachments, and more!.
- Joined
- April 1, 2012
- Messages
- 391
- Reaction score
- 42
- City, State
- Salt Lake City, Utah
- Year, Model & Trim Level
- 1993 Explorer
Thanks MrSport!
And yes... Updates!
I did some routine cleaning, this time it was the coil retainers. I ended up painting them black afterwards (It'll get photographed at some point). I also cleaned up the studs for the dreaded 'threading of the needle'.


Then I proceeded to pull a royal screwup! Since I had help to torque down the 1" bolts that hold the radius arms to the transmission/frame bracket and had no help today I figured I would put the axle on while everything else was hooked up... BAD IDEA!

I was alone and wanted to rush getting the axle on, again, bad idea. This resulted in the stud hole getting cross threaded @#$!!

Of course everybody reading is probably thinking, "that sucks". So, this leaves getting a tap or getting a new axle half. Since I just cleaned the crap out of this axle half, and painted it, I figured I would give tapping it a go. Besides, it isn't rocket science, however, who sells a tap that big? Well, after researching and comparing I found out the tap I would need had to be 3/4 diameter WITH 10 threads per inch! For what ever reason this is a less common pitch in threading. Most taps are 16 threads per inch similar to a spark plug tap and only 1/2" at that! Auto Zone, Home Depot, Ace Hardware, and Harbor Freight did not have a tap big enough. A set here or there with 'Jumbo' taps would max out at 1/2" diameter. Finally, Sears! They carry one set that has a 3/4" tap with both 10 and 16 threads per inch. It was on sale but was still $89.99! But when you need it, you need it...


BAM!!! Got it to thread again!

After it threaded the stress just melted off of my shoulders! Now, more so because I had help at this point instead of trying to do it alone, I went ahead and detached the radius arms and mounted them BEFORE attaching the whole assembly to the truck! Definately a much better way to go about it!

Victory!


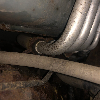
To say the least I am totally stoked to get this thing rolling! Also probably going to have to jack the vehicle up higher to put the tires on, hell yeah! Thanks again for tuning in, I just have brake lines, steering, add-a-leaf, and shackles left to go!
And yes... Updates!
I did some routine cleaning, this time it was the coil retainers. I ended up painting them black afterwards (It'll get photographed at some point). I also cleaned up the studs for the dreaded 'threading of the needle'.
Then I proceeded to pull a royal screwup! Since I had help to torque down the 1" bolts that hold the radius arms to the transmission/frame bracket and had no help today I figured I would put the axle on while everything else was hooked up... BAD IDEA!
I was alone and wanted to rush getting the axle on, again, bad idea. This resulted in the stud hole getting cross threaded @#$!!
Of course everybody reading is probably thinking, "that sucks". So, this leaves getting a tap or getting a new axle half. Since I just cleaned the crap out of this axle half, and painted it, I figured I would give tapping it a go. Besides, it isn't rocket science, however, who sells a tap that big? Well, after researching and comparing I found out the tap I would need had to be 3/4 diameter WITH 10 threads per inch! For what ever reason this is a less common pitch in threading. Most taps are 16 threads per inch similar to a spark plug tap and only 1/2" at that! Auto Zone, Home Depot, Ace Hardware, and Harbor Freight did not have a tap big enough. A set here or there with 'Jumbo' taps would max out at 1/2" diameter. Finally, Sears! They carry one set that has a 3/4" tap with both 10 and 16 threads per inch. It was on sale but was still $89.99! But when you need it, you need it...
BAM!!! Got it to thread again!
After it threaded the stress just melted off of my shoulders! Now, more so because I had help at this point instead of trying to do it alone, I went ahead and detached the radius arms and mounted them BEFORE attaching the whole assembly to the truck! Definately a much better way to go about it!
Victory!
To say the least I am totally stoked to get this thing rolling! Also probably going to have to jack the vehicle up higher to put the tires on, hell yeah! Thanks again for tuning in, I just have brake lines, steering, add-a-leaf, and shackles left to go!
Featured images


Featured images
Similar Threads
- Replies
- 2
- Views
- 2,622
- Replies
- 4
- Views
- 1,364
- Replies
- 18
- Views
- 3,461