TSB
06-2-12 MIL ON WITH PCM DTC P0463 AND/OR IC DTC B1201 - FUEL GAUGE DROPS TO EMPTY OR
SLOW TO UPDATE AFTER REFUELING
Publication Date: January 20, 2006
FORD: 2002-2006 Explorer
LINCOLN: 2003-2005 Aviator
MERCURY: 2002-2006 Mountaineer
This article supersedes TSB 05-21-3 to update the Service Procedure.
ISSUE:
Some 2002-2006 Explorer/Mountaineer and 2003-2005 Aviator vehicles may exhibit a customer
complaint of the fuel gauge being slow to read full after refueling, the malfunction indicator lamp (MIL)
on with diagnostic trouble code (DTC) P0463, instrument cluster DTC B1201, and/or the fuel gauge
dropping to empty. This may be due to the fuel level sender assembly sending incorrect data to the
instrument cluster and/or powertrain control module (PCM).
ACTION:
Refer to the following General Information for a description of two (2) modes of fuel gauge operation
prior to following the TSB Service Procedure. This brief explanation of current fuel gauge strategy will
help ensure the correct diagnosis is made. The fuel gauge on these vehicles has several distinct modes
of operation. The difference in the various modes is the speed at which the fuel gauge pointer moves
in relationship to fuel level input from the fuel level sender. After reviewing the General Information,
refer to the TSB Service Procedure.
GENERAL INFORMATION
Fuel gauge strategy provides several modes of operation. One being referred to as Fast Acquire Mode
and another as Slosh Mode. The time for the fuel gauge pointer to move from "E" to "F" can be 2
seconds, 17 minutes or 55 minutes depending on build date and which mode the fuel gauge is in.
Fast Acquire Mode:
The 2-second "E" to "F" mode is referred to as Fast Acquire Mode. Fast Acquire Mode strategy requires
two (2) conditions to be met before the fuel gauge indications can be updated. First, at least four (4)
gallons of fuel must be added to the fuel tank. Second, the Instrument Cluster must acquire a valid
Key-ON fuel sender reading within 1 second of the key being put in the Run position. The Key-ON
sample reading is considered valid if the fuel sender reading is between 10 and 160 ohms. If both of
these conditions are not met, the fuel gauge stays in Slosh mode. If the Cluster does not go into Fast
Acquire Mode after a refueling event, the system will stay in Slosh Mode. This will result in a slow to
Read Full event.
Slosh Mode:
The 55-minute "E" to "F" mode is referred to as Slosh Mode. In Slosh Mode, this is 55 accumulated
minutes of the key in the Run position. Unless the conditions are met to put the fuel gauge into one of
the other operating modes, the default is Slosh Mode. Example: If a customer operates their vehicle
11 minutes per day, it will take 5 days to accumulate 55 minutes of run time. This means it will take 5
days for the fuel gauge to go from "E" to "F".
NOTE: SLOSH MODE STRATEGY WAS REDUCED FROM 55 MINUTES TO 17 MINUTES FOR VEHICLES
BUILT AFTER 12/22/2004.
NOTE: IT IS IMPORTANT TO THOROUGHLY UNDERSTAND THE CUSTOMER CONDITION BEING
REPORTED.
It is important to determine if the customer has a fuel gauge that slowly gets to full or has a fuel
gauge that never gets to "F" (stuck) when the fuel tank is filled. If the fuel gauge slowly goes from "E"
to "F" (in 55 minutes of key in the Run position or less), the problem is most likely not in the cluster.
It is absolutely imperative that the appropriate pinpoint test(s), located in the Workshop Manual or
this TSB, be completed for this customer complaint to determine root cause of the condition. Root
causes may include but are not limited to: the Fuel Sender, Fuel Tank, Wiring, or Instrument Cluster
SERVICE PROCEDURE - INITIAL STEPS (All Vehicles)
Retrieve and record PCM and the instrument cluster (IC) DTCs, from continuous and on-demand self
tests.
If DTCs other than B1201 or P0463 are retrieved, follow normal Workshop Manual diagnostics, DO
NOT CONTINUE WITH THIS TSB.
If IC DTC B1201 and/or PCM DTC P0463 are retrieved, perform Procedure A for 2002-2005 Model
Years and Procedure B for 2006 Model Years.
If No DTCs are retrieved, go to Procedure C.
PROCEDURE A (2002-2005 MY)
CHECKING FUEL GAUGE OPERATION:
NOTE: WHEN PERFORMING STEPS 4A-O, FUEL GAUGE SLOSH STRATEGY REQUIRES SPECIFIC KEY ON
AND KEY OFF CYCLE TIMES. THESE TIMES MUST BE OBSERVED OR THE DIAGNOSTIC RESULTS WILL
NOT BE ACCURATE.
Key in OFF position.
Remove Fuse F1.15 (15 amp) from the Battery Junction Box, wait 1 minute and reinstall fuse.
NOTE: THIS IS DONE TO RESET THE CLUSTER FUEL GAUGE TIMERS. FAILURE TO COMPLETE THIS
STEP MAY RESULT IN ERRONEOUS TEST RESULTS.
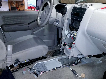
Disconnect the in-line connector to the fuel pump module (C438 for 4.6L) or (C431 for 4.0L), located
on the RH frame rail.
On the vehicle harness side of the connector, connect one lead of an instrument gauge system tester
(Rotunda # 014-R1063 or equivalent) to Circuit 1356 (LG/VT - Pin-8 in Connector C438 and C431)
and the other lead to Circuit 1357 (LB/YE - Pin-5 in C438 for 4.6L or Pin-4 in C431for 4.0L) (Figure 1).
Figure 1 - Article 06-2-12
With the key in the RUN position, move the shift lever from PARK to DRIVE, wait 10 seconds and then
back to PARK.
Wait 30 seconds with the key in the RUN position and the shift lever in PARK.
Turn key to the OFF position.
Set the tester to 160 ohms.
Turn key to the RUN position, move the shift lever from PARK to DRIVE, wait 10 seconds and then
move the shift lever back to PARK.
Wait 30 seconds with the key in the RUN position and the shift lever in PARK.
Turn key to OFF position and wait 30 seconds.
Set the tester to 15 ohms.
Turn key to RUN position, move the shift lever from PARK to DRIVE, wait 10 seconds and then move
the shift lever back to PARK.
Wait 30 seconds with the key in the RUN Position and the shift lever in PARK.
NOTE: THE FUEL GAUGE SHOULD READ "E" (EMPTY MARK) OR BELOW WHEN CARRYING OUT THIS
TEST STEP.
Turn key to OFF position and wait 30 seconds.
Set the tester to 160 ohms.
Turn key to ON position.
NOTE: THE FUEL GAUGE SHOULD READ "F" (FULL) OR ABOVE WHEN CARRYING OUT THIS TEST STEP.
Wait 1 minute for the gauge to respond.
Turn key to OFF position. After completing Steps 4A-O, if the fuel gauge operates correctly replace the
fuel sender only (9A299). If not, refer to the Workshop Manual, Section 413-01 and perform normal
diagnostics.
PROCEDURE B (2006 MY)
NOTE: WHEN PERFORMING STEPS 4A-O, FUEL GAUGE SLOSH STRATEGY REQUIRES SPECIFIC KEY-ON
AND KEY-OFF CYCLE TIMES. THESE TIMES MUST BE OBSERVED OR THE DIAGNOSTIC RESULTS WILL
NOT BE ACCURATE.
CHECKING FUEL GAUGE OPERATION:
Key in OFF position.
Remove Fuse F24 (10 amp) from the Smart Junction Box, wait 1 minute and reinstall fuse.
NOTE: STEP 2 IS DONE TO RESET THE CLUSTER FUEL GAUGE TIMERS. FAILURE TO COMPLETE THIS
STEP MAY RESULT IN ERRONEOUS TEST RESULTS.
Disconnect: Fuel Pump Gauge Sender C433.
Connect one lead of the instrument gauge system tester to the Fuel Pump Gauge Sender C433-8,
Circuit VMC11 (YE/VT), harness side and the other lead to the Fuel Pump Gauge Sender C433-5,
Circuit RMC32 (GN/BU), harness side. (Figure 2)
Figure 2 - Article 06-2-12
With the key in the RUN position, move the shift lever from PARK to DRIVE, wait 10 seconds and then
back to PARK.
Wait 30 seconds with the key in the RUN position and the shift lever in PARK.
Turn key to the OFF position.
Set the tester to 180 ohms.
Turn key to the RUN position, move the shift lever from PARK to DRIVE, wait 10 seconds and then
move the shift lever back to PARK.
Wait 30 seconds with the key in the RUN position and the shift lever in PARK.
Turn key to OFF position and wait 30 seconds.
Set the tester to 10 ohms.
Turn key to RUN position, move the shift lever from PARK to DRIVE, wait 10 seconds and then move
the shift lever back to PARK.
Wait 30 seconds with the key in the RUN Position and the shift lever in PARK.
NOTE: THE FUEL GAUGE SHOULD READ "E" (EMPTY MARK) OR BELOW WHEN CARRYING OUT THIS
TEST STEP.
Turn key to OFF position and wait 30 seconds.
Set the tester to 180 ohms.
Turn key to ON position.
NOTE: THE FUEL GAUGE SHOULD READ "F" (FULL) OR ABOVE WHEN CARRYING OUT THIS TEST STEP.
Wait 1 minute for the gauge to respond.
Turn key to OFF position. After completing Steps 4A-O, if the fuel gauge operates correctly replace the
fuel sender only (9A299). If not, refer to the Workshop Manual, Section 413-01 and perform normal
diagnostics.
PROCEDURE C (2002-2006 MY With No DTCs)
NOTE: TO BEGIN DIAGNOSTIC PROCEDURE, SUBJECT VEHICLE MUST HAVE BETWEEN 1/4 AND 3/4
TANK OF FUEL.
Engage the Instrument Cluster Self-Diagnostic Test Mode by pressing and holding the appropriate
buttons for 4 seconds:
2002-2006 - Base Cluster - Trip Odo Reset button
2002-2005 - Message Center Cluster - SETUP and RESET Message Center buttons
2006 - Message Center Cluster - RESET (only) Message Center button
With the vehicle in park, turn the key to the run position key on/engine off (KOEO).
Release the button(s):
2002-2005 - Base Clusters will display "tESt"
2002-2005 - Message Center Clusters will display "TEST"
2006 - Clusters will indicate "ENGINEERING TEST MODE"
NOTE: IF "ENGINEERING TEST MODE" IS NOT DISPLAYED, DEPRESS THE ODO RESET OR MESSAGE
CENTER RESET BUTTON 1 OR MORE TIMES UNTIL THIS MESSAGE IS DISPLAYED.
Access Raw Fuel Level data also called the Unfiltered Value by pressing:
2002-2005 - Base Clusters - Trip Odo reset button 15 - 20 times for - until the display shows a "F"
followed by a 3-digit value (000 to 254)
2002-2005 - Message Center Clusters - Message Center Reset button 18 times until the display shows
"FUEL A/D" or "FUEL LEVEL A/D"
2006 Clusters - Trip Odo reset button 14 times until the display shows "FUEL LEVEL x.. INST" where
x.. is a value between 000 and 254
Rock the vehicle front to back (not side to side) at a slow and steady rate while noting the value on
the display
NOTE: THE UNFILTERED VALUE SHOULD CHANGE SMOOTHLY ALONG WITH THE FUEL SLOSH.
If this unfiltered value exceeds 231 at any point during this test, there is an open circuit in the sender
and/or wiring. Refer to Diagnostic Procedure A for 2002-2005 Model Years and Diagnostic Procedure B
for 2006 Model Year.
If the Unfiltered value drops below 28 at any point during the test, there is a shorted circuit in the
sender and/or wiring. Repair as necessary.
If the Unfiltered value stays between 028 - 231 during the test, the concern is intermittent. Refer to
the appropriate shop manual and follow normal diagnostics.
Tips For Procedure C And Optional Diagnostics:
If F is increasing and FP isn't - go to Cluster Diagnostic Section of Shop Manual If FP and F are
increasing and fuel level isn't - go to Cluster Diagnostic Section of Workshop Manual
If Last line (Open) values aren't 255 and 254 (MY 05 and before), or 255 (MY 06) - go to Cluster
Diagnostic Section of Workshop Manual
If Open, or if F does not represent the level of fuel as described - then go to the Workshop Manual and
look for wiring and fuel sender issues. The cluster is not at fault
Optional Diagnostics
NOTE: THE FILTERED VALUE CAN ALSO BE DISPLAYED TO AID IN DIAGNOSIS. THE FILTERED VALUE
DIRECTLY RELATES TO THE POSITION OF THE FUEL GAGE POINTER.
2005 - Message Center Clusters will indicate "PER x.." on the second line of the Message Center
2003-2004 & 2006 - Clusters, the Trip Reset or Message Center Reset Button must be depressed one
additional time to display "FUEL LVL % x..", "PER x..", "FUEL STAT x.. %" or "FP x..". (x.. is a
3-digit value that ranges from 0 to 254) this is the filtered value. Wait 90 seconds and note the
position of the fuel gauge pointer, and the value on the Cluster Display. (Refer to the appropriate
Figure below)
2002-2005 Units Built After 3/4/2002 - Non Flex Fuel Engine Equipped Vehicles (Figure 3)
2002-2005 Units Built After 3/4/2002 - 4.0L Flex Fuel Engine Equipped Vehicles (Figure 4)
2006 Model Year Vehicles - All Engine Applications (Figure 5)
NOTE: VALUES IN REFERENCE CHARTS ARE NOMINAL TEST VALUES. (EX. A FULL FUEL TANK FILL
SHOULD INDICATE FULL, AND THE DISPLAY SHOULD INDICATE A VALUE BETWEEN 242 AND 254)
WARRANTY STATUS:
Eligible Under Provisions Of New Vehicle Limited Warranty Coverage
DEALER CODING
BASIC PART NO. CONDITION CODE
9a299 28
Figure 3 - Article 06-2-12
Figure 4 - Article 06-2-12
Figure 5 - Article 06-2-12
 I am looking for a Fuel sender/Module/Gage wiring diagram for a 4.0L Explorer. Chilton helped some...shows the Fuel Sender wired to the Instrument Cluster module, but doesn't show how the Fuel Gage is connected to it all.