How to: - 1994 Head gasket replacement / engine pull | Ford Explorer Forums - Serious Explorations

  • Register Today It's free!

How to: 1994 Head gasket replacement / engine pull

Prefix for threads which are instructional.

arco777

Explorer Addict
Joined
April 6, 2008
Messages
2,404
Reaction score
59
Year, Model & Trim Level
1994 Explorer 2dr 4x4
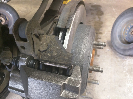
Photo Diary - 1994 Head gasket replacement / engine pull / rebuild

This originally started as a head gasket repair and turned into a full rebuild.


Tackling the head gasket job on my 94X and figured I'd share how I did it. Grab some popcorn...

The candidate, a '94 4x4 2-door Explorer with auto trans and no AC.

PICT0001.JPG


Join the Elite Explorers for $20 each year.
Elite Explorer members see no advertisements, no banner ads, no double underlined links,.
Add an avatar, upload photo attachments, and more!
.


PICT0002.JPG
PICT0003.JPG
1. The "before" picture, and hopefully identical to the "after".

2. Starting by removing the hood. Detach the harness for the underhood light and undo the ground strap near the passenger fender. Mark the positions of the hinges before loosening the 4 bolts.

Put cardboard down to protect your paint and your hood. The hood is light enough for one person to pick up easily. Let the prop rod hold the hood as you remove all four bolts and set it back against the cardboard. Then, undo the prop rod and lift it off the truck. No helper required and no damage if you're careful.

Store the hood carefully to avoid damage/dents.


PICT0005.JPG
PICT0007.JPG
Drain the coolant. It will take a while so might as well start now and let it go while you do other stuff.

Find the drain valve on the lower passenger side of the radiator. Yours may be hex shaped. Attach a rubber hose to the fitting and route it to your catch container of choice. Loosen the drain valve and let coolant drain out. Don't unscrew it too far or it'll start leaking coolant around the threads and make a mess.

Keep an eye on this thing because it'll drain quietly and predicatably for a while, then act like it's stopping, then jet out farther than expected as a new wave of coolant hits.

If you have a shop cat/dog, they need to stay out of the shop while draining coolant. They could drink it and die.


PICT0008.JPG
PICT0010.JPG
PICT0011.JPG
PICT0012.JPG
PICT0013.JPG
Time to get some stuff out of the way.

1. First remove the throttle body beauty cover, and the air duct that runs from the MAF to the throttle body. Usually a 5/16 socket is all you need for the two cover bolts and the hose clamps.
-If your throttle body cover doesn't look this fancy, look in the junkyard for one like it. They seem to be more common on 93-94 higher trim Explorers.

2. Remove the battery. You could just disconnect it, but you risk shorting the terminals by setting a wrench on it. So disconnect the terminals and remove it by undoing the hold down bolt (my red t-handle is on the bolt). You gain a neat shelf to hold your tools.

3-5. For more space we'll remove the airbox. Unplug the MAF by squeezing the connector tabs underneath. It should come off easily if you're doing it right. Get the airbox out of the way by removing the single bolt on the side of it. It will lift out. If the intake air duct doesn't want to come off, squeeze the top of it down with a screwdriver to release the tabs (pencil points at them).


PICT0015.JPG
Remove the upper radiator hose. You might have spring clamps instead of screw clamps.

I've heard people say the spring clamps are better for providing constant 360 degree tension, versus screw clamps being inconsistent. I've had problems with both types so use whatever works for you. Just be aware that cheapo screw clamps may be made of such soft metal parts that they strip and won't hold tension.

Once you remove the clamps, work the hose off each end. Corrosion may make it stick to the ends; you can use a (blunt) tool to get underneath it and break it free, but try not to damage the hose.

If you're replacing the hose anyways, just slip it (parallel to length) with a razor and it'll easily split and come off the fittings.


PICT0016.JPG
PICT0017.JPG
PICT0018.JPG
PICT0019.JPG
PICT0020.JPG
PICT0021.JPG
Next we'll remove the radiator fan.

1. You'll want a tool for this that looks like this picture. You can buy them for $20 or rent them from a parts store. Yes, you can use a crescent wrench, but it's a pain.

2. Close up of the part number.

(Next steps can be done in different order as desired)

3. If you'll be removing the water pump during your job, at some point you'll need to undo the pulley bolts. It's hard to hold that pulley still do do so. So, before undoing belt tension, loosen the bolts a little bit. You could do this after removing the fan but for some reason I did it first.

4. Remove the serpentine belt by putting a 3/8 head ratchet into the square hole on the tensioner, and release the belt tension. Slip belt off the pulleys. Extract the belt.

5. The large hex head nut for the fan clutch needs to be undone. But, if you just turn it, the water pump will spin. That's what the special tool set is for.

6. Get one wrench onto the fan clutch hex, and the other is used with a 1/2 drive breaker bar to hold the pulley still using the heads of the pulley bolts. Hold the pulley steady and loosen the fan clutch hex counterclockwise (it is not reverse thread). Once loosened up, spin the fan counterclockwise off the threads. You can let it rest in the shroud.


PICT0022.JPG
PICT0023.JPG
PICT0024.JPG
PICT0025.JPG
Next remove the shroud. The fan assembly should be sitting in it by now. Try not to risk damaging the threads on the water pump shaft.

1-2: Remove the two bolts at the top of the shroud. 5/16 socket.

3. Lift the fan and shroud out together. The shroud just sits on clips at the bottom, which should stay with the radiator.

4. Protect your radiator with some cardboard if you'll be leaving it in the car. You don't want to puncture it with a tool or dent it. For a head removal this is probably optional and it could be left in, for engine removal you should remove the radiator.


PICT0026.JPG
PICT0027.JPG
PICT0028.JPG
PICT0029.JPG
PICT0030.JPG
1. Hopefully coolant is done draining by now and hasn't gone all over the floor.

2. Remove the lower radiator hose. Undo the clamps and work it off. Expect the hose to have some coolant in it, so undo the water pump end first and bend it down to dump the coolant into your container.

3. Optional - drain the coolant recovery tank. Disconnect the hose from the fitting near the radiator cap. Position your recovery pan, aim through the hole in front of the inner fender and drain the tank. Alternately if you wanted you could just plug this hose and leave the coolant in the tank.

4-5. (Auto Trans only, radiator removal) Disconnect the transmission lines. Hold one fitting still while turning the other. Line wrenches would be best but a pair of adjustable wrenches works fine. For the bottom line, you may want a container to catch the dribble of trans fluid.


PICT0031.JPG
PICT0032.JPG
PICT0033.JPG
1. (Radiator removal) Undo the two top bolts. 10mm socket.

2. Lift the radiator out. Cuss as the radiator dumps coolant it was holding in reserve all over your creeper.

3. Now, there's so much room for activities. Take a break.


PICT0034.JPG
PICT0035.JPG
PICT0036.JPG
PICT0037.JPG
PICT0040.JPG
PICT0041.JPG
PICT0043.JPG
PICT0044.JPG
PICT0045.JPG
1. Ford says to remove the AC compressor and bracket+brace. I don't have AC but the same bracket holds the power steering pump. There are 5 bolts that hold the bracket and brace.

2. Ford says you can just set the assembly aside. However, for space reasons I'm going to remove it. You can see I haven't removed the brace yet.

3. Disconnect the lower rubber hose from the power steering pump. Expect to catch a good quantity of fluid. This is a good opportunity to change your fluid over to Ford Type F transmission fluid, which these PS pumps like a lot more and also results in less leaks.

4. Next you'll need to remove the hardline that goes to the steering gearbox.

5. Hold the pump side fitting still while unscrewing the line side fitting.

6. Removed. Expect more fluid to drain out. Cover the pump fittings.

7. Cap off the lines. The rubber line will probably have fluid in it, so I used a bolt. The hardline didn't so I just covered it.

8-9. Remove the bracket. Ideally just the nuts holding it will come off. If the stud comes out, then after removal of the bracket you need to separate the nut and bracket, and put the stud back in (holds the timing cover).


PICT0047.JPG
PICT0048.JPG
PICT0049.JPG
PICT0050.JPG
Now we'll remove the accessories on the other side.

1. Disconnect the electrical connectors from the alternator. A small flathead screwdriver will help to release the clips on the connectors. Don't just yank them out. Remove the nut that holds the positive wire on the alternator.

2. To remove the bracket, just three bolts. 13mm socket. One is tricky to get at with the tensioner in the way, so you can remove the tensioner with another 13mm socket to get a straight shot at it.

3. Assembly removed.

4. Progress.


PICT0051.JPG
PICT0053.JPG
PICT0054.JPG
PICT0052.JPG
PICT0055.JPG
PICT0056.JPG
Water pump removal time.

1. Hopefully you loosened these 4 pulley bolts earlier. If not, you'll have to use a screwdriver between them (or a pulley strap wrench) to hold the pulley still while loosening them. Don't damage the shaft threads. Remove the four bolts and the pulley will come right off.
-You probably could remove the water pump bolts without removing the pulley, but it's a pain in the butt.

2. Remove the two heater hoses. Hopefully corrosion won't make them difficult. If it does, clean up the fittings before re-assembly later. I like to put a little grease on the fitting to keep them from sticking and corroding. Haven't had a leak yet. Expect some coolant to leak from the lower hose.

3. Tie the hoses back out of the way. A bungee works well, you can hook it into the clamps.

4. Front view of the pump. You need to remove all the bolts for it. 10mm socket. Should not take much force as they aren't supposed to be highly torqued.

5. Remove the pump. Expect a torrent of coolant to come out and make a mess. Cuss and clean it up.

6. Removed pump.


Okay I have to cry foul on the Surgical bay Clean (*^+*% GARAGE!


Okay I have to cry foul on the Surgical bay Clean (*^+*% GARAGE!

Haha. Thanks FR-425. Pictures hide a lot, but its the first real garage I've had (and my first house I'm buying instead of renting) so I do take some pride in it. Might have to slip in some pictures of what all I've built in there.


PICT0057.JPG
PICT0058.JPG
PICT0059.JPG
PICT0060.JPG
PICT0061.JPG
PICT0062.JPG
PICT0063.JPG
PICT0064.JPG
As a reminder, for someone just R&Ring heads, this isn't all necessary. But I am planning to tackle removing this motor. I went into this job thinking "maybe I can" and so far I'm thinking I can do it after all.

1-3. Next remove the ground cable from the engine block. There's a bolt that holds the ground near the oil filter. Easiest way to get it is with a long extension through the wheel well. Set it aside.

4-6. Remove the accelerator cable. Use a screwdriver to pop it off the ball stud. Remove the two bolts holding the bracket to the intake manifold. Mine are shiny because I replaced them with new 8.8 hardware a while ago.

7. Pop open the cable clip atop the manifold to release its grip on the two cables.

8. There's a spot where the cable clips onto a bracket off the intake manifold. Unclip it. Set the accelerator cables aside out of the way.


PICT0065.JPG
PICT0066.JPG
PICT0067.JPG
PICT0070.JPG
PICT0072.JPG
Time to remove vacuum lines.

1. (Automatic trans) Remove bolt holding the hardline onto the intake manifold. This hardline goes down the trans tunnel, and eventually provides vacuum to the vacuum modulator on the A4LD.

2. The vacuum tree. Yours may be somewhat different depending on options. I've attempted to label which ones are which. It's not crucial which goes onto which fitting as long as they are the right size. Note the capped off fitting (green clamp) which might have a purpose on your vehicle depending on options.

3-4. More pics. For the three small ones, just keep them together so you don't miss one. I've been putting blue masking tape on all vac lines to remind me when I put it all back together... otherwise they just blend in and are easy to overlook.

5. On the passenger side of the engine bay I have a vac line for HVAC purposes with a check valve. Disconnect it and set it out of the way. Tag it so you remember to reconnect. You might have more vac lines on an A/C equipped car.


PICT0071.JPG
PICT0073.JPG
PICT0074.JPG
PICT0075.JPG
PICT0076.JPG
PICT0077.JPG
Fuel lines.

1. Release fuel pressure. Use a blunt tipped object like a punch and release the pressure at the fuel rail test port. There shouldn't be much.

2. Find the two fuel lines above the steering gearbox. One has a silver clip, the other a black clip. These clips come off easily, just rotate them to where you can push them off the fitting. Upon re-assembly, make sure they go back on the same lines they came off of - the sizes are different.

3. Mark at least one of them so you can tell them apart later. Good time to grab each end of each line and twist them a little to release any gunk.

4. You'll need something like these to disconnect these connections. Pretty cheap. There's another version that clasps over the hose. If you're having trouble... make sure you're using the right tool.

5. Pick the appropriate sized tool (the two lines are two different sizes) and press it into the fitting. There's a "garter" spring that needs to spread to release the barbed end. Just be patient and don't force things. It may take a little while to do both.

6. Once the lines are separated, cap off or plug the ends. You don't want anything getting in them or it could clog your injectors.


PICT0078.JPG
PICT0079.JPG
PICT0080.JPG
PICT0081.JPG
Start undoing electrical connections.

1. Undo both the oxygen sensor connectors. First the one on the passenger side. I have all this room because I don't have A/C, so you might have to do this from underneath. Near the tip of my thumb the connector has a small release tab - press it down and wiggle the connector apart.

2. Couldn't easily get a pic of the drivers side one, sorry. I found it was easiest to stand on the radiator core support and reach behind the intake manifold to get at it.

3. Passenger side main harness connector blocks. Find the release tab, press it, wiggle connector apart.

4. Drivers side connectors. Same procedure as before.


PICT0082.JPG
PICT0083.JPG
Remove starter.

1. Remove the two bolts holding it in. The upper bolt may give you some grief. I barely managed the wiggle room to break it free, then used a tiny 1/4" drive ratchet to finish it. 13mm socket for both.

2. The starter will drop out. I doubt it will fall on you but be careful. If desired, pull the red cap off. Remove wire nut with a 13mm socket. Pull off the spade connector.


Join the Elite Explorers for $20 each year.
Elite Explorer members see no advertisements, no banner ads, no double underlined links,.
Add an avatar, upload photo attachments, and more!
.


Remove the four manifold to Y-pipe bolts from underneath the vehicle.

One picture, because it's hard to get a cam under there. Long extensions, a breaker bar or large ratchet, and penetrating oil are your friends. 15mm socket. Spray penetrating oil on the threads of the bolts and let it soak in before loosening. You can easily spray them through the holes in the wheel wells/inner fenders. They will take some strength but if you're careful you might be able to re-use them afterwards.

ATTACH=full]88948[/ATTACH]

Take a break. Eat something.
[
I'll post more tomorrow...

PICT0084.JPG


Back
Top