arco777
Explorer Addict
- Joined
- April 6, 2008
- Messages
- 2,404
- Reaction score
- 59
- Year, Model & Trim Level
- 1994 Explorer 2dr 4x4
I hate to make a negative post in this great thread but if it was me, I wouldn't soak them. They're an electrical item with a coil. It would be like soaking your starter. The coil may fare perfectly fine but then again it may weaken a coil that's seen millions of heat cycles.
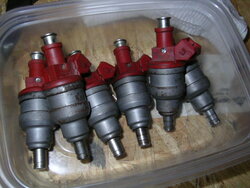
No offense taken! IIRC it was a thread on this board that recommended soaking them in this stuff. I did it this way before on a previous X and was amazed at the amount of gunk that floated out of the injectors. I experienced an improvement in driveability and it fixed my hot start misfire issue.
Can't imagine soaking a starter causing much issue if it was dried out afterwards and regreased. That's just a big electric motor and they don't mind being submerged and running (wears brushes out faster, but can be used to seat new brushes to the commutator). I've run plenty of electric motors in water briefly to clean out the sediment before disassembly and rebuild.
I'm not saying for sure that this is 100% safe for the coil, but I would bet it is. With nearly 200k on the injectors I don't have much to lose and I don't mind replacing them if they fail. I do have a hot start issue from at least one of these injectors already.
")