cruisin_n_style
Member
- Joined
- August 29, 2012
- Messages
- 31
- Reaction score
- 2
- City, State
- Indiana
- Year, Model & Trim Level
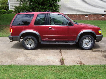
- 1993 Explorer Limited
I ran some old hella halogen fog lights for upwards of 17 years on my 1993 Explorer Limited. But the last few years the bulbs have been blowing often and I had disassembled them and cleaned and resoldered connections and resealed the housings countless times. Also with the fogs on one day, super heating the lens, I plowed through a snow bank (in 4x4 with my winter tires to rescue a stranded motorist - was successful at pulling him out too). And when the cold snow smacked onto the hot fog lens, it cracked. I finally decided these old things must go. So I picked up a set of Hella Micro DE halogen projector fog lights. I removed the fog light bracket from the truck and modified it by cutting some out and welding on some steel bar stock I had to fit the new Hellas. Test fit then primed and painted and installed. They are SO much better than the old ones even though they use the exact same bulb. The projector gives a very smooth and very wide output.
I also decided to retrofit hid projectors into the factory headlight housings. So I ordered up a kit from DDM tuning with projectors and hid kit. It ended up being MUCH easier than I anticipated. Pulled old headlights. Trimmed some plastic off the back "collar" but did not need to enlarge the opening at all. Separated the lens from the housing. Test fit the projectors and adjust aim. Did this multiple times. Then painted the reflector black (as I don't need it to reflect any light anymore). Installed and tightened up the projector a final time. Resealed the headlights with new butyl sealant. Put the headlights back in. Hooked up the hid kit and aimed headlights a final time. Done. Of course there are other little details here and there but not much more. It looks awesome and performs amazing. Only thing I regret is not doing this sooner. The combo of hid projector headlights and projector fog lights is killer.
I wanted the crystal clear lens replacement headlights for this project but I was doing this on a budget and the crystal ones are now stupid expensive for what they are (~$300 pair). So I used the factory ones. The cutoff is still perfect and seems nearly unaffected. I'll post more about it if anyone has any questions. I'm currently at work and thought I'd do a quick post from my phone. I'll upload/link photos when I get home.
http://s1271.photobucket.com/user/cruisin_n_style/slideshow/1993 Ford Explorer Limited/Lighting