My wife's 2000 XLT 4-door's driver seat belt was acting up and would not fully retract and kind of "chug" in a herky-jerky fashion which it had not done before.
I dove into the job this morning, here's how I did it:
1. Pull up the 4-foot long floor trim strip, no tools really needed it is clipped in, set it aside.
2. The upper guide / shoulder strap adjuster is covered by a plastic fitting which pried open either with a straight slot screwdriver or by hand, depending on the specific version. Once that's off, you can see the T-47 torx mounting bolt underneath. Unscrew it all the way.
3. Next, pull the floor carpet back a bit to uncover the floor T-47 torx mounting bolt; unscrew that one.
4. At this point, I chose to thread the entire belt, along with the various hardware still attached as they are through the 3/4-inch high or so slot in the upper trim piece that is still attached but hanging loose. Now you've just got the retractor bolted to the inside of the frame.
5. I unscrewed the 10mm-head screw from the top of the retractor and then the T-47 bolt at the bottom of the retractor. Once done, you're holding the entire seatbelt and retractor assembly in your hand.
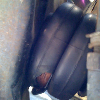
6. In my case, the retractor was quite dust-covered. I vacuumed and brushed it off.
7. There were plastic external side covers on the retractor mechanism which had "Caution do not remove" on them. With these covers on, it was impossible to see the mechanism moving parts, although that probably isn't all bad, given the spring tension in there.
8. Without getting any on the belt itself, I was able to use a fine tube to spray lubricant on the inside roller hub axle areas. After that, I exercised the seat belt through a couple of pull-out and roll-up cycles; the performance quickly improved to good as new.
9. Just the mechanism oiling and cleanup accomplished what I was looking for, so I put everything back together in reverse order. You could just about as easily install a new assembly in there too, if needed.