rewind's Bull Fighter II (Parts Truck turned DD-Project) | Ford Explorer Forums - Serious Explorations

  • Register Today It's free!

rewind's Bull Fighter II (Parts Truck turned DD-Project)

Another Saga...
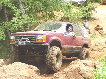
I purchased this 2002 XLT 4.0 in the Summer of 2015.

1e6c6aaa-592e-4c3f-837e-a635c86dc148_zps3hbjif0l.jpg


TLDR; I bought a truck, drove it for a while, now the transmission is getting swapped. While I'm at it, might as well do some PM.

It was listed on craigslist for $600 with a bad transmission but a healthy motor, body and interior. My intent was to use it as a parts source for my rotting 2003 EB 4.6, as well as my girlfriend's 2003 XLT 4.0 and my sisters 2004 XLT Sport 4.0 should they need anything.
I was already ahead when my dad and I went to pick it up because the owner had said that it would not move under its own power but to our surprise it did. No need to use our ratcheting pulley to get it on our trailer, we just drove it on!
Ambitiously, and unwilling to forfeit my V8, my original plan was to perform a body swap to remedy the rot on my 03 Eddie. However a change in jobs in the Fall of 2015 forced me to give up that idea due to lack of time. I decided I would drive the Eddie through the Winter and then sell it. After failing to do so in the Spring of 2016, I decided to wait until Fall (when people look for 4x4s). I had parked both trucks for the summer to drive my Mustang and eventually my Focus RS when it arrived in July of 2016. After realizing that I had put 10k mi on my brand new Focus in just 4 months, I needed a junker to rack up my work miles on. Welcome back, 2002 XLT with a "bad tranny"!
Despite dealing with some shift flares and needing to warm up in the morning, this $600 parts truck drove me back and forth to work 60+ miles a day, 5 days a week, for nearly 4 months. Then one night just around the bend from home, the tranny suddenly gave up the ghost. It seemed to have overheated on the highway and when I got off the exit, it refused to move from a stop. I rolled across the intersection and shut the engine for ~5min. I started it back up and finished the drive home in 2.
So its March 2017, the 02 has been down for over a month. I re-registered the 03 Eddie (thank god no one called on it in the two weeks it was listed for sale) and did I mention...

...I picked up another parts truck.

IMAG0745_zpsqjg1l94w.jpg


This 2002 XLS is in piss-poor condition inside and out, but the motor was pulled for someone else's 2004 (lost the chains) and was sold to me for a bargain so that I could rip the transmission out.
3 weeks ago I did just that, and this past weekend was spent pulling the bad transmission from my 02 DD.

But the fun doesn't end there.With almost 200k on this truck, I'm not about to bust my rump swapping trannys only to have the infamous timing chains blow up on me next month. So tonight I start tearing down the motor for some very important preventative maintenance.

More to come....


Join the Elite Explorers for $20 each year.
Elite Explorer members see no advertisements, no banner ads, no double underlined links,.
Add an avatar, upload photo attachments, and more!
.


Well I didnt get very far last night, I attempted to remove the intake manifold but was unable to get one last bolt out from under the cowl on the drivers side.
I thought I had the socket on it but it just kept spinning. I was using a T30 for the rest of the bolts but I think this may be larger?
After watching some videos on it this morning, I believe I was on the right track but I guess I just need to take another crack at it, maybe try another socket. I'll be back at it again all day Saturday.


After a solid 3 months of weekends and long nights in the garage, the repairs have been completed and "Conchita II" is back on the road.
There were several hiccups (3 outright mistakes) along the way but the truck is running strong now and I could not have done it with out the help of several members on this forum.
@2000StreetRod - Thank you so much for the very detailed walkthroughs, parts lists, torque sheets, and misc advice offered.
I would not have been able to perform this job without it. At the same time, I probably would not have taken on the project without it so... haha
@Tech By Trade - Thank you for your input, your cautious observation led me to do more research and make the best possible decsions.
@thorney_5 - Thank you for the tool and the spare parts, the job is complete and the extra parts came in handy as I had to re-do some TTY bolts and had them already!
@Grant S - The tranny was really beginning to concern me, your experience led me down the right path in getting the swap to work.

I will be detailing some of my troubles in future posts but I really wanted to say thank you before too much time goes by. This community is great and I could not have done it without your help.


The issue with the intake happened to be that there was just so much gunk in the head of the rear drivers side torx head that the bit wasn't fully seating. After taking a night off and returning to the task. I decided to clean it out with a small pick first and try it again. It loosened up so easy I felt like it was mocking me.

Later in the project I had to remove the intake again and I has the same issue with another bolt that came out fine previously.Cleaned it out and it was good to go.


When attempting to install my new rear timing guide I snapped the lower guide bolt off in the block. I was using a click style torque wrench and never felt it click. As it turned out I was moving the wrench too slowly and therefore the click was very light. Rule of thumb going forward, if using a click style, just turn it till it clicks. My nervousness and trying to feel it out is actually what did the harm here. I was able to back the bolt out of the block with a screwdriver and I put the new guide bolt back in with a beam style torque wrench. You live you learn. Fortunately, the bolt came out as easily as it did.


I ran into a scary situation with my right rear cam bolt where it wasn't tightening properly with the beam style wrench. I almost went ahead continued the project with the uncertainty of torque on the sprocket but, after soliciting some wise advice from @2000StreetRod and @Tech By Trade, I called SuperSixMotorsports for some insight from a professional engine builder.
I cleaned out the threads with a soft bristle pipe cleaner, got a new cam bolt, and ran it in by hand. Feeling no resistance by hand, I then applied the slightest bit of oil to the washer/head and torqued the sprocket on. Perfect!


While I had the motor and the tranny out I took the chance to apply some POR-15 to the underside of the body and the tops of the frame rails. The body of this truck is in very good condition with minimal rust and only a 3 inch section of rust on the passenger rear door/wheel arch. With all the work to make the drivetrain last, I wanted to ensure the body and frame would hold up too.

It was a tedious process that went like this:
-Clean rust scale with wire wheel/brush on cordless drill.
-Wipe away dust
-Clean with degreaser
-Wash away degreaser with water
-Wipe dry
-Prep/Etch surface with Metal Prep
-Allow to sit for 30min
-Wash away metal prep with water
-Wipe dry, allow to completely air dry
-Apply POR-15 with sponge brush.

I coated the top and inside of the frame while standing within the engine bay. From here, I was able to get as far back as the Cat heat shields and then had to continue the above process on my back from under the truck. As stated this work was not too difficult, but extremely tedious and time consuming.

{PICs of POR-15 application, before, during, after coming soon}

I only did what was needed while the major parts were out, tops and insides of the frame rails for the most part. I will be completing the undersides and outsides of the rails now that the truck is back on the road.


After getting the motor back in, the tranny was up next. every thing lined up well with the exception of the crossmember. The inner frame brackets had to be banged/bent in some to fit back in and the tranny mount had to be twisted with a crowbar while putting the bolts into the tranny. Otherwise, installation was smooth.

The real trouble started when it came time to hook up the harness. There are two connectors on the tranny harness that reside in the engine bay. One is a big block that bolts into the firewall and the other is a smaller oval shaped connector hanging off of the passenger fender. Well the firewall plug lined up just fine but not that oval connector. I was using the harness that came with the replacement tranny from the parts truck vs the one that was originally with my vehicle because the main connector that goes into the tranny was damaged on the original.
The pin configuration of those oval connectors was exactly the same but, in addition to being different colors, the outer plastic had a notch in a different location causing me to not be able to connect it. I began to research why and realized the the parts truck I picked up came with a 5R55W, not the 5R55S like the bad one I was removing.
After getting some helpful advice from @Grant S on his experience with a similar swap on his V8, I decided that this tranny would work some way some how. I hacked off the oval connectors and spliced them the right way with solder and heat shrink wrap.

When I put it all together and tried to start the truck for the first time, there were a lot of problems.
OBD codes wery flying left and right and the tranny wouldn't even engage.
The joy experienced from the motor purring post-surgery was quickly replaced by fear that my replacement tranny was either broken or simply not going to work with my truck/pcm.

This was a low point in the project for me. I went home that night and felt defeated. The prospect of having to find another transmission and replace it again when I had just spent a few hundred dollars for this one was almost too much to bear. And then I took a shower.
I started thinking about the codes that were being thrown and remembered that two of them were for the downstream O2 sensors. I was not concerned with those errors originally but it occurred to me that those sensors were connected to the tranny harness. After finding a harness pinout diagram it was clear to me that none of the codes thrown were from sensors communicating over the connector that I had switched but rather, they were on the larger firewall connector that I didn't quite remember bolting down.

The next day at the garage I took to the firewall right away. At first the connector appeared to be flush with the other 2 bolt-in connectors above and below it, but when I started ratcheting it moved in. In fact it sat in probably another 1/4in. I cleared my codes and started the truck up. No more codes! After letting it warm up I tried to engage the tranny, with a slight blip of the throttle she was moving. VICTORY!!!


The truck was now running and moving.
We didn't realize until we started it again, but after letting it run for a few minutes the day before something had happened. There was this clicking/tapping noise I could hear bouncing off the walls of the garage but I couldn't tell where it was coming from. Finally I looked in the engine by and realized the the belt had slid backwards one rib on the crank pulley.
Thinking that I had not been careful installing the belt, I was happy that was the only problem. I quickly got a new belt on and was sure to position it correctly. After taking it for a spin around the parking lot i started to hear the tapping again. The belt had slipped backwards again! Now I realized there was trouble.
Everything appeared to line up properly by eye so we used a laser level and discovered that the crank pulley was out about 1/4". Ok, no big deal, just bang it on a little more, right? ...Wrong!
I picked up a universal pulley installer from Advance but it didnt have a long enough bolt to go all the way through the super deep balancer on the 4.0.
The proper (Ford/OTC) tool was $150. So I did some research and found another kit (OEM Tools 27306) which I specifically stated it was for this motor. It runs about $50-$70 but I found it on eBay for $25. When it arrived I was again surprised to find that it still didnt fit. The bolt was long enough but the threads for thrust bearing/nut came down too far so it was too thick to fit through the hole on the balancer. My dad got creative and ground the threads off of it so it would fit through.
Now that we finally had a useful tool we got to work spinning the bearing. It seemed to move just slightly initially but then it stopped and was only getting harder to turn. Then, just about the time we decided it was too much, BANG! The puller bolt snapped.
Now the balancer was on the crank with a fair amount of force and we had no way of pulling it off because the broken end of the bolt was still in the crank. Using a menagerie of different tools (including but not limited to: screwdrivers, pics, tie wire, and magnets) I finally spun the bolt out of the crank and was able to wiggle it through the hole in the balancer.
So I was now back in a good position but so, so frustrated. I realize how lucky I got with this situation but simultaneously realized that there was something much more involved wrong here.
The next day I pulled off the timing cover and immediately realized the error of my ways.
The sprocket for the primary timing chain was on backwards. It was another Saturday in the garage tearing through half of the motor again to get the timing tools back on the cams and so forth just to be able to remove the sprocket and flip it around and put it all back together again.
Let me make it clear that the single worst part to remove in this entire motor is the damned intake manifold and yet it is required to be removed for almost any task.
For some reason I was much more nervous when torquing everything back up the second time around. When I torqued the jackshaft bolt my heart was racing like I've never felt it race before. It was the exact same process I had done 3 weekends before but this time it was nerve racking. Fortunately, I am now a pro :cool: at assembling this motor and had it all done in a jiffy.
She started right up and all I had left to do was check the tranny fluid level. FORScan helped me do that and the level was perfect!


I drove the truck for a week and I still had a lot of painting supplies in the back. Early in the 1st week I was smelling some fumes. I drove with the windows until i had a chance to get all of that stuff out. Once I did, It helped the situation but I had forgot a tarp in the trunk area that may have had some smelly substance on it as well. Once i got rid of that I didnt smell anything like that when I got into the truck, but I was still smelling fumes after driving for a bit. It finally dawned on me that this was not paint fumes anymore, it was fuel. About 10 min later and 10min from home I got stuck in a traffic jam. It was then that I noticed there was a skip to the motor and the fumes were overwhelming. Moments later, the CEL started flashing. I had guess that an injector must have busted and FORScan confirmed that there was an issue with injector #3. It took me a few days to look at but I finally discovered that an O-Ring had busted and somehow the injector electrical plug came off the injector. This could have been a catastrophe but someone must have been looking out for me. I took the intake off again (it really is the worst) and corrected the issues and have now been driving the truck without issue for 2 full weeks.


There is a lot planned for the coming weeks including:
-Stripping/cleaning my corroded EB 17s (with 31" BFG KO2s) down to the machined aluminum face.
-Bedlining and Reinstalling the body trim and tubular step bars
-Installing BTF Spacers and UCAs for a 2.5" lift
-Installing aviator brakes
-Painting and Installing Aviator mirrors
I have all the parts ready to go so now its just a matter of time. Wish me luck and check back soon for updates.


Back
Top