Gauge Installation
I decided that I wanted a transmission temperature gauge. After looking at what was out there, I decided on Dakota Digital (
http://dakotadigital.com/ ) as my gauge of choice. This was based on its looks and its ease of reading this digital display.
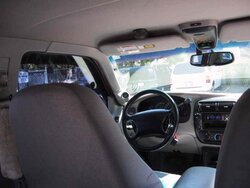
I also wanted to “pod” mount on the driver’s side A frame trim moulding..
Dakota Digital was backordered ( a month, they reported to me ) on the single instrument pod, therefore I choose a dual instrument pod. I selected a voltmeter as my second gauge. When the pod came, it was in a box from Auto Meter ( part number 15308 -
http://www.autometer.com/ ).
The pod came black. I wanted to match it to my interior color ( tan ). Therefore, I took off the A pillar trim and had the color computer matched at a local paint store. Next, I painted the trim with two coats and allowed it to dry.
I pre wired the gauges and then installed them into the pod. Getting the gauges into the pod is a *****; they are a press in fit. I had to trim a smidgen on the pod to get them in. On the tranny temperature gauge, there are 4 wires to run – one to the sender, one to switched 12 v power, one to the tail light wire ( to facilitate the dimmer circuit ), and a ground. The voltmeter is wired similar except there is no sender; I simply tapped into switched 12 v power at the fuse block to get a signal for the gauge.
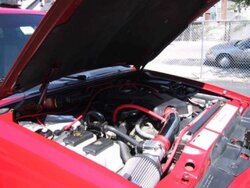
The remainder of the installation was straightforward. After mounting the pod ( by screwing it into the trim., I ran the appropriate wires to the fuse block and to the temperature sender. The 12 v power is from the fuse block, the ground is made near the fuse block. The sender wire for the tranny temp gauge is run through the firewall and carefully routed to the sender which is mounted on my tranny filter housing mounted near the frame in the right front wheel well. I changed the transmission aux filter while I was working there ( and added 1 quart of Mobil 1 ATF ). By the way, the fluid was clean as could be and was nice and red, further, after cutting open the filter, there was NO particulate matter whatsoever ).
At this time, I did not wire the dimmer circuit.
The trim was now reinstalled.
The transmission temperature gauge had to be recalibrated for the sender. It is done just like Bill reported earlier in this thread. . This procedure is completed before installing the gauge into the pod. You would think on instruments this expensive; the factory would set the gauge and sender to match, oh well, it’s a simple task.
After the installation was concluded, I fired up the truck to check for a leak at the sender; there was no leak. However, there was a problem with the transmission temp gauge; it read a flashing EEE, indicating a ground problem. After checking all wiring and the complete installation, I discovered that the filter housing was mounted to plastic parts and there was NO ground. After installing a ground wire to the housing, all was fine.
The gauges are unbelievably easy to read when mounted in this manner, except in direct sunlight.
Time for a road test….