410Fortune - 96 5.0L XLT refurbish (making 1 great Ex from 2) | Page 11 | Ford Explorer Forums - Serious Explorations

  • Register Today It's free!

410Fortune - 96 5.0L XLT refurbish (making 1 great Ex from 2)

Okay here we go 09/13/05

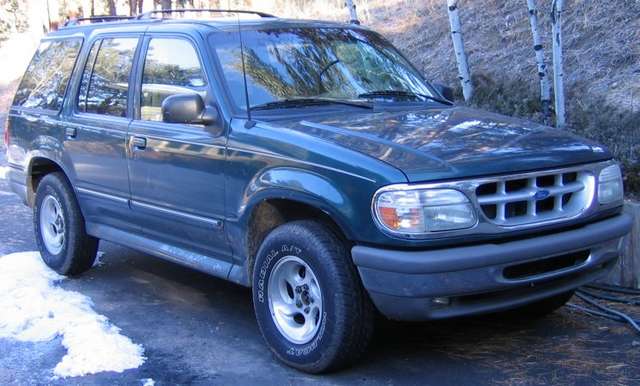
In march of 05 I rolled my new to me 96 5.0L AWD 86K miles, just after driving it back to CO from OR and putting $1000 into it. You see I bought this truck from my brother with 86K miles on the clock, it would not pass emissions for him and he drove it into the ground. This was the same explorer he bought new when I got the BII from him for $500 12 something years ago.
Well I payed him $500 for the green Explorer and $1000 later (shocks, tune up, 02 sensors, etc) it was in primo condition. Then I rolled it in an ice storm...
RIP 96 EB:
2893expldr-med.jpg

exafter.jpg


So in April my buddy Brett found this great deal here in town for a 96 XLT 5.0L AWD, $900 is what I paid, it has front end damage and air bags deployed, picked it up from a fellow board member:
2893drives.jpg


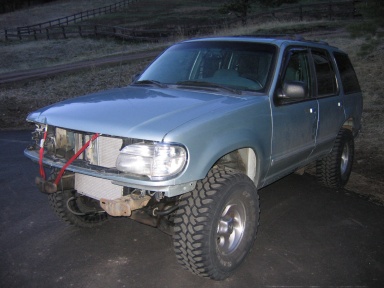
After the wreck the owner put in a new radiator and battery so it could be driven.
The truck has sat since April of this year, untouched, until this morning.
I have been preparing my new garage to accept my new project, and well she's ready, so today is the day I am driving this truck home.
To my disbelief this truck had no problem and started right up after sitting since April!

Here are some "before" shots:
Font end damage, sagging T bars, new rad:
beforework1.jpg

No airbags, interior is in great shape! (just needs TLC):
interiorbefore1.jpg

Rear:
rear.jpg

It has some "issues". Like steering extension is rubbing the manifold (3" body lift), no dipstick:
dipstickmissing.jpg

No fan, No ac condensor, and no trans cooler:
nofan.jpg


This is a 1996 5.0L AWD XLT with 151K miles on the clock.
Truck is loaded with sunroof, leather, tint, etc.
Previous owner installed 3" body lift and 33" tires.
Alot of things have been "rigged" but it runs and drives fine!

I will be completely removing the front clip, everything except the frame and inner fenders will be cut out. The entire drivetrain will be pulled (too many miles), the entire front end will be fixed, new bushings, bearings, new steering rack, torsio bar twist, shocks, brakes, etc.

the body lift will be fixed and or reduced to 1-2". the rear bumper will be re-located.

The drivetrain from my green 96 will be installed into this truck, along with alot of other "donor" parts.

The front clip will then be replaced using factory metal replacements, welding in new rad support, and then prepped for paint.

truck needs new windshield, airbags, and alot of TLC.


My long term plans for this truck include: "long travel" 4x4 IFS suspension lift (dixon bro's Camburg, etc). Stereo, tow package, SOA, low range T case, and custom everything else.
This is my "other" baby, and in keeping with tradition she will have the heart of my brothers old truck, just like the BII was his and run into the ground, so was "part" of this one.

Still no car payment after 12+ years.


Join the Elite Explorers for $20 each year.
Elite Explorer members see no advertisements, no banner ads, no double underlined links,.
Add an avatar, upload photo attachments, and more!
.


How did you check clearance? putty or just wipe clean then turn it over by hand a few times? BTW my friggin hands hurt from the handle on that F*&^&'in HF spring compressor, but it started to loosen up after the 8 on the drivers side and by then end I was swapping springs and retainers in like 10 minutes each...what a PITA hahaha
total job took about 6 hours working slow over two days, with a learning curve and with the help of my friend Dave, finished it up last night at about 11 :)


Join the Elite Explorers for $20 each year.
Elite Explorer members see no advertisements, no banner ads, no double underlined links,.
Add an avatar, upload photo attachments, and more!
.


I would just turn by hand.

I actually didn't do anything as I thought I wouldn't have a problem. After all, Robert ran 1.7s with stock covers. So after finishing the install and trying to figure out why it was only running on six cylinders... that was the reason. I pulled off the covers and you could see a little tiny scratch where it was making contact. :eek:


When I did mine, my buddy ASP84 (from this site) flew in and we attempted it as a team. Neither of us had done if before but how hard would it have been?! :p It was a two-day deal for us too. But imagine if you had your header panel in and a bar going down right infront of where the cam comes out. :confused:


No way jose I would have pulled the engine and trans or hacked off the radiator support :) I was thinking of making this new rad support bolt on instead of tack weld!!

We had to re-do cyl one after we got the two springs on because thats when we learned there are two spring retainers, one for intake (flat top) and one for exhaust (dished) that actually adjust the spring height.....then I forgot the trays under the folcrum on the d side so I had to re-mount the rockers, no biggie.
gaskets and intakes tonight :)
I must have looked at your pictures 5 times hahaha, thanks!


friggin A, okay everything is installed, just waiting to pick up some HO valve covers from Brett.
I took a bunch of pictures of how the spring compressor works and the spring/retainer and rocker install but when I went to download the pictures this morning they were not on the memory card......so it sucks but I am not about to do it again!

So I will get some pics of the rockers installed, and progress as the compete engine bay goes back together this week

Should be up and running REAL soon.....


Brett just happened to have some HO valve covers.
He was nice enough to clean them up a bit for me before I picked them up.

valvenew.jpg


So I cleaned them up a bit more and painted them with high heat silver:

valvepainted.jpg


oh yeah and the new valvetrain is complete (SEXY):

valvetrainpass.jpg

New springs, retainers, 1.6 rollers

ready for the lower intake:

beforelower.jpg


Lower installed:
afterlower.jpg


To check the valve covers for clearance I put a bit of vaseline on both tips of the rockers (valve side & cam side). I then bolted on the covers and turned the engine over by hand a few times.
Opened up the covers and looked for vaseline. None! The oil baffles in both covers have been removed.

I had to get new bolts for these aluminum covers, they are thicker then the stock stamped steel stock pieces. The new bolts are 1/4" thread x 1" long.

Today = plumbing, upper intake, timing cover, accessories, etc. Basically finish the entire engine bay.

MUAHAHAA


More progess, hope you like blue :)

lower intake ready for gaskets and FMS 1" phenolic spacer:

beforespacer.jpg


Spacer:
spacer.jpg


spacer height:
spacer2.jpg


You must purchase 2 additional long bolts to use this spacer with the GT-40 explorer intakes. Here you can see all the bolts in the kit and the two bolts I bought:
spacerbolts.jpg


Last time I did this Jefe commented that I spent alot of time cleaning the upper intake in order to paint it the stock color (silver).

This time I decided blue would be a good color for the accents on this engine :)

blue.jpg


Installed:
blueinstalled.jpg


EGR and Elbow installed, throttle body installed.
remember when installing the elbow, first mount the EGR, then put the two elbow studs and two elbow bolts in place, gasket and then install. (otherwise the heater box is in th eway of getting the 4 bolts in)
elbowinstalled.jpg


You can see how much room is gained around the fuel injectors (good airlflow = cooler) Also the spacer allows me to keep the HO valve cover un-modified for changing oil:
spacerspace.jpg


I had to cut my own gaskets for the TB and elbow. I stopped working today because I need a timing cover gasket........painting parts takes up ALOT of time!!

It's all downhill now baby!


Cant wait to see it done! I want to get some of those Monster torque headers, are they really worth 700 bucks??

I had never heard of that lift either, looks like a good choice!

Creager said:
Hahaha! Com'on man, you gotta see what some of these southern guy's trucks look like underneath. Dunked in mud heheh, that thing looks new.


You know thats how we do it Down here! That truck looks immaculate compared to mine:


Sorry, did a little searching and found the torque monster header install by MOUNTAINEERGREE.

Good stuff! Definately on my list!


The TM headers are worth the $$$
I also used a set, the 5.0L conversion headers on my Bronco II.


Thanks, 410.

Itll be awhile before I get the $$$ for them, but I will get them, everyone I talk to says they made a HUGE difference.


GREAT THREAD. There is some thing innately beautiful about an engine at this stage of assembly... (sigh - takes me back). I wish I could share the thrill of first firing.

ps. Ship me the core and I would love to build you the HD tranny for this... parts cost only.


lookin great


Glacier thats a deal!!! Chu that man!
I have a 96 4r70w, stock with 151K miles on it, was slipping when pulled.
I will clean that sucker up, remove the engine from it and send it to you, I have no problem paying for parts! (might be a couple weeks)

Also I will get some video of her running, just like the BII, so you can share to an extent.


Mutineer:
All you have to do is look at the stock exhaust manifolds and you can see where your power is being choked, just installing the TM headers will remove this restriction and well Robert has posted the dyno results to prove it. IMO they are the first performance mod that should be done to a 5.0L Ex.


Just like my Bronco II I keep eliminating things where I can, Ford uses all sorts of little metal brakcets everywhere to pick up wires and hoses, etc. I try to find a way to route things so they are not needed, use a zip tie here and there. It really cleans up the engine bay and makes access to those nooks and crannies a bit easier on the hands.
I too love to see an engine go together like this, it is a shame to bury it with hoses and shrouds etc, so I try to keep it as clean as I can....I am not sure about the blue here, but hey if I dont like it when its all back together I can go aftermarket of put this intake in the BII! Perhaps silver ghost flames on top of the blue? hehehe


Heck yes got more parts yesterday.
I picked up a 5.0L fan blade from Joe Deitz (thanks Joe!)
ONLY part I am missing (that I know of) is the fan clutch and I might have a use-able one.

I also picked up a nice oil coooler for the transmission with fittings, and also 8 more spark plug booties to help protect the wires near the headers...

Should be LOTS of progress this week.....none yesterday except for getting parts, I went wakeboarding instead :) Friggin 98 here in Denver yesterday....


Looking great man! I can't wait to see this thing when it is finished!


Look good.


Wake boarding RULES!! Haha YEAH!!

edit: I found an old pic of me on some rails.
Parks%20Bonifay.gif


ppffft I am not that good! working on w2w 360 though hahaha
I am now hooked on the skate, but yesterday I stuck to the board...

Also I am still trying to get the green slime off my boat from Elsinore! hahaha I was living in Laguna Niguel and that was the closest lake, went once and only once. Neon nuclear lake!


Join the Elite Explorers for $20 each year.
Elite Explorer members see no advertisements, no banner ads, no double underlined links,.
Add an avatar, upload photo attachments, and more!
.


Dude.. thats Parks Bonifay. :rolleyes:


Back
Top