RockRangerII Refresh | Page 4 | Ford Explorer Forums - Serious Explorations

  • Register Today It's free!

RockRangerII Refresh

I am going to be going through my 93 ranger and giving it a refresh. I bought the truck in late 2004. Other then a rancho lift kt it was an all stock stripped truck with a 4.0 manual trans and tcase. No AC cruise or power windows. The perfect basic wheeling rig.

Here are the specs of how the truck currently sat before this refresh.

4.0V6 all stock
Stock 5 speed
d.d. machine duel case setup with manual 1350 front and 1354 rear.
Front axle is a 1984 Jeep wagonner dana 44 converted to 5 on 5.5 bolt pattern 4.88 gears and an Aussie locker
Three link front suspension using 8" skyjacker TJ springs.
Rear axle is a 1992 explorer 8.8 4.88 gears and welded spider gears.
63" Chevy springs with a bellteck shackle.
BroncoII tank behind the rear axle
Warn 9.5 XP winch behind the front grill.
Interior roll cage
37" MTR on 17" steel rims

11806351705_12f3ea8e7c_c.jpg

Untitled by dresselhausfc, on Flickr

I took the truck down to King of The Hammers and few years ago and did some wheeling and managed to crush the bed good. Broke both front hubs and all 4 front axles, bent the rear driveshaft and ripped a shock mount off. Due to life getting in the way it sat on the trailer for 18 months before I even touched it again. Now I plan to give the truck some love and get it back on the trials again.


Join the Elite Explorers for $20 each year.
Elite Explorer members see no advertisements, no banner ads, no double underlined links,.
Add an avatar, upload photo attachments, and more!
.


I agree. The 2nd try looks great:chug:


Join the Elite Explorers for $20 each year.
Elite Explorer members see no advertisements, no banner ads, no double underlined links,.
Add an avatar, upload photo attachments, and more!
.


I think the second version might get hung up when trying to push the front over rocks to get up on them. Is it possible to make it not so tall and angle the front bottom edge? You are on the right track, but if you build a bumper with the bottom of the first one, and the top angles of the second, it would be what most rock crawler types want. I would rather have it stick out farther to the front than hang down so low.
I do like how you angle it off on the sides so severely to reduce the approach angle. I guess if you had to push the bumper into a rock to get the front to slide over, you could hit it at an angle.

That skid plate, link mount set up looks incredibly tough. With that under your rig you take a lot of worry about damage out of an off road adventure. How much does it drop below the frame? I need to make up some sort of a cross member, skid plate. It has to work around the transfer case which looks to be at about the same front drive shaft angle as yours. It used to be clocked flat up in the frame rails, but with the SAS, I need to clock it down to improve the front drive shaft angle. My problem is with the radius arms; I need to leave the space in front of the frame mount clear, so whatever mount I have there needs to be flat with the frame.

I couldn't raise it to much more then it is. Any higher and then I could not get my hand in to turn the free spool lever. It is an inch above the bottom of the frame rails. Any farther back and the winch motor hit the frame rails.
I do have an idea for a version three eventually but want to get this one finished up. It will have better ground clearance but will have to cut the grill to make it work. Cutting the grill is something I wanted to avoid with this one.


I also think the skid plate will work very well. It hangs 2 3/8" below the frame rails. It clears the transfer cases by about 1/2" and the catalytic convertors by an inch. I am still trying to figure out a skid plate from the trans mount to the engine cross member to better protect the transmission and oil pan. If I had radius arms up front I think I could do it. My three link is causing issues with my ideas. I am still thinking about it. Gas tank has a 3/16 skid plate so no worries there. Only thing left is the muffler. it has a few scratches on it and a small leak so I will wait till I destroy it then re do it. It needs an easy reroute and it could be pretty well protected.

I am also working on getting a rear drive shaft made out of 1/4" wall or 3/8 tubing so I can drag it across rocks and not worry about. My current one is bent.


I just picked up a few pieces of 3/16" plate for my skids. I am doing two, one for the transfer case, one for the transmission, bell housing area. I still need to figure it out so they clear the exhaust and transfer case front output.


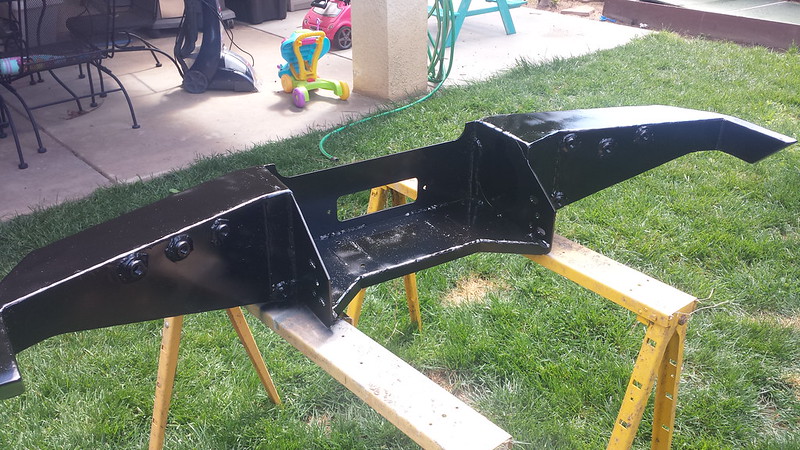
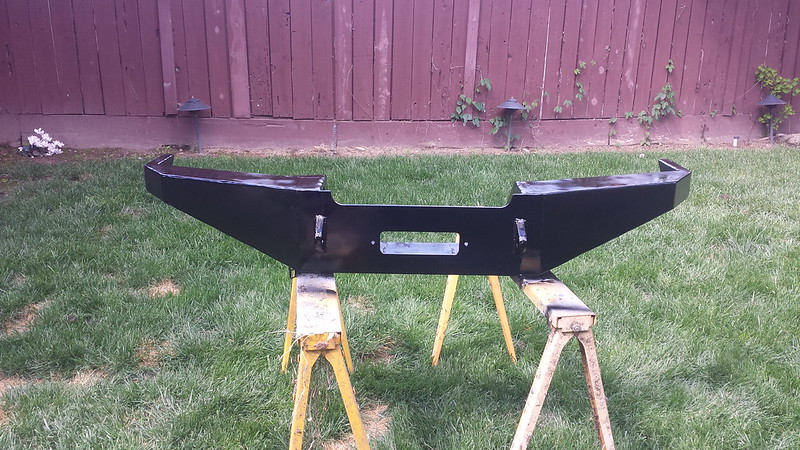
Finally got the bumper painted. After I built it I figured the two ends would make decent air tanks so I picked up some weld in bungs from a local hydraulic shop. Also Just picked up a York210 compressor to mount up next on the truck. It will probably be after Easter before I get it mounted on the truck


What are the 3 holes on each side of the back?


There is 4 on each side. One is the air in from the compressor. One will be a pressure switch, one a pressure relief valve, 2 are for drains, one for an air chuck, and one on each side to tie each tank together.


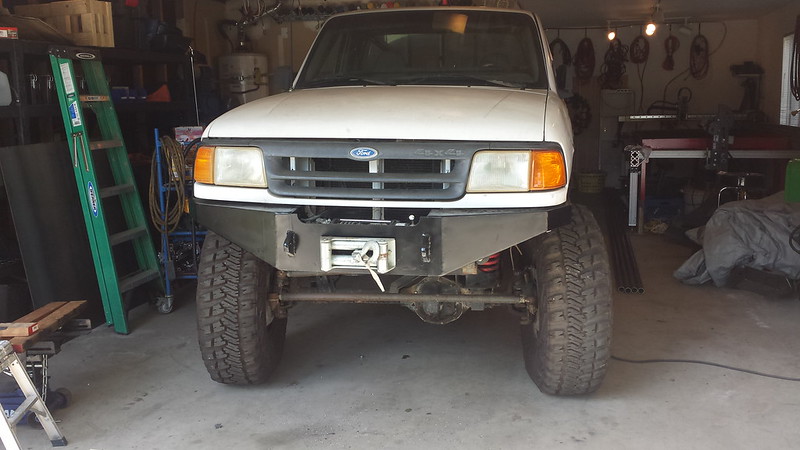
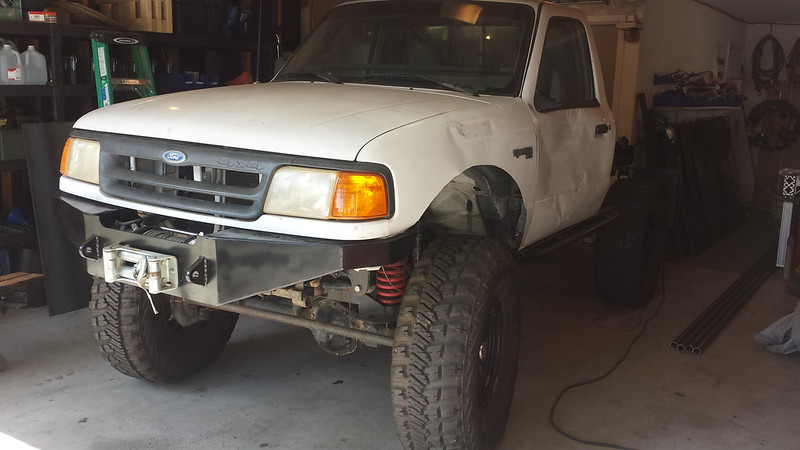
Finally have some time to work on this. Got the bumper mounted up with the winch installed.

Untitled by dresselhausfc, on Flickr

Untitled by dresselhausfc, on Flickr

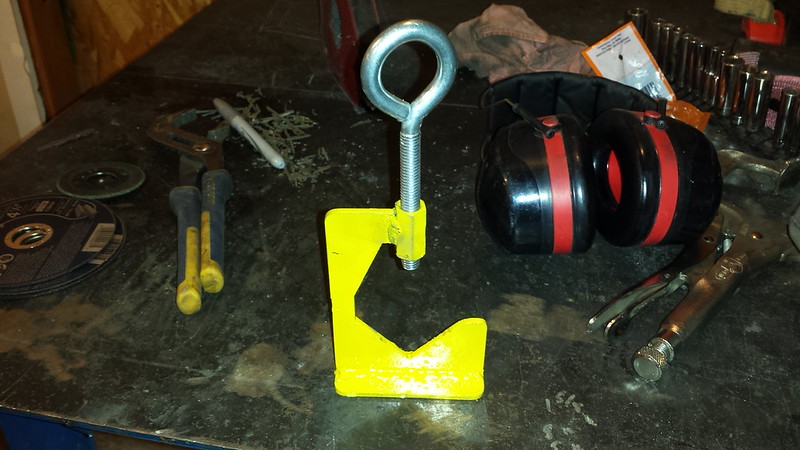
Getting ready to start on the new cage/ tube bed so I built a bracket to mount on the tube to be able to keep track of the plane.

Untitled by dresselhausfc, on Flickr


It's a bumper, It's and air tank... ..that's genius!

I have been scratch'n over where to put an air tank and it never dawned on me to just build one.. ... Duh!


Are you going to add lights? I know you have a set sitting around:D


Lookin good! :biggthump


Are you going to add lights? I know you have a set sitting around:D

Those lights are so 2005 or when ever I got them from you. I haven't decided if I will use them or not. With the cost of LED light bars falling so much I might pick up a 24" long one to mount above the winch. I will decide that once i get everything else finished up.

Lookin good! :biggthump

Thanks.


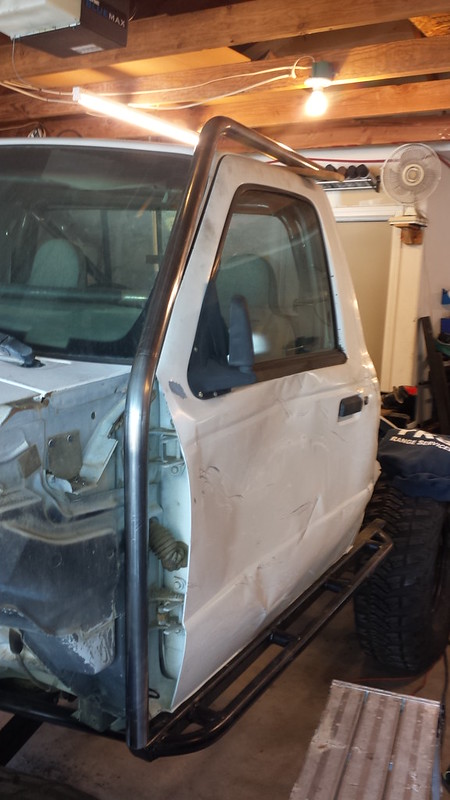
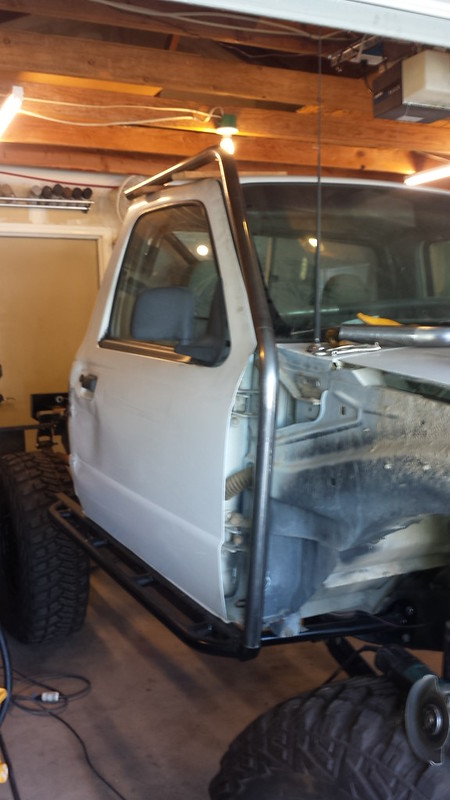
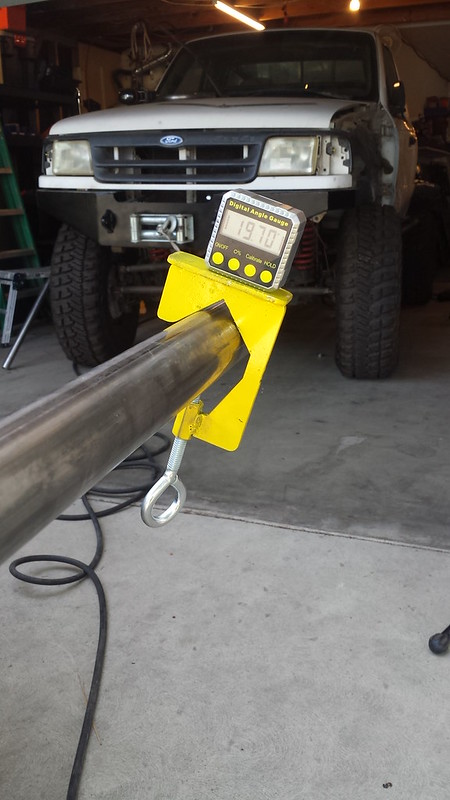
Started bending up the cage today. I have had the bender for 5 plus years and this is the first time I have actually used it. It is going slow and I have wasted some tube but still enjoyable. Also A picture of the bracket I made so that I can make sure I bend to the plane that I want to.

Untitled by dresselhausfc, on Flickr

Untitled by dresselhausfc, on Flickr

Untitled by dresselhausfc, on Flickr


Those lights are so 2005 or when ever I got them from you. I haven't decided if I will use them or not. With the cost of LED light bars falling so much I might pick up a 24" long one to mount above the winch. I will decide that once i get everything else finished up.


Thanks.

I paid just over $100 for the set of 12" LED's for JP. :thumbsup:

They had them dirt cheap at KOH


After about 10 different variations I came up with some new shifters for the Transfer cases. Still need to get a shift boot and some handles. Will see how it works when I get it on the trail.


12762870815_e70d5842fb_c.jpg

Untitled by dresselhausfc, on Flickr

12763311794_17e50da564_c.jpg

Untitled by dresselhausfc, on Flickr

12763309914_3dd3ed12e6_c.jpg

Untitled by dresselhausfc, on Flickr

12763009443_62a9435dfe_c.jpg

Untitled by dresselhausfc, on Flickr


Would you mind posting a picture or 2 of how and where you attached the levers for the transfer case and doubler? I'm assuming it's to the flat parts on the transmission end but would like to see if possible. Thanks.


Steve


Would you mind posting a picture or 2 of how and where you attached the levers for the transfer case and doubler? I'm assuming it's to the flat parts on the transmission end but would like to see if possible. Thanks.


Steve

Yes I just welded a rod to the flat areas. I will see if I can get a picture of it but with my skid plate it might be difficult.


Got a few more pieces done yesterday.

Untitled by dresselhausfc, on Flickr

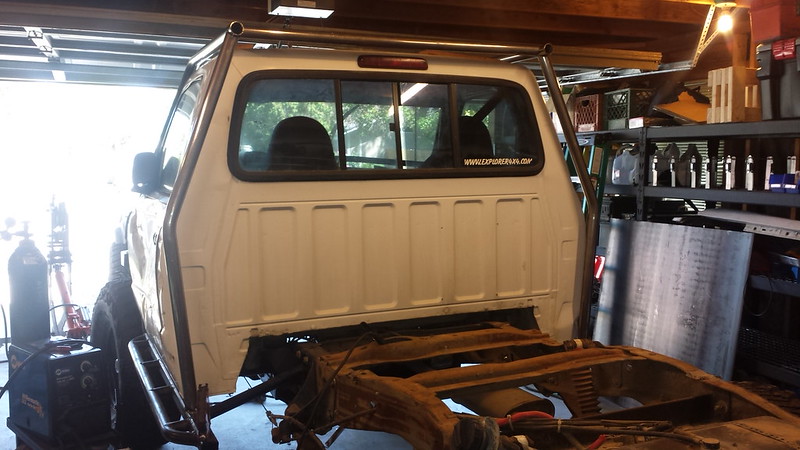
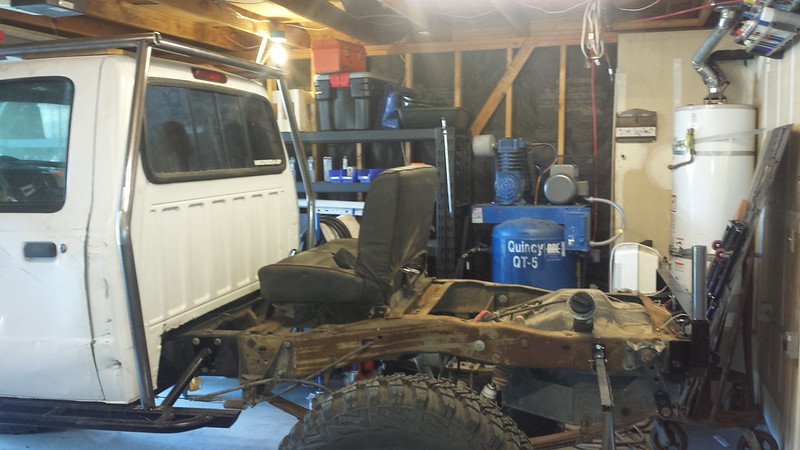
Talking with Tracy about how I was going to do the back she thought it would be nice to have a seat in the back. So 5 bolts later and the back seat is out of her CJ7 and sitting on my truck to decide if it will work. Looks like it will work for people under about 5' tall. Should be perfect for our daughter who is 3 right now. I will need to pick up some more tube to finish as wasn't planning on adding a c pillar with cross bracing or a braced roof structure in the back.

Untitled by dresselhausfc, on Flickr

I also smashed my thumb pretty good trying to get a piece of tube out of the bender. Any bets if I will loose my nail?

Untitled by dresselhausfc, on Flickr


Join the Elite Explorers for $20 each year.
Elite Explorer members see no advertisements, no banner ads, no double underlined links,.
Add an avatar, upload photo attachments, and more!
.


Nail, bye bye.

You live in California, its illegal to ride in the back of a pickup truck even with seats and belts. You could not even have anybody in the back in a state park, like Truckhaven is now. Also, Tracy is pretty cool, but I don't think even she would let her kid ride in the back of a truck without her sitting within arms reach of said kid so you need to make the seat fit her. Its the momabear thing. Maybe a couple of bucket seats with harnesses. Or, maybe since Tracy has a Jeep, its time to turn the Ranger into a rock buggy?? Eventually, you are probably going to do it anyway, why not now and save some transition time?


Back
Top