thejoker91
New Member
- Joined
- May 2, 2014
- Messages
- 5
- Reaction score
- 0
- City, State
- mount olive nc
- Year, Model & Trim Level
- 92 ford explorer
How much did all of the parts cost you to do it yourself?
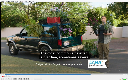
My finished A4LD sat on my workbench for so long!
I finally got it bolted in a few weekends ago, Im getting putting the exhaust back together now. Then Im going to replace the radial arm bushing and get this thing running!
I've gotten a replacement aux trans cooler and I've flushed out the in rad cooler. I've still got to figuire out what tee Im going to put into the line for the trans temp gauge. I'd like to tee into the steel line as it comes out of the trans with a flare tee, but I may just put it in flex line with some barb fittings...


How much did all of the parts cost you to do it yourself?
")


it may just be that I'm noticing the difference in shift points due to the VB mods I've done... I'll pay more attention next time I drive it and record shift points.
I also think I'll double check the torque on the bands now that I've driven it around a bit.