HiImBrian
Explorer Addict
- Joined
- September 4, 2009
- Messages
- 1,426
- Reaction score
- 7
- City, State
- St. Petersburg, Florida
- Year, Model & Trim Level
- 2003 Explorer Eddie Bauer
How-To: Rear Bumper/Hitch Bracket for 3" Body Lift

This bracket will raise your rear bumper/hitch receiver 3" to become level with your bumper cover, after the PA-883 Body Lift; while maintaining strength for maximum towing potential. This is an alternative to "flipping" your bumper.
Credit and thanks to James (Ronin8002) AND BigOne65 for the original idea and instructions for me. Be sure to take all safety measures possible. You get metal shavings in your eye... It's your fault.
Materials Needed :
(Available at Fastenal and your local metal supplier)
2 - 6"x8"x1/4" steel plates
1 - 6"x8" cardboard template
4 - 1/2"x1.25" bolts (Grade 8+)
4 - 1/2" Locknuts
-or-
4 - 1/2" Nuts & Lockwashers (Grade 8+)
1 - Spray can of Rustoleum (Any Color)
Tools Needed:
- Drill or Drill Press with 1/2" bit
- Angle Grinder w/metal cutting discs
-or-
- Bandsaw with appropriate blade
- Correct wrenches for all bolts/nuts
- Combination Square
- 3-in-one oil/lubricant
- Safety glasses and gloves
Step 1:
Remove rear bumper cover. Take notice of trailer wiring harness and foam bumper cover supports. Removal of tail lights is necessary for proper removal of bumper cover.
Step 2:
Remove rear bumper/hitch receiver. Disconnect trailer wiring harness if necessary. There are 6 bolts (3 each side) attaching the bumper to the frame rails. KEEP THESE BOLTS.
Step 3:
Measure and drill steel plates. Using your cardboard template, place it against the frame rail and mark the 3 holes necessary to mount the bumper. Be sure to mark these holes toward the bottom of your template to allow enough room at the top for the new mounting holes.
Once you have these marked, use your combination square and measure 3" up from the TOP 2 holes and mark.
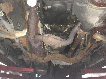
General Idea:

The bottom hole will not be used as the frame rail will be in the way.
Seen here:

Transfer these marks (5) onto your steel plates and drill accordingly. Be sure to use oil/lubricant to drill more effectively.
Step 4:
Cut existing bumper brackets to allow for proper mounting to the frame rail. Using your Angle Grinder or bandsaw, remove the bottom bend on the existing brackets.

This allows a flush mount between the frame rail and new brackets. The Angle Grinder can be used to smooth any rough metal edges to avoid injury.
Step 5:
Mount modified bumper with new brackets. Loosely attach new brackets to frame rails using the 6 original bolts. Lift and attach the bumper to the new mounting plates using the 4 new bolts and nuts. Tighten all bolts accordingly. Thread lock may be used if desired.
Your bumper/hitch receiver should now sit EXACTLY 3" higher. Now would be the best time to cover yourself and hit the new brackets with a few coats of Rustoleum. They are very exposed to the elements and should be protected. Allow them to dry if necessary and reattach your bumper cover and foam support. Be sure to reconnect your trailer wiring harness.

A few settling noises may be heard when first applying great weight to the hitch. This is nothing to be alarmed about. However if noises continue, review your work and adjust accordingly.
A new drop hitch is also recommended to ensure a level tow. Adjustable drop hitches like mine can be had for less than $50 on Craigslist all day.

Any questions are welcomed, and will be added to this if necessary.
Enjoy your new altitude!
This bracket will raise your rear bumper/hitch receiver 3" to become level with your bumper cover, after the PA-883 Body Lift; while maintaining strength for maximum towing potential. This is an alternative to "flipping" your bumper.
Credit and thanks to James (Ronin8002) AND BigOne65 for the original idea and instructions for me. Be sure to take all safety measures possible. You get metal shavings in your eye... It's your fault.
Materials Needed :
(Available at Fastenal and your local metal supplier)
2 - 6"x8"x1/4" steel plates
1 - 6"x8" cardboard template
4 - 1/2"x1.25" bolts (Grade 8+)
4 - 1/2" Locknuts
-or-
4 - 1/2" Nuts & Lockwashers (Grade 8+)
1 - Spray can of Rustoleum (Any Color)
Tools Needed:
- Drill or Drill Press with 1/2" bit
- Angle Grinder w/metal cutting discs
-or-
- Bandsaw with appropriate blade
- Correct wrenches for all bolts/nuts
- Combination Square
- 3-in-one oil/lubricant
- Safety glasses and gloves
Step 1:
Remove rear bumper cover. Take notice of trailer wiring harness and foam bumper cover supports. Removal of tail lights is necessary for proper removal of bumper cover.
Step 2:
Remove rear bumper/hitch receiver. Disconnect trailer wiring harness if necessary. There are 6 bolts (3 each side) attaching the bumper to the frame rails. KEEP THESE BOLTS.
Step 3:
Measure and drill steel plates. Using your cardboard template, place it against the frame rail and mark the 3 holes necessary to mount the bumper. Be sure to mark these holes toward the bottom of your template to allow enough room at the top for the new mounting holes.
Once you have these marked, use your combination square and measure 3" up from the TOP 2 holes and mark.
General Idea:
The bottom hole will not be used as the frame rail will be in the way.
Seen here:
Transfer these marks (5) onto your steel plates and drill accordingly. Be sure to use oil/lubricant to drill more effectively.
Step 4:
Cut existing bumper brackets to allow for proper mounting to the frame rail. Using your Angle Grinder or bandsaw, remove the bottom bend on the existing brackets.
This allows a flush mount between the frame rail and new brackets. The Angle Grinder can be used to smooth any rough metal edges to avoid injury.
Step 5:
Mount modified bumper with new brackets. Loosely attach new brackets to frame rails using the 6 original bolts. Lift and attach the bumper to the new mounting plates using the 4 new bolts and nuts. Tighten all bolts accordingly. Thread lock may be used if desired.
Your bumper/hitch receiver should now sit EXACTLY 3" higher. Now would be the best time to cover yourself and hit the new brackets with a few coats of Rustoleum. They are very exposed to the elements and should be protected. Allow them to dry if necessary and reattach your bumper cover and foam support. Be sure to reconnect your trailer wiring harness.
A few settling noises may be heard when first applying great weight to the hitch. This is nothing to be alarmed about. However if noises continue, review your work and adjust accordingly.
A new drop hitch is also recommended to ensure a level tow. Adjustable drop hitches like mine can be had for less than $50 on Craigslist all day.
Any questions are welcomed, and will be added to this if necessary.
Enjoy your new altitude!