Big Antifreeze Leak at back of 1998 4L OHV | Ford Explorer Forums - Serious Explorations

  • Register Today It's free!

Big Antifreeze Leak at back of 1998 4L OHV

tinkering

Active Member
Joined
July 14, 2014
Messages
99
Reaction score
0
Year, Model & Trim Level
1998 Explorer XL 4L ATM
I know there are already good archived threads on changing the lower intake manifold gaskets, as found here http://www.explorerforum.com/forums/showthread.php?t=399036&highlight=antifreeze+leak but I want to make absolute sure that it isn't something simpler before I go ahead.

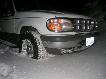
I have a big coolant leak at the back of my 1998 Explorer 4L OHV. When I pour AF into the rad it pours out quickly at the rear of the engine. I can't really see down in there (maybe I can use a mirror, if I can find one:) to verify the exact leak location but it seems to be coming out below the wiring harness than crosses over at the back of the engine. Is there anything other than the LIM gasket that could be the culprit? The coolant doesn't appear to be leaking from the front of the engine and then draining back along the top of the engine. When I start the engine and the coolant level goes down to the leak level, there is definitely steam coming up from between the firewall and the engine. Are there any hoses or other components that might be leaking from down in that general location? (please say yes because I am still building my garage and I don't relish the thoughts of doing the manifold gaskets out on the street in the winter:eek:


Join the Elite Explorers for $20 each year.
Elite Explorer members see no advertisements, no banner ads, no double underlined links,.
Add an avatar, upload photo attachments, and more!
.


I don't believe so.... I could be wrong. Check your heads and or lower intake gasket. Isn't there a freeze plug back there too


there is a lower intake gasket that will leak, it's the reason i got my 99 for $700 cause it was in real good condition,,

the parts were about $200 and i did the labour myself, , took about 6 hours to do it,,

208924_10150495792035165_3897885_n.jpg


reach your hand over the back of the valve cover to the area between the cam synchro and the cover, you may feel the gasket pushed out like i did,, , your hand will be covered with coolant afterwards,,


reach your hand over the back of the valve cover to the area between the cam synchro and the cover, you may feel the gasket pushed out like i did,, , your hand will be covered with coolant afterwards,,

I now have my garage up and I am ready to do this manifold gasket antifreeze leak job, out of the weather:D I couldn't feel the gasket sticking out but I was getting antifreeze on my fingers.
It's time to go ahead with replacing the manifold gaskets.

"What is the best thread to use as my reference guide?"

It is best to reference as many of the suggested manifold gasket replacement 'links' as possible. I will take the time to check out as many of these related threads and links as I can, before and while I am doing the job. This thread should come in handy too.


My freeze plug back there rusted out. Make sure it isn't that


My freeze plug back there rusted out. Make sure it isn't that

It seems like it is too high for the frost plug. I have it partially torn apart now with gasket kit in hand so here's hoping.

The wiring harnesses are a bit of a job to get out of the way. I took my time to undo the components and pull each harness up and out of the way the best I could. There are a couple of sensors down the front of the engine (timing/temp?). I managed to unplug the one but the sensor at the harmonic balancer has the strangest connector. I didn't want to gamble prying on the sensor so I just snipped the wires up top and I will splice them back together upon reassembly.

I will post some more details (and eventually pictures) as I proceed further.
Thanks:salute:


I see that the 1995 manifold uses a different 'New' bolt which has a larger head diameter. It torks up to only 11ft lbs, as opposed to 15 ft lbs for the 1994 and earlier 'Old' bolts. I assume that the 1998 uses the 1995 'New' bolt procedure?? The 'New' bolt uses a 3 stage torking procedure to 11 ft lbs, as opposed to a 4 stage torking procedure to 15 ft lbs for the 'Old' bolt. Torking procedures are shown in this pdf link which was posted by MaioCampo: http://rockledge.home.comcast.net/~rockledge/RangerPictureGallery/Early40LIntakeGasketTSB.pdf
:salute:
I was coming across varying and patchy information regarding torques. The gasket kit came with some torque listings too. Later in the thread I will list the torques I used.
There is a bit of pitting present on the manifold coolant mating surfaces. I know the best procedure is to replace the manifold but I do not have time or money right now for that, so I am going to fill the pits with JB Weld, and carefully file/sand the repair flat and true. This is not the 'best fix' but it has been used successfully by mechanics in the past.

The sensor wires I cut (mentioned in previous post) turned out to be shielded with aluminum tape. I will have to splice them, and shield them again with a wrap of aluminum tape. I would have liked to do solder splices but to save time I cut the blue barrel off of 14 gauge crimp connectors, and spliced using just the metal part. This made the splices less bulky; and made for cleaner wraps of the aluminum tape (shield). Don't forget to isolate the wires from each other, using electrical tape, before you wrap the aluminum tape on.

My repair won't look as pretty as Shamal's because I don't have the time or the facilities right now but it should be solid.


I am needing to clarify the fastener torques. In the threads I have found, the years of the 4L Explorers were 1990 to 1995.
What are the torques for a 1998 4L OHV?
-LIM
-UIM
-Fuel Rail Studs
-Valve Covers
-Heads

I did searches on this forum but with no results.
I could use these tork values as soon as possible.:thumbsup:

Later, I will list the torques I used.


I had to get a helper to push, using a length of 2x4, on the thick wiring harness at the rear of the drivers side bank, to allow enough room for me to get that valve cover off and then back into place.

I also had trouble with a lack of elbow room when removing and replacing the lower manifold. Again I say, just take your time, and if it didn't feel like it went on quite right, pull it out of there and try again; just make sure the RTV sealant is still applied evenly everywhere. It's easier to reinstall it at this point than after the job is back together and a leak is present :salute:

I did find the main culprit area where and why the antifreeze leak existed. It was at the rear of the driver's side manifold gasket. When I get the pictures posted it will indicate it well.

There are a number of other things I would like to mention here but I don't have my notes or pictures with me now; it may wind up being a few months before I can post these things.

The bottom line is The Job Is A Success! :salute::D

I should mention here, that dern check engine dash light is staying out!!


Back
Top