Engine swap 98 sohc | Page 2 | Ford Explorer Forums - Serious Explorations

  • Register Today It's free!

Engine swap 98 sohc

Hi,

I could help you posting the pictures.

Who is your internet provider? Some give you space to upload. Then all you need is an FTP to store them, then post the link.

But the best is for you to go elite this way there will always be a link to the pictures.

Cliff

OK, thanks. I'll try that.


Join the Elite Explorers for $20 each year.
Elite Explorer members see no advertisements, no banner ads, no double underlined links,.
Add an avatar, upload photo attachments, and more!
.


Can you use a prybar on the flexplate teeth?

Got started today. About half done disconnecting stuff on the top side and removed the hood. Soon I'll go down below.

First problem I'll face is how to rotate the flex plate to take off the TC bolts. The crank is broken, so the usual Hamonic balancer bolt is not an option.

Any ideas?

Thanks, Rydrew55

When I had to rotate the flexplate to line up the new engine I used a small prybar/big screwdriver to rotate the flexplate and line up the holes for the tc...


Take off the drivers side valve cover and put a wrench on the cam sprocket bolt. You could pull all the plugs to make it easier to turn.


excellent ideas!

Take off the drivers side valve cover and put a wrench on the cam sprocket bolt. You could pull all the plugs to make it easier to turn.

Those are excellent ideas! The crankshaft will turn twice as fast as the camshaft which means twice the force on the camshaft sprocket retaining bolt. I agree that the spark plugs should be removed to eliminate compression.


Thanks. I'll try all of those. Not that it matters on a trashed motor, but won't turning the Cam put tension on the wrong guides (left vs right), possibly damaging them.


Tough Day, but progress

I got lucky once today. There was just enough threads left in the busted crankshaft to screw in the old Harmonic Balancer 19mm bolt. I could turn the motor from the front like you are supposed to. Problem solved.

But I have to say, this is one tough bucket of rust to work on. I seriously thought about giving up and sending it all to the heap. I am calmer now and will keep trudging on...but seriously, I thought trucks were supposed to have all this extra room to work. That's what my pickup truck buddies told me. I guess they never had an explorer. You can get your hands on stuff, but no room to turn a wrench. OMG.

Most of the stuff was routine enough, but here is what I struggled with (as I cursed the Ford designers for squeezing a french engine into an American truck). I will leave all the questions till the end of the post.

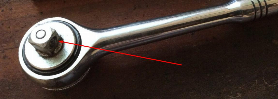
Top Bolt on Starter - Wow. Another wobble needed and fishing around blind. Better clearance with a qurter inch drive, but no leverage. Finally got it with the 3/8 and the wobble. Set it aside as advised by others, but it is in the way to get the TC bolts off (see below).

Starter wire loam stuck to the block Can't get it out. Some kind of tape/plastic tee thing. They are all over the place but this one you can't get a hold of, too tight.

Spark Plug on #3 cylinder. Lots of crushed and cut fingers. Finally realized you need to jack it up, remove the tire and splash guard and it was still a PITA. Had to cut the wire so I could rotate the boot as it was stuck from never being changed. Glad I am trashing the motor as the electrode was almost gone.

Whats up with that clunky PS/AC mounting casting. Lots of crap to deal with.

Book says can't undo the fuel line spring lock coupling without a special tool. What crap. Guess I'll leave that till last.

Exhaust.....need I say more. Why would you design everything to require wobbles. Recipe for disaster which it appears everyone has experienced. The last guy must have busted them as there were 2 different bolt sizes, 12mm and 13mm rounded off of course. I thike he just threw in some hardware store bolts. I got the 13 off, but the 12's are like one ball of rust. They will never come off. I thought these are suposed to be studs with nuts, not bolts. The Mustang motor has studs like I would expect.

Flex to TC bolts. No clearance. Can only get 1 or 2 clicks on the ratchet before hitting the drive shaft. Might have more room if I totally removed the starter instead of laying it off to the side. Also, no room for the ratchet head. It hits the bell housing and the socket is not square. Another wobble?????? crap. I got two off, but I'm stuck on the third. Worked on it for 30 minutes.

Well even with all the busted knuckles and swearing, I made good progress today. Can't wait to get this thing out and start building up the Mustang motor. All that I see left before attaching the crane is:

1. Last 2 Flex/TC nuts
2. Last 3 Exhaust bolts (not nuts-see above)
3. Starter Wire loam
4. Fuel lines
3. Engine to Tranny bolts

Sorry for the ramble. It was a tough day. (Not sure I like working on Fords....my first one). I'll post a new comment with questions to avoid a busy thread. Once I get this pig out, I'll start putting up some pictures and comments about the Ex vs Mustang motor.

Rydrew55


Last few items before attaching the crane

1. Is there a trick for the Fles/tc nuts. I can't keep the socket square with a 3/8 drive. Also, no room to turn the ratchet.

2. I'm confused about why everyone (and the book) says to mark the relationship of the TC bolts and the flex plate. They are bolts that go right trhrough the flex plate holes. What is there to line up? Won't they just pop through the holes?

3. Best method to cut off the exhaust bolts. See my prvious post. Shouldn't these be studs with nuts? Mine are through bolts with just a bolt head (rusted and rounded) 12mm just rotates on the head.

4. How do you unatach the starter wire loam from the block (black tape and plastic tee thing)

5. Which is better for upper engine bolts, long extensions or remove carpet and go in from the cabin through the manual shifter access hole?

6. Do I really need that fuel line coupling tool? Is there another trick?

7. Do I need to remove the small tran cooler mounted on the crossmember if I remember correctly. It looks like it might get damaged when you pull the engine forward before lifting.

Thats it for now. I'm sure I'll have more questions later.
Thanks,
Rydrew55


Hey Janolsson,
It looks like you just ran the belt right to just 2 points direcrly across from eachothe, not diagonal like most say to do. Is that what I see? Did it balance OK?

Exactly where did you attach the sling. Center exhaust tube? or around multiple tubes?

Thanks
Rydrew55


question responses

1. Is there a trick for the Fles/tc nuts. I can't keep the socket square with a 3/8 drive. Also, no room to turn the ratchet.

There's a "sweet spot" position for the flexplate bolt relative to the opening when the starter has been set aside. It allows just enough clearance for the socket to fit squarely on the bolt. I believed I used a 3 inch long extension when I removed the nuts and a shallow socket. I doubt there is enough clearance for a deep socket.

2. I'm confused about why everyone (and the book) says to mark the relationship of the TC bolts and the flex plate. They are bolts that go right trhrough the flex plate holes. What is there to line up? Won't they just pop through the holes?

Only one TC bolt and its position on the flexplate is marked. That's to allow reassembling the TC and flexplate in the original position for balance and distortion. If you use the Mustang flexplate then there is no need to mark the relative positions.

3. Best method to cut off the exhaust bolts. See my prvious post. Shouldn't these be studs with nuts? Mine are through bolts with just a bolt head (rusted and rounded) 12mm just rotates on the head.

The stock configuration on the Explorer uses exhaust bolts that thread into the exhaust manifold. I had to cut one of mine off but was able to loosen the other three. Once the engine was pulled there was enough of the shaft left that I was able to remove it. Many members end up drilling out the old shaft and just using a bolt and nut.

4. How do you unatach the starter wire loam from the block (black tape and plastic tee thing)

21 Starter motor removal

There's a small plastic pin on the plastic tee that is pushed into the block. It will probably break off when you pry between the block and the tee. I just cut the outer sheathing and then reattached the loom to the tee with plastic ties.

5. Which is better for upper engine bolts, long extensions or remove carpet and go in from the cabin through the manual shifter access hole?

I believe that you have to cut the carpet down the centerline of the transmission tunnel in order to fold it back so you can remove the access panel in the floor. That's why I used the long extensions working under the vehicle.

6. Do I really need that fuel line coupling tool? Is there another trick?

13 Fuel line disconnection


7. Do I need to remove the small tran cooler mounted on the crossmember if I remember correctly. It looks like it might get damaged when you pull the engine forward before lifting.

Thats it for now. I'm sure I'll have more questions later.
Thanks,
Rydrew55

I believe that you're referring to the power steering fluid cooler. I didn't remove mine and had no problems.


Wow!!!! Very quick and well done. I really appreciate it.
Rydrew55.


Yes the belt is just around the center tube on each side.
The starter loom plastic clip has a bolt that goes down thro the engine to mount bracket (10mm nut on underside).
I removed the starter.
For the tc bolts i ran 2x12"extensions with a 14mm deep socket staight along the side of the block so that lying underneath i could see it engage and reach under the front of the engine with the ratchet.

Top tranny bolts i used a 13mm flexihead ratchet spanner going in through the wheel wells. worked a treat but had to put a ring spanner on the end for more leverage to intially loosen. Some people have had sucess by dropping the tranny mount to angle the set up to be able to run extentions and wobbles up to the bolts, i had no joy hence the flexi ratchet.
HTH


1. Last 2 TC bolts- Done, Used a 6 point 9/16 which seating better.
2. Last 3 Exhaust bolts -Done, cut the upper one on driver side, removed the exhaust manifold passenger side. Will cut the bolts later when motor comes out.
3. Starter Wire loam. Done. The bolt was really tough to get to.
4. Fuel lines. Done, bought the plastic tool for 5 bucks at a tool outlet.

I think that's it. Will check around once more before attaching sling.

I need to find a better spot for the jack stands as the crane won't fit between them.

Now some real fun removing the 8 engine to tranny bolts and motor mounts.

I'll start posting pictures once the 2 motors are side by side and I start swapping parts. Going to the beach tomorrow.

Rydrew55


Good to hear you are making progress...

And getting away from the garage for awhile is a great mental vacation too... I worked on mine for a week straight and then we went to Vegas after I found the cylinder wall damage...

Had a great time there and put the truck in the back of my mind...And when I came back I was really focused to get it done...

Enjoy the beach....And I can't wait to see the pics!!!


1. Last 2 TC bolts- Done, Used a 6 point 9/16 which seating better.
2. Last 3 Exhaust bolts -Done, cut the upper one on driver side, removed the exhaust manifold passenger side. Will cut the bolts later when motor comes out.
3. Starter Wire loam. Done. The bolt was really tough to get to.
4. Fuel lines. Done, bought the plastic tool for 5 bucks at a tool outlet.

I think that's it. Will check around once more before attaching sling.

I need to find a better spot for the jack stands as the crane won't fit between them.

Now some real fun removing the 8 engine to tranny bolts and motor mounts.

I'll start posting pictures once the 2 motors are side by side and I start swapping parts. Going to the beach tomorrow.

Rydrew55

Glad to hear things are moving along for you. I had to unbolt and bolt the transmission to engine bolts twice (long story), so I consider myself a semi-expert on them. If you haven't completely removed the plastic inner fenders I would suggest doing that. I was able to do each bolt from the sides with the exception of one. I believe it was the second (or third) one from the top on the driver's side. I got a socket on all of them, but one of them did with a basic wrench because I couldn't get the socket in there (this was also on the driver's side-I believe this was either the second or third as well). I also have a 3/8" air rachet which was very helpful for the top bolt on the driver's side because there was not enough room to swing the rachet.

Enjoy the beach. Let me know if you could use a hand. Also, I don't think you will need them because you are doing a full swap, but I have the timing tools.


Quick Question.

Was that 2005 Mustang engine out of an automatic? The manual Shift has the balance shaft.


Quick Question.

Was that 2005 Mustang engine out of an automatic? The manual Shift has the balance shaft.

It was an auto so it might not have the BS. After reading comments in the mustang swap thread in modified 95-2001 forum, I decided to take a chance that it won't affect drivability too much. Hope I didn't make a mistake. I also posted the following in that thread;

Not conclusive, but there is a listing for a balance shaft on the fordparts.com site on the mustang with automatic.
6A311
Engine Balance Shaft
4.0L V6 12V Single Over Head Cam EFI Automatic Transmission $273.15 Select a dealer for their prices and availability.
and for the manual
6A311B
Engine Balance Shaft
4.0L V6 12V Single Over Head Cam EFI Manual Transmission $452.82 Select a dealer for their prices and availability.

rydrew55


Hi All,
I am a little embarassed, but have a question. I read dozens of posts about placing the jack stands, and am totally confused. Where I have them, (under the front portion of the control arm) the crane will not slide under the truck, they are too close together. Please can some one give me a straight answer (there was soooo much sarcasm in the many posts I read.
Thanks,
Rydrew55

I put them under the front crossmember just inboard of the torsion bars with a wooden plank between the stands and crossmember. As the rear wheels were still on the ground (chocked) there was no instability or rocking with them being so close together.
HTH


Join the Elite Explorers for $20 each year.
Elite Explorer members see no advertisements, no banner ads, no double underlined links,.
Add an avatar, upload photo attachments, and more!
.


2 ton crane

As I recall you purchased the larger 2 ton crane that probably has a wider stance than the 1 ton crane I and many other members use. You may not be able to get the jact stands far enough apart for the crane legs to fit between them. You may have to straddle one of the jackstands with the crane legs and pull the engine with the crane off center. Once the engine is free and raised some you can rotate it about 45 degrees (diagonal to engine compartment) to clear everything.


Back
Top