LurchII
Member
- Joined
- October 11, 2019
- Messages
- 37
- Reaction score
- 17
- City, State
- MD
- Year, Model & Trim Level
- 2020, Explorer, ST
I decided to do the installation myself. The dealer would not cover this, since it was not on the original build data list. I am though getting reimbursed for the parts, please don’t ask how…
Have a Ford Dealer that is close
Be friends with a mechanic
Have Patience
Parts list:
HN5 Nut, already on the vehicle. Holds the heat shield
Parts to order:
<11778 deflector
HN1 C-Nut x 4, should come with the deflector. Make sure it faces up, nut towards the sky.
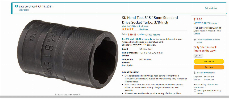
HS1 Bolt x 4 (P/N W5052745439). This may/or may not be correct. When it came in it was WAY too big. This is where mechanic friend comes in handy, he was able to find the right one in his toolbox. Sorry no P/N.
HM1 x 2 Plastic push pin (P/N W14040S300)
Remove HN5 x 4 10mm, place deflector in place, snug up the 4 nuts (HN5). The deflector should sit on top of the rear bumper, snug up HS1 x 4, 8mm. At this point I installed the HM1 x 2 plastic push pins, to help alignment. Tighten up the remaining hardware. I did HN5, then HS1, no specific torque value that I could find, so just snug.
Refer to attached pictures, and diagram under post: “Is this part (Air Deflector) missing…” it’s that simple, it took me less than 10 minuet’s to install, no ramps or special tools required.
Jeff


Have a Ford Dealer that is close
Be friends with a mechanic
Have Patience
Parts list:
HN5 Nut, already on the vehicle. Holds the heat shield
Parts to order:
<11778 deflector
HN1 C-Nut x 4, should come with the deflector. Make sure it faces up, nut towards the sky.
HS1 Bolt x 4 (P/N W5052745439). This may/or may not be correct. When it came in it was WAY too big. This is where mechanic friend comes in handy, he was able to find the right one in his toolbox. Sorry no P/N.
HM1 x 2 Plastic push pin (P/N W14040S300)
Remove HN5 x 4 10mm, place deflector in place, snug up the 4 nuts (HN5). The deflector should sit on top of the rear bumper, snug up HS1 x 4, 8mm. At this point I installed the HM1 x 2 plastic push pins, to help alignment. Tighten up the remaining hardware. I did HN5, then HS1, no specific torque value that I could find, so just snug.
Refer to attached pictures, and diagram under post: “Is this part (Air Deflector) missing…” it’s that simple, it took me less than 10 minuet’s to install, no ramps or special tools required.
Jeff

")