- Joined
- June 3, 2003
- Messages
- 3,293
- Reaction score
- 43
- City, State
- Austin, TX
- Year, Model & Trim Level
- OBD-1 Kenobi
Just...plain....
You are simply the best!
You are simply the best!
Just...plain....
You are simply the best!
I don't know about that, but I'll take it!
haha, did that transfer case ever come in handy for yea we gave yea last year?
Was really looking forward to meeting you and some others out there and maybe squeezing in a trail. )Well, if you're heading to Moab down I-70, maybe we could meet you for a quick bite to eat or something on your way through or way back if it works out. We moved up to Central City for the time being which is not far from Idaho Springs which is right on I-70.
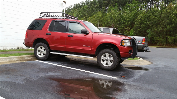
Nice work on the buckets and towers, and those rock lights too!! I love those!!
And if you have someone interested in those RA drop brackets, by all means sell em buddy!! We're back to looking at going SAS with full width again. Just can't pass up the deal on these axles. Not entirely decided which Ex to put em under, but most likely would be the 94 anyway.
Sorry we didn't stop...trip out took longer than we planned and we were pushing time to be back in Ohio by 6pm Tuesday...would have liked to though!
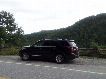
Pics of the trip and a report to come later!
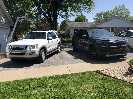
Can't believe I missed your build thread. It was nice meeting you and your wife in Moab. Wish we would have had a chance to chat more. I am impressed you drove it to Moab and back.

Well, not much to update, everything is running smoothly...I have run into a problem though...
Every now and then, after we get a good rain, I get a leak...unfortunately, this dribbling water comes out of my visor lights (emergency light-bar) which means my windshield is leaking...I thought this was the only place (passenger side of the windshield,) but as I was cleaning out my truck today, I found a puddle on the driver side floor mat and the road maps I collected from our trip to Moab that were sitting on my dash were soaked.
Now my natural instinct says "don't be an idiot, do it right...remove the windshield, reseal it, do it the right way and do it once..." My bank account however says "yeah right! You'll need to buy tools, sealant and new trim...you can't do that!"
So.....since my trim around the windshield is curling and cracking anyway (maybe the problem), I'm thinking of pulling what I can off and running a bead of silicone around the windshield until I can do it right...any thoughts?
*EDIT*
I have found what I need to do it right...$10 on eBay gets me the removal tool, $15/tube gets me the urethane adhesive and $50 gets me the trim....so in all, probably around $90...aka: not gonna happen right now...will stop at a home improvement store tomorrow and get some silicone...we use this at work, and I'm thinking it might be the better option and somewhat mask the fact for a little while that I didn't do what I should as it's also black in color (http://www.loctiteproducts.com/p/pl...-S30-Polyurethane-Roof-&-Flashing-Sealant.htm)...
Hey man i know its a hual for you but septemeber 16 17 18th a large group of my buddies and i are going to silver lake sand dunes. If its in your cards you should come up
I don't know enough about the issue to start digging in and spending money. I think the best place to start, unfortunately, is to remove the headliner and see exactly where it's coming from.
Mine does the same. I'm about to pull the windshield and replace the gasket with a new one and fresh adhesive. A local autoglass installer said this is a common problem on lots of makes and models from Ford and others. The original OEM gaskets swell and dont seal anymore. The only cure is to replace them. Adding sealant more often than not fails because the sealant is often applied over dirt and grime in the cavity and water, through capillary action, works it apart and the leak soon reappears.