I am trying to replace the same passenger blend door actuator on my 2008 Limited with dual controls. I have the 3 screws out but there is a metal actuator rod running across the top corner of the blend door actuator that is preventing me from pulling the actuator out far enough to disengage the actuator shaft and remove the actuator. How did you deal with this issue?
Hearing no response I proceeded and and got the job done. For the benefit of the next guy, here is my story.
I had been having intermittent problems with the passenger side HVAC outlets blowing hot when the controller was calling for cooling. It didn't matter whether the controller was in Dual Mode or not. The driver side outlets always worked properly. I connected my OTC Encore scan tool and accessed the HVAC controller and found one DTC: B2267 (Passenger side blend door malfunction or short).
I ordered an new Motorcraft YH1759 (F7DZ-19E616-BA) actuator from Rock Auto for $23.89.
When I eventually got the old actuator out and opened it I found that the cause for the failure was grease that had flowed from the gears onto the resistance surface that the feedback wipers run on. There was nothing mechanically wrong with the actuator. It could easily be cleaned and reinstalled.
Step by Step Installation Instructions
Tools
8mm nut driver
7” long, 8mm box end wrench
7” long Pittsburgh Professional ¼” flexible head ratchet from Harbor Freight
8mm socket
Remove the finish panel from the right side of the console by pulling the push pin at the front out then pulling out on the rear of the panel to release two retaining pins.
Drive the bottom wire bundle push pin out with a hammer. Pry the middle wire bundle push pin out using a pair of dikes (diagonal wire cutters). This frees up the wire bundle which allows it to be moved out of the way.
Unplug the wire connector from the actuator.
Remove the top actuator retaining screw using the 8mm box end wrench. This screw will be too hard to put back in so it won’t be used with the new actuator. The 2 bottom screws are all that are necessary to securely retain the actuator.
Use the ¼” ratchet and 8mm socket to remove the remaining 2 actuator retaining screws.
Drop the glove box down by pressing in on both sides.
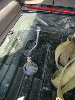
Working through the glove box opening, use the 8mm nut driver to loosen the two floor door vacuum motor retaining screws. They are nearly impossible to see, especially the top one and require the nut driver to be held at an angle to work. Back them out about half way. Don’t remove them because it looks impossible to put them back in. This will allow enough clearance to get the actuator out since the rod from the floor door vacuum motor to the floor door runs across the top left corner of the blend door actuator.
The blend door moves 90 degrees and needs to be positioned at it’s rear most position (CCW) to align it with the shaft in the new actuator. Open the old actuator using 8 toothpicks to free the latches and remove the shaft. Use the shaft to align the blend door as described above.
Use a Dremel tool with a plastic cutoff wheel to remove the top left mounting tab from the new actuator. This tab is not used when the actuator is installed on the passenger side. This will allow the actuator to rotate clockwise into its final position after installing it. It could be possible to skip this step but I would not recommend it. The blend door shaft will only stay in 2 positions, full CW or full CCW. It barely wants to hold in the full CCW position.
Tape the wiring connector out of the way so it doesn’t get between the new actuator and the surface it is mounting to.
Insert the new actuator and secure it with the 2 bottom screws by starting the screws with your fingers then tightening them with the ratchet. The top screw can be discarded as it isn’t really necessary and is very hard to access.
Plug the wiring connector into the new actuator.
Re-tighten the 2 floor door vacuum motor retaining screws using the 8mm nut driver.
Swing the glove box back into its proper position and close it.
Re-install the console finish panel.