AMMO_HOOAH
Well-Known Member
- Joined
- December 16, 2005
- Messages
- 835
- Reaction score
- 1
- City, State
- Spokane, Wa
- Year, Model & Trim Level
- 1996 Ex V8, AWD XLT
Well despite the idiots at truckaddons.com (search for my other rant on that point, they actually told me today as I'm opening boxes it would be to me on Monday or Tuesday next week  ). The kit got in today, so I ran the parts check list, accounted for everything, and decided to put the rear on since I didn't have a full day for the front. All I can say is OMG what a PITA. It would have been cake except first I ran out of jack trying to get the truck high enough to get the lift on. Once I finagled that It took me FOR FREAKIN EVER to get the dang leave pins to line up with the axle. Since it has the trailing arms when it dropped the axle had to rotate..... which was fine on the one side but once i got it in, and snugged up I couldn't for the life of me get the other side to come even close. I took the leaf off, but then of course couldn't get the leaf to line back up with it's mounting holes but I ended up loosening the other side just short of the pin coming out, and let the truck down on its weight. This got me close enough to get the pin to slide in as i tightened the u-bolts. Also the instructions talk about a brake line t-block that doesn't even come with the kit for the explorer. They also don't tell you that you have to remove the "lateral movement dampener" the little shock attached to pumpkin and frame. Other than that it was pretty straight forward.
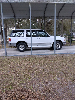
Here's why I really posted this. Tomorrow I'm going to hit the front (although the rake is kinda cool), and I need some tips on getting the outer tie-rods, and lower ball joints out of the old knuckle. I'm doing it in my driveway otherwise I'd be using an air-pickle gun. I'm not worried about the uppers because I just replaced all of them (uppers, and lowers) a few months ago, so they shouldn't be stuck yet..... I hope , but I've never taken the outer tie-rods off, and the lowers are really pressed into the knuckle. Thanks in advance for any help you guys have. I'll try and snap some pics of the rake and finished lift.... on 31s till the 15th. LOL, they already looked small with the TT/ shackles, and BL. Now it's almost comical.
). The kit got in today, so I ran the parts check list, accounted for everything, and decided to put the rear on since I didn't have a full day for the front. All I can say is OMG what a PITA. It would have been cake except first I ran out of jack trying to get the truck high enough to get the lift on. Once I finagled that It took me FOR FREAKIN EVER to get the dang leave pins to line up with the axle. Since it has the trailing arms when it dropped the axle had to rotate..... which was fine on the one side but once i got it in, and snugged up I couldn't for the life of me get the other side to come even close. I took the leaf off, but then of course couldn't get the leaf to line back up with it's mounting holes but I ended up loosening the other side just short of the pin coming out, and let the truck down on its weight. This got me close enough to get the pin to slide in as i tightened the u-bolts. Also the instructions talk about a brake line t-block that doesn't even come with the kit for the explorer. They also don't tell you that you have to remove the "lateral movement dampener" the little shock attached to pumpkin and frame. Other than that it was pretty straight forward.Here's why I really posted this. Tomorrow I'm going to hit the front (although the rake is kinda cool), and I need some tips on getting the outer tie-rods, and lower ball joints out of the old knuckle. I'm doing it in my driveway otherwise I'd be using an air-pickle gun. I'm not worried about the uppers because I just replaced all of them (uppers, and lowers) a few months ago, so they shouldn't be stuck yet..... I hope
, but I've never taken the outer tie-rods off, and the lowers are really pressed into the knuckle. Thanks in advance for any help you guys have. I'll try and snap some pics of the rake and finished lift.... on 31s till the 15th. LOL, they already looked small with the TT/ shackles, and BL. Now it's almost comical.