How to: 2nd gen bodylift - PA 883 Bodylift Instructions | Page 3 | Ford Explorer Forums - Serious Explorations

  • Register Today It's free!

How to: 2nd gen bodylift - PA 883 Bodylift Instructions

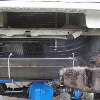
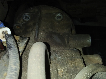
Essentially what you're doing is moving the radiator temporarily out of the lower supports so that you can remove the rubber seats that they are sitting in. When you're looking at the truck head on, you shift the radiator to the passenger side to remove the driver's side radiator seats, and then shift it to the driver's side to remove the passenger side radiator seats. It's a gigantic PITA but with a little manhandling, it will eventually shift to where you need it to go so that you can get at the rubber seats. Hope this helps, and if you have any more questions, just let me know. Good luck!


Join the Elite Explorers for $20 each year.
Elite Explorer members see no advertisements, no banner ads, no double underlined links,.
Add an avatar, upload photo attachments, and more!
.


I never liked the whole drop your radiator 3" deal with the body lift.

What I did was leave the radiator in its place and rotated the fan shroud 180 degrees. If I remember right, I had to cut off those things on the side that go into the rubber seats. I'm not at home at the moment to go look at my truck. I drilled holes in the shroud at the top and bottom to tie wrap the shroud to the radiator. Duct tape and tie wraps is all you need to keep your truck together. :D


That makes total sense. Why didn't I think of that?!!!? Thanks for all your help and great writeup!!


Good job on the write up!

The only thing I did different was the interior. Front & rear seats, trim molding, and carpet was removed for access to the mount bolt locations. No cutting of carpet was done this way.

Did you mention the re-using of some of the stock bolts? I had to use some of the fronts for the rears because some of the new bolts were to long. I did use the 853 kit though, so I am not sure about the 883 kit bolt length's.

My bumper brackets had to be made as well. The front mounts were a nightmare. Ended up cutting them off, and making some new from John Deere tractor hardware(grade 10).

Were you able to reinstall the shift cable to the firewall? Did you notice any binding of the shift cable binding at the trans bracket? I ended up leaving mine off the firewall due to some binding.


I'm doing a hockeypuck BL of 2in. Will anything need to be done with the shift linkage??? is there any extensions or brackets that you used in your kit??


Good job on the write up!

The only thing I did different was the interior. Front & rear seats, trim molding, and carpet was removed for access to the mount bolt locations. No cutting of carpet was done this way.

Did you mention the re-using of some of the stock bolts? I had to use some of the fronts for the rears because some of the new bolts were to long. I did use the 853 kit though, so I am not sure about the 883 kit bolt length's.

My bumper brackets had to be made as well. The front mounts were a nightmare. Ended up cutting them off, and making some new from John Deere tractor hardware(grade 10).

Were you able to reinstall the shift cable to the firewall? Did you notice any binding of the shift cable binding at the trans bracket? I ended up leaving mine off the firewall due to some binding.

Honestly, I used all the kit bolts throughout the whole job. I suppose since I have a Sport, something may be different from the Explorer's, but I personally had no issue with bolt lengths whatsoever. I did initially notice some slight binding with the gas pedal, but that's about it. The only other cable that I even touched was my E-brake line, and I put that back in properly once I was done installing the driver's side spacers.


I'm doing a hockeypuck BL of 2in. Will anything need to be done with the shift linkage??? is there any extensions or brackets that you used in your kit??

The only linkage that I had to alter was the steering linkage, and the extension for that came with the kit I bought. I honestly don't know much about the hockeypuck lift, due to it not involving the radiator drop brackets, steering linkage extension, the bumper brackets, and all the other things that came with the 883 kit. Hopefully someone else can shed some light on it, but I know you have to extend the steering linkage, or else you're asking for trouble.


I'm doing a hockeypuck BL of 2in. Will anything need to be done with the shift linkage??? is there any extensions or brackets that you used in your kit??

The lift blocks in these PA kits are also called hockey pucks.

I did the 3" and I had to remove the shift cable from the firewall because the way the mount on the cable is attached, it dont move. So, after lifting is done, you can either re-attach it to the firewall by making a new hole, or just leave it alone, unattached. If it feels too sloppy when you shift, you might want to attach it back to the firewall (a couple of inches lower).

So---- No drop brackets for the shift cable were in my 853 kit.


What an excellent write up! Good job man, cudos. '02 Sports are rare, and info is hard to find.:thumbsup:


Haha, thanks man. If only I had a 4x4, then I would have been more stoked about ownin it, I didn't really care about all this truck stuff back in 04 when I first got it. Oh well, hopefully I'll be getting a 96 Explorer 4x4 for about $500 soon, but it's still up in the air.


Hey buddy this was very helpful and gave me alot of hope for my truck! Where did you get the kit? How much was it? Is that a shackle kit as well? Any tips or suggestions?


Hey buddy this was very helpful and gave me alot of hope for my truck! Where did you get the kit? How much was it? Is that a shackle kit as well? Any tips or suggestions?

Hey, no problem man, I just wanted to help everyone who hasn't tackled this yet. I actually bought the kit from here

http://www.summitracing.com/parts/PRA-PA-883/

There is also the Summit kit, which looks a helluva lot like the PA, but about 50 bucks cheaper

http://www.summitracing.com/parts/SUM-7888300/

As for the shackles, they are Warrior Shackles, part number WAR-153. I can't really remember where I bought them, but they were about 80 bucks, so it's not really that bad. All in all, with the 3" BL, TT/Shackles, I got about 5" of lift.
Concerning tips/suggestions, take your time, don't get frustrated, print out my guide and have it with you (prevents you from having to run back and forth to the computer), review both my guide and the installation manual before you start, and most importantly BE EXTREMELY CAREFUL (especially when lifting the body from the frame) I honestly would hate to hear of anyone getting hurt like I did doing this mod, much less mangled or even killed.

Good luck with it, and feel free to ask me any questions you need to get the job done. :D


Wow, Amazon sells car parts.... sigh, I'm always the last to know :( Good find John, that's much cheaper than Summit, that's for sure. And gman is right, one side at a time, steady as she goes, you'll be set in no time.


just wondering about adding a brushguard to a bodylift. i understand it would most likely require special brackets.anyone input is welcome.


just wondering about adding a brushguard to a bodylift. i understand it would most likely require special brackets.anyone input is welcome.

Yeah it won't line up. Pottsy makes a winch bumper that fits a 3" body lift but I don't have any personal experience with it. Looks good though.


First off, thank you for writing this up. It helped make my body lift go pretty darn smooth since I was well prepared beforehand. I ended up purchasing the summit kit, which as far as I can tell is just a re-boxed PA kit. It had everything I needed and more (I still have a lot of parts left over, lol)

I have yet to get the rear bumper mounted. I have been looking at the bumper and am somewhat confused. Does the bumper end up being mounted with only two bolts per side? I assumed that by raising the bumper you would have to end up using 4 bolts since it had 2 per side originally. If I only need to do 2 per side I think it will be far easier than I was anticipating, although not as strong.


Join the Elite Explorers for $20 each year.
Elite Explorer members see no advertisements, no banner ads, no double underlined links,.
Add an avatar, upload photo attachments, and more!
.


First off, thank you for writing this up. It helped make my body lift go pretty darn smooth since I was well prepared beforehand. I ended up purchasing the summit kit, which as far as I can tell is just a re-boxed PA kit. It had everything I needed and more (I still have a lot of parts left over, lol)

I have yet to get the rear bumper mounted. I have been looking at the bumper and am somewhat confused. Does the bumper end up being mounted with only two bolts per side? I assumed that by raising the bumper you would have to end up using 4 bolts since it had 2 per side originally. If I only need to do 2 per side I think it will be far easier than I was anticipating, although not as strong.

Hey man, yea no problem at all making this thread, just trying to do my part with helping out the community. Definitely glad to hear that it helped you out and that everything went smoothly for you :cool: As for the rear bumper, essentially what needs to be done is you need to cut the braces that are holding the two bolts (a total of 8 bolts in 4 sets) to allow you to align them properly with the holes on the frame. You will use two bolts per side (total of 4) to attach the rear bumper brackets, which have been hammered flat to allow them to function properly, to the stock brackets on the interior of the rear bumper. From there, they should look like the picture with the red and white circles of the bumper lying on my front lawn. Once those are mounted, aligned on the bumper, and tightened, you will then need to attach them to the frame via the hammered out kit brackets with the remaining 4 bolts (two per side). This is where the use of another person comes in handy as they can hold the bumper and move it to where you need it to go so that you can align the holes properly. From there, it's a simple process of holding the nut with a vice-grip, or something similar, and then using a 21mm socket wrench to tighten the bolts, thereby completing the installation. Sorry it took me so long to respond, haven't been online in a few days, haha. Hopefully this helps out with your question and if you have any further questions, don't hesitate to ask.


Back
Top