How To: Upper Control Arm / Ball Joint Replacement (Lots of Pictures) | Page 16 | Ford Explorer Forums - Serious Explorations

  • Register Today It's free!

How To: Upper Control Arm / Ball Joint Replacement (Lots of Pictures)

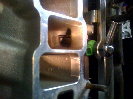
I used the Doorman brand upper arms and they fit perfect and looked like quality parts, every bit as good as the Moog brand for 15 bucks less each arm. It was only 73 dollars for the arms and shipped to my door from www.rockauto.com .


Join the Elite Explorers for $20 each year.
Elite Explorer members see no advertisements, no banner ads, no double underlined links,.
Add an avatar, upload photo attachments, and more!
.


Pinch Bolt Removal

I soaked the pinch bolt in WD40 for about two days before trying to remove it. But unfortunately the WD40 didn't help, because I snapped the head off of the pinch bolt on the passenger side. I tried to heat the housing around the pinch bolt but I keep melting the old rubber boot so I stopped. I tried hitting the end of the bolt that I snapped the head off with a 3lb. hammer to push it through the other side, but it will not budge. Any suggestions on how to get this pinch bolt out so that I can replace the UCA/UBJ?


UCA Pinch Bolt Headache

Sounds like you are doing the right stuff...lube, heat and force. I had used WD40 for 20 years before learning it's a better water displacement solution and Kroil and PB Blaster are better for creep quality. Maybe a cheap ball/u-press tool would work or a slightly off angle c-clamp with that flared piece at the end of the theads broken off.


I soaked the pinch bolt in WD40 for about two days before trying to remove it. But unfortunately the WD40 didn't help, because I snapped the head off of the pinch bolt on the passenger side. I tried to heat the housing around the pinch bolt but I keep melting the old rubber boot so I stopped. I tried hitting the end of the bolt that I snapped the head off with a 3lb. hammer to push it through the other side, but it will not budge. Any suggestions on how to get this pinch bolt out so that I can replace the UCA/UBJ?


some guys are using the loctite freezeand release stuff, check here

http://loctitefreezeandrelease.com/aaaa.htm

, i gave my bolt lots of lube and let it sit, also whacked around the sides with a hammer for a bit to loosen anything, then had to rock it back and forth with the impact and keep spraying it. if you have a air compressor, get a air chisel to get it out


I soaked the pinch bolt in WD40 for about two days before trying to remove it. But unfortunately the WD40 didn't help, because I snapped the head off of the pinch bolt on the passenger side. I tried to heat the housing around the pinch bolt but I keep melting the old rubber boot so I stopped. I tried hitting the end of the bolt that I snapped the head off with a 3lb. hammer to push it through the other side, but it will not budge. Any suggestions on how to get this pinch bolt out so that I can replace the UCA/UBJ?

all good... make sure that the "joint" is properly "seated"... not too high or not too low as the pinch bolt passes thru a "channel" that is used to "lock" the joint and prevents the knuckle from seperating from the control arm. IF the joint is not "exactly right depth"... the bolt may be "binding" in that channel. Of course, the suggestion of the air hammer is a good one in a "pinch".


all good... make sure that the "joint" is properly "seated"... not too high or not too low as the pinch bolt passes thru a "channel" that is used to "lock" the joint and prevents the knuckle from seperating from the control arm. IF the joint is not "exactly right depth"... the bolt may be "binding" in that channel. Of course, the suggestion of the air hammer is a good one in a "pinch".

Excellent post.

I was going to point that out also. The bolt is round and not special, but the ball joint shaft that goes into the spindle has a groove machined into it. The bolt will not go into the spindle/BJ assembly unless that groove is at the proper depth to match the hole of the spindle.

It is easy for the BJ to go in too far as you install it. You just tap it down in only enough to line up that groove with the hole.

It may be that your BJ is applying a lot of pressure on the pinch bolt. I suggest working on the BJ, loosen it up figuratively, by forcing the BJ up, and down versus the spindle. Support the LCA to take the pressure off of the UCA and spindle. Try to get the UCA closer to horizontal, so you can move the upper BJ around slightly(without so much pressure on it(immovable)). Tap the UCA up and down as you watch the area around the pinch bolt and BJ.

Keep at it.


So I have the two piece on my passenger side and i figured since i'm replacing the drivers side lets just get both done at once. I ordered the two piece, any issues with getting this in? Seems pretty simple with three bolts only...


What I learned on 2-piece upper control arm

So I have the two piece on my passenger side and i figured since i'm replacing the drivers side lets just get both done at once. I ordered the two piece, any issues with getting this in? Seems pretty simple with three bolts only...

I will make one recommendation about the passenger side- do NOT remove or bend the adjustment bolt at the front of the arms! I did not slip the forked feature into the unthreaded portion of the adjustment bolt and accidentaly bent it while tightening the nuts...only to twist the head of it off and have to torch and drill it out. (insert profanity!). I couldn't find replacement without spending 30 bucks on a junky used two piece just for the bolt so started over with a one piece.


Do not touch the adjustment bolt, you don't need to the outer UCA just slots into it. Leave it as it or you will change the alignment.

Just remove the 2 large nuts and remove the outer UCA piece. Then fit the new one and make sure you line up the guide into the bolt adjuster slot as you fit the new one and then replace and tighten the nuts.


Just got a quote for $982 for upper and lower BJs, after taking it in for "death wobble". Bandaided the wobble for now with some lower tire pressure--I had too much air in them babies--now time to read up for my Christmas vacation project....:p:


Just finished doing mine this past weekend. This walkthrough was invaluable. I also did the lower ball joints, inner and outer tie rod ends, and new shocks. I have 150k on my '02 ST and this was the first time any of these have been replaced. My tires were wearing pretty bad on the insides. I also put in new camber adjustment kit. Hope they can get a good alignment on it now. Will find out soon.


Guys with torsion twists - any tips on getting the knuckle up enough so the upper balljoint can slide down and you can get the bolt thru? Even with the suspension fully loaded I'm about 1/2" short. Only thing I can think of is to loosen the torsion bolts.


Guys with torsion twists - any tips on getting the knuckle up enough so the upper balljoint can slide down and you can get the bolt thru? Even with the suspension fully loaded I'm about 1/2" short. Only thing I can think of is to loosen the torsion bolts.
The suspension travel and vehicle (static) weightwill not fit the ball joint pin into the knuckle. Do not adjust the torsion bar to fit the ball joint pin.

The upper control arm (which contains the upper ball joint) has plenty of travel. The ball joint pin is a tight fit into the knuckle and requires you to tap it down (just enough to line up the slot with the hole) so that the bolt can be inserted.


Guys with torsion twists - any tips on getting the knuckle up enough so the upper balljoint can slide down and you can get the bolt thru? Even with the suspension fully loaded I'm about 1/2" short. Only thing I can think of is to loosen the torsion bolts.

Put a bar in your upper control arm and pull it down to your knuckle. Slide it in and have a helper slip the pinch bolt in real quick.


The suspension travel and vehicle (static) weightwill not fit the ball joint pin into the knuckle. Do not adjust the torsion bar to fit the ball joint pin.

The upper control arm (which contains the upper ball joint) has plenty of travel. The ball joint pin is a tight fit into the knuckle and requires you to tap it down (just enough to line up the slot with the hole) so that the bolt can be inserted.

You are misunderstanding the problem...I can't even get the balljoint down far enough to tap it in the knuckle.

Put a bar in your upper control arm and pull it down to your knuckle. Slide it in and have a helper slip the pinch bolt in real quick.

Thanks I'll that a shot.


Ended up having to unbolt the control arm, beat the ball joint in the knuckle, then bolt the control arm back in. Passenger side slipped right in though.


Replacing bolts in camber adjuster

Love the picks looks just like mine in the garage all up on jacks. I took out the control arm and am trying to replace with the new one but I can't for the life of me get the bolts back in due to the frame (where the shock mounts) and appears to be the brake line. Metal looking line in one of your pics right side. Are there some aftermarket bolts that are easier to get in. It has me super fustrated. Any help appreciated.


Love the picks looks just like mine in the garage all up on jacks. I took out the control arm and am trying to replace with the new one but I can't for the life of me get the bolts back in due to the frame (where the shock mounts) and appears to be the brake line. Metal looking line in one of your pics right side. Are there some aftermarket bolts that are easier to get in. It has me super fustrated. Any help appreciated.

I think the line you are talking about is the fuel line. I had to unmout the fuel line(s) when I did my upper control arms. When you remove the mounting screws for the fuel lines you can move them just far enough to get the bolts back in for the control arm.


I think the line you are talking about is the fuel line. I had to unmout the fuel line(s) when I did my upper control arms. When you remove the mounting screws for the fuel lines you can move them just far enough to get the bolts back in for the control arm.
Appreciate. Got it back in next day. Didn't end up having to unmount gas line. I was able to finally just squeeze it by after a took the night off of getting mad at it. Still have a little vibration going on and gotta do the right side now. then i'll get my alignment and hope that takes care of it.


Join the Elite Explorers for $20 each year.
Elite Explorer members see no advertisements, no banner ads, no double underlined links,.
Add an avatar, upload photo attachments, and more!
.


Those fuel lines are a pain. I battled those on my old 4.0 and I was hoping they would be routed differently on the 5.0....not the case. I unclipped them and carefully pryed them out of the way with a screwdriver while I rotated the bolt in just the right way.


Back
Top