KPPCExplorer
Well-Known Member
- Joined
- August 16, 2010
- Messages
- 169
- Reaction score
- 0
- City, State
- Kings Park, New York
- Year, Model & Trim Level
- 2002 XLT V6
I've had HIDs in my stock headlight housing for over a year now. My friends always complained that my headlights were blinding them and I was constantly getting flashed by people. It's bad when you can see your headlight reflection in trees and also see your headlights reflecting off the rear view mirror of the car in front of you and blinding you! Sorry everyone!
The other day I finally decided to do something about it. I ordered a set of Morimoto Mini H1 5.0 projectors from www.theretrofitsource.com with new H1 bulbs for aprox $145 to my door. I already had a ballist and wiring kit from when I had HIDs in my stock housing, but the projector uses H1 bulbs instead of 9006 bulbs. If you are upgrading a current HID kit you only need the projectors and bulbs, but if you are doing this from the beginning you also need a set of ballasts and I would highly suggest a wiring harness as well.
Parts:
Bi-xenon: Morimoto Mini H1 5.0 with Mini Gatling Shroud and 4300K H1: Morimoto 3Five bulbs
Tools:
Flat head screw driver
Philips head screw driver
T15 torx
T10 torx
Dremel
Oven
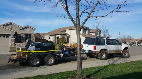
Okay so hopefully you're starting with something similar to this.

I have a 2002 4 Door XLT. I imagine anything similar to that would be almost the exact same steps.
Obviously make sure all the parts that you ordered have came in before your start ripping your headlights apart. I did one headlight at a time as not to mix anything up. I also did them on 2 separate tables, that way if I had any left over parts I would know which headlight it went to. Also, use something to label where every part you take off goes (I used painters tape.)

First things first, start by taking your headlight off your explorer. Take everything off your headlight assembly that you can. Take out both bulbs, than use a T15 torx bit to undo both bulb retainers. Use the same torx head to remove the two pieces on the side that lock your headlight in place and also allow you to adjust the vertical/horizontal aim of your headlight. Don't worry, this will not mess up your beam alignment. Remove the 4 metal tabs on the outside of your headlight. Finally, there are 3 plastic caps that are on the end of stems protruding from the back. Pull those caps off. You should now be left with something like this.

Next, you need to heat your oven to 260 degrees fahrenheit. No, we are not cooking dinner. You need to heat your headlight housing in order to melt the glue that holds the lens cover on. Once your oven reaches 260 degrees, put the housing in and let it bake for 12 minutes. I put a piece of cardboard underneath the housing so that the plastic would not melt on the rack. I also put the rack as low as I could in the oven to keep the housing away from the heating element at the top of my oven.

After your 12 minutes is up, remove your headlight housing from the oven. Remember, it will be hot! Use oven mitts or something similar. I happened to have a pair of structural firefighting gloves to use, lucky me!

Once you get the housing out of the oven, get to work splitting the two pieces apart. Keeping my gloves on, I put a flat head screwdriver in all four corners and popped them up. Once that was done the lens cover came off easy. I thought this part would be messy with stringy glue going everywhere and making a mess, but luckily on both headlights the glue stayed where it should have and was literally no problem at all.

Give the housing a little bit of time to cool down so that you don't burn yourself. 5 minutes should be more than enough. Take a T10 torx bit and remove the center cap that goes over the bulb.

I than tried to fit my projector only to realize that the base of the projector was making contact with the base of that bulb cap. I used my dremel to file it down just enough where the projector housing would not make contact. I also used the screw hole as a guide where to drill a hole to run my solenoid wires.
From this...

To this

Once this is done, you should be able to fit the projector no problem. Screw your projector shroud onto the housing using the 4 philips screws provided with the kit.

Undo the three philips screw on the back of the projector and remove the bulb retainer. The instructions online say to put one of the rubber grommets between the projector and the housing (as shown in above pic), but I found if you did this than you would not be able to thread the nut deep enough to allow the bulb retainer to screw back in, so leave the rubber grommets off.

There are two adapter brackets that come with the kit. I believe one is for H4 and one is for H7 bulbs. We have the 9006 bulb, so none is made to fit. I called the retrofit source and asked them if they even carried such an adapter and the guy on the phone said "definitely not." That's fine. I used the smaller adapter and it worked fine. It will set your bulb up for the proper vertical and horizontal setting that you previously had, but it will not set the proper rotational angle of the projector. This is not as big a deal as it sounds. Be very careful not to cross thread the locking nut, supposedly it is very easy to do and will ruin your projector. I tightened the locking nut about as good as I can get it hand tight, which is fine because I know it's not going to go anywhere and if you tighten them up too much you risk cracking your housing. If you don't trust the nut holding in, throw some blue locktite on it after you align it. Throw your H1 bulb in, screw the two mounting brackets on the back and put it back on your Explorer for now. Plug the bulb in and turn it on. Adjust the rotation of the projector as necessary, than power it down and bring it back inside.

Run the two solenoid wires through the hole you made before. You must now again remove the bulb and two mounting brackets. You will be preparing to put the lens cover back on the housing. If any glue seeped anywhere you didn't want it do, get it off now. Also make sure to clean all the dust and fingerprints out of everything inside of your housing. This may be the last time you ever go inside there, and if you miss a spot it's going to be very difficult to clean later. Put the lens cover back on the housing and reattach the 4 metal clips onto the outside of the housing.

Heat your oven to 260 degrees farhenheit again and place your housing back in for 8 minutes this time. Make sure you look over the entire housing several times and make sure everything is done before you put it back in the oven.

Again, be careful taking it out of the oven-it will be hot. Allow time for the housing to cool off, than reattach the bulb, mounting brackets, high beam bulb retainer along with high beam bulb, and the two caps on the back of the reflectors. You should still have 1 cap, the bulb cover and screw, low beam bulb retainer and your old low beam bulb left over. Everything else should be mounted somewhere.
That's it. Same step for the other side obviously. The first housing took me probably 1 hour 45 minutes while taking pictures. The second one took about an hour. You can chose to wire up the solenoid to your high beam or use your old high beam bulbs. I chose to wire my high beam directly to my solenoid so that the projector is now my high beam, but you could just plug your high beam back into your old high beam bulb. Or if you feel like it, you can run your solenoid wires into your high beam wire and keep that plugged into your high beam bulb. This would give the maximum amount of light. I plan on doing this, but I was too tired after all of this work to do it today.
And the finished result.


And the real reason I did this
Low beams

High beams

I was honestly intimidated by this reading up on projects in the beginning. However, after doing it now I can say it was much easier than I expected. I would give it a 4/10 on the difficulty scale. Most people can do this with no problem, just read up on it.
I have to give a huge shout out to MustangP51. He did this retrofit to a 4th gen, and it was similar to this one. His writeup is what gave me the confidence to do this. His thread is here
http://www.explorerforum.com/forums/showthread.php?t=368916
I also used the online guide at thee retrofit source's website which is here
http://www.theretrofitsource.com/pdf/trs_tech/Morimoto_Mini_H1_Retrofit.pdf
I know this site has helped me so much with my Explorer, and I hope this can help somebody do this mod to their Explorer.
The other day I finally decided to do something about it. I ordered a set of Morimoto Mini H1 5.0 projectors from www.theretrofitsource.com with new H1 bulbs for aprox $145 to my door. I already had a ballist and wiring kit from when I had HIDs in my stock housing, but the projector uses H1 bulbs instead of 9006 bulbs. If you are upgrading a current HID kit you only need the projectors and bulbs, but if you are doing this from the beginning you also need a set of ballasts and I would highly suggest a wiring harness as well.
Parts:
Bi-xenon: Morimoto Mini H1 5.0 with Mini Gatling Shroud and 4300K H1: Morimoto 3Five bulbs
Tools:
Flat head screw driver
Philips head screw driver
T15 torx
T10 torx
Dremel
Oven
Okay so hopefully you're starting with something similar to this.
I have a 2002 4 Door XLT. I imagine anything similar to that would be almost the exact same steps.
Obviously make sure all the parts that you ordered have came in before your start ripping your headlights apart. I did one headlight at a time as not to mix anything up. I also did them on 2 separate tables, that way if I had any left over parts I would know which headlight it went to. Also, use something to label where every part you take off goes (I used painters tape.)
First things first, start by taking your headlight off your explorer. Take everything off your headlight assembly that you can. Take out both bulbs, than use a T15 torx bit to undo both bulb retainers. Use the same torx head to remove the two pieces on the side that lock your headlight in place and also allow you to adjust the vertical/horizontal aim of your headlight. Don't worry, this will not mess up your beam alignment. Remove the 4 metal tabs on the outside of your headlight. Finally, there are 3 plastic caps that are on the end of stems protruding from the back. Pull those caps off. You should now be left with something like this.
Next, you need to heat your oven to 260 degrees fahrenheit. No, we are not cooking dinner. You need to heat your headlight housing in order to melt the glue that holds the lens cover on. Once your oven reaches 260 degrees, put the housing in and let it bake for 12 minutes. I put a piece of cardboard underneath the housing so that the plastic would not melt on the rack. I also put the rack as low as I could in the oven to keep the housing away from the heating element at the top of my oven.
After your 12 minutes is up, remove your headlight housing from the oven. Remember, it will be hot! Use oven mitts or something similar. I happened to have a pair of structural firefighting gloves to use, lucky me!
Once you get the housing out of the oven, get to work splitting the two pieces apart. Keeping my gloves on, I put a flat head screwdriver in all four corners and popped them up. Once that was done the lens cover came off easy. I thought this part would be messy with stringy glue going everywhere and making a mess, but luckily on both headlights the glue stayed where it should have and was literally no problem at all.
Give the housing a little bit of time to cool down so that you don't burn yourself. 5 minutes should be more than enough. Take a T10 torx bit and remove the center cap that goes over the bulb.
I than tried to fit my projector only to realize that the base of the projector was making contact with the base of that bulb cap. I used my dremel to file it down just enough where the projector housing would not make contact. I also used the screw hole as a guide where to drill a hole to run my solenoid wires.
From this...
To this
Once this is done, you should be able to fit the projector no problem. Screw your projector shroud onto the housing using the 4 philips screws provided with the kit.
Undo the three philips screw on the back of the projector and remove the bulb retainer. The instructions online say to put one of the rubber grommets between the projector and the housing (as shown in above pic), but I found if you did this than you would not be able to thread the nut deep enough to allow the bulb retainer to screw back in, so leave the rubber grommets off.
There are two adapter brackets that come with the kit. I believe one is for H4 and one is for H7 bulbs. We have the 9006 bulb, so none is made to fit. I called the retrofit source and asked them if they even carried such an adapter and the guy on the phone said "definitely not." That's fine. I used the smaller adapter and it worked fine. It will set your bulb up for the proper vertical and horizontal setting that you previously had, but it will not set the proper rotational angle of the projector. This is not as big a deal as it sounds. Be very careful not to cross thread the locking nut, supposedly it is very easy to do and will ruin your projector. I tightened the locking nut about as good as I can get it hand tight, which is fine because I know it's not going to go anywhere and if you tighten them up too much you risk cracking your housing. If you don't trust the nut holding in, throw some blue locktite on it after you align it. Throw your H1 bulb in, screw the two mounting brackets on the back and put it back on your Explorer for now. Plug the bulb in and turn it on. Adjust the rotation of the projector as necessary, than power it down and bring it back inside.
Run the two solenoid wires through the hole you made before. You must now again remove the bulb and two mounting brackets. You will be preparing to put the lens cover back on the housing. If any glue seeped anywhere you didn't want it do, get it off now. Also make sure to clean all the dust and fingerprints out of everything inside of your housing. This may be the last time you ever go inside there, and if you miss a spot it's going to be very difficult to clean later. Put the lens cover back on the housing and reattach the 4 metal clips onto the outside of the housing.
Heat your oven to 260 degrees farhenheit again and place your housing back in for 8 minutes this time. Make sure you look over the entire housing several times and make sure everything is done before you put it back in the oven.
Again, be careful taking it out of the oven-it will be hot. Allow time for the housing to cool off, than reattach the bulb, mounting brackets, high beam bulb retainer along with high beam bulb, and the two caps on the back of the reflectors. You should still have 1 cap, the bulb cover and screw, low beam bulb retainer and your old low beam bulb left over. Everything else should be mounted somewhere.
That's it. Same step for the other side obviously. The first housing took me probably 1 hour 45 minutes while taking pictures. The second one took about an hour. You can chose to wire up the solenoid to your high beam or use your old high beam bulbs. I chose to wire my high beam directly to my solenoid so that the projector is now my high beam, but you could just plug your high beam back into your old high beam bulb. Or if you feel like it, you can run your solenoid wires into your high beam wire and keep that plugged into your high beam bulb. This would give the maximum amount of light. I plan on doing this, but I was too tired after all of this work to do it today.
And the finished result.
And the real reason I did this
Low beams
High beams
I was honestly intimidated by this reading up on projects in the beginning. However, after doing it now I can say it was much easier than I expected. I would give it a 4/10 on the difficulty scale. Most people can do this with no problem, just read up on it.
I have to give a huge shout out to MustangP51. He did this retrofit to a 4th gen, and it was similar to this one. His writeup is what gave me the confidence to do this. His thread is here
http://www.explorerforum.com/forums/showthread.php?t=368916
I also used the online guide at thee retrofit source's website which is here
http://www.theretrofitsource.com/pdf/trs_tech/Morimoto_Mini_H1_Retrofit.pdf
I know this site has helped me so much with my Explorer, and I hope this can help somebody do this mod to their Explorer.