just finished 4.0L mustang swap | Ford Explorer Forums - Serious Explorations

  • Register Today It's free!

just finished 4.0L mustang swap

dablack

Active Member
Joined
June 15, 2006
Messages
79
Reaction score
1
City, State
Houston
Year, Model & Trim Level
2002 XLT
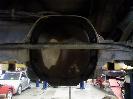
Ok Guys! Last week I finished up swapping a 2008 mustang 4.0L into my 2002 explorer. It wasn't too bad of a job but I did learn a few things along the way that I think would help the next guy.

For me, the two hardest parts of the swap was pulling the radiator and unbolting the block from the transmission.

I don't really have any advice for the radiator but I can help with the transmission attachment. I kept reading about how everyone said to pull the intake and do the top two bolts from above and then do the other bolts from way back with long extensions. Neither method works well for me at all. For me the best way to get to the transmission to engine bolts was to lift the engine a little and pull the middle engine mounts. Then you can lower the engine. Then pull the wheel wells. Once they are out, and the engine leaning forward, you can easily get to all the engine to trans bolts through the wheel well.

Do the same when it is time to put the engine back in. Leave off the middle motor mounts, lower the engine into the bay (make sure the studs on the exhuast don't get hung up on the exhaust pipe), and get a couple of the lower trans to engine bolts going (line up the torque convertor studs and flexplate holes). Tighten up those lower engine to trans bolts (make sure the torque convertor bolts are freely going into the flexplate) and then lower the engine when will pull the trans down too. Then you can easily get to the other bolts. Once done, lift engine and put back motor mounts.

I really wish I would have known this going in.

The rest was easy. I bought new exhaust manifold gaskets (qty 2) and intake manifold gaskets (qty 6). I used the mustang oil filter adapter, harmonic ballancer, oil pan and oil pan dip stick. I put on the explorer intake, exhaust manifolds, valve covers, accessories and brackets.

Besides needing a new fuel pump, the engine started right up and ran like a top. I paid $1100 for the engine with 58k miles on it. Not the best price but it was close by and a whole lot cheaper than a car note! The gaskets and misc cost about $100.

It is the wife's car and she is very happy.

Austin


Join the Elite Explorers for $20 each year.
Elite Explorer members see no advertisements, no banner ads, no double underlined links,.
Add an avatar, upload photo attachments, and more!
.


Just a quick follow up.

I had some CPS wires there were pinched behind the PS pump bracket that was giving me some fits. Once that was fixed, it has been running great. I put 500 miles on it in the last couple of days and it feels great.

Plus, with the mustang motor I got a spare coil pack, spark plug wires, and CPS.

The only gaskets I bought were the six intake manifold gaskets and the two exhaust manifold gaskets.

I would suggest this swap to anyone that can turn a wrench and has (or an barrow) an engine hoist.

Austin


What was the difficulty on the part of the radiator exactly?

I'd presume the oil cooler assembly, but seeing as how your doing an engine swap, that'd get disconnected anyway.


I hated how the trans cooler had to come with the radiator. You have to CUT the trans cooler lines and then splice them later. As an engineer, I was shocked at this design. I know there are reasons for it but I was not impressed.

I don't have an oil cooler.

Austin


Is it an oil cooler or trans cooler in front of the radiator?

If you remove the front bumper, headlights and header panel, there are acces holes to the cooler to radiator mount. Then you can pull the radiator out by itself.
A little trickier when trying to put back together, but possible.
Front bumper comes off fairly easy. Granted mine was off due to a deer impact anyway.


It is a trans cooler.

I would have never thought to pull the bumper and other parts. Is the condensor in the way?

Too late for me but at least others will know if they search mustang swap or similar.

Austin


I only noticed it because my bumper and header panel was already off. But there are small holes, just big enough for a socket to fit through that allows access to the cooler screws.
Not like it's a piece of cake, but beats having to cut the cooler lines.
Condensor was not in the way.
Only problematic screw was the lower passengers. Undo it last as you can move the radiator and cooler around at that point.
It was harder putting the screws back in. But it was possible. Having the bumper and header panel off made the access to remove the disconnected radiator easier as well.


crankcase vent?

Does the 2002 have a crankcase breather?
breather.jpg

Or is the opening plugged like on the Mustangs?

What about the injector seats/insulators? The ones on the Mustang are different then the ones on the 2nd generation SOHC V6.


crankcase breather? No. The 2002 has a PVC that goes from the driver's side valve cover to the intake. So the explorer valve covers went onto the mustang motor as well.

injector seats/insulators? I remember pulling the mustang injectors/fuel rail and then installing my old explorer injectors and rail. There was no insulators and where the injector insertion area looked just like the explorer. The explorer fuel rail bolted right on as well. I had both engines side by side so it was easy to make sure all the parts were finding a home, one by one. My cell phone came in handy taking some quick pictures of thing on the explorer motor to ensure they went on the mustang motor the same way. I would also take some general whole engine shots as the progress went so if I needed to go back and look at something I didn't take a specific picture of, then it was easy to do. I didn't have to use that data but it was smart to have it.

I basically tooke the mustang motor, stripped it down to a long block with a water pump and crank pulley. Then I put on the explorer injection, valve covers, intake, exhaust manifolds, wiring harness, alt bracket (and whatever else is over there), seperator plate, flex plate and engine mounts. Had a heck of a time putting the engine in with the motor mounts so I pulled them back off. Tried again and it was much easier. Finally got the engine lined up with the trans and made sure the torque convertor studs were through the flex plate. I started the lower transmission bolts and then tightened the torque convertor studs. After that I lowered the engine in the bay as far as it would go. That pulled the transmission down which made the other transmissions bolts EASY to get to from the wheel well.

I also made sure the O2 sensors were hooked up while the engine was low like that. Then I lifted it to get the exhaust lined up perfect. Bolted that up and lifted the engine to fit the mounts in.

There were some "words" used while trying to get the engine to line up with the trans and then I had words again while trying to get the exhaust lined up. One of the studs on the exhaust manifold had gone into the exhaust pipe and if I lifted the engine it would just lift the exhaust. After 45 minutes, I finally got it unstuck. HA! I was ready to get done.

The rest was hooking the old explorer wiring harness back up.

After that I had no fuel pressure because the pump had gone bad in the year since it had ran. New pump and we were up and running. Then I had a pinched CPS wire behind the coil / PS pump bracket. Finally found that and it has been running like a top for a couple of weeks now. It is my wife's daily driver and my four kids are always in it.

The transmission is original and has 180k miles on it now. I changed the fluid twice on it in one week trying to make sure I get most of the old fluid out. It seems fine.

The rear end makes the same noise it has made since 80k miles. No big deal.

Wife and kids love that thing and it sure as heck beats a car note.

Austin


Mustang engine waiting to be stripped.

014_zpsa2f20886.jpg


Mustang engine stripped and ready for explorer parts.

020_zpsbbb4d7eb.jpg


No mounts with the engine low in the bay. Easy to reach the other trans bolts.

009_zps0b5d9af6.jpg


UG! The exhaust manifold stud was stuck in the exhaust pipe.
004_zpscc2956f6.jpg


Here is what I used to splice back the trans cooler lines.
018_zps6a112d70.jpg


Where I cut and spliced the cooler lines. I just used hose clamps over the splice.
019_zps8b43a152.jpg


Fuel pump swap.
068_zpsde975ce6.jpg


injector insulators

Thanks for the response and photos. On the 2nd generation heads the O ring on the lower end of the injector fits into an insulator/seal that is recessed in the head. There was a post by a 2nd generation forum member that swapped in a Mustang V6 and mentioned the insulator/seal was different. Most of mine were brittle and broke when I removed my fuel rails.
PsngrRail.jpg


Apparently, neither the 3rd gen nor the mustang 4.0 have the 2nd gen insulators.


Just wanted to check in and say my mustang swap engine is running like a top. I'm very pleased with the way it turned out.

Austin


Glad to hear it! Looks like a bunch of work.


Back
Top