Mn Mountaineer V8 SAS | Page 5 | Ford Explorer Forums - Serious Explorations

  • Register Today It's free!

Mn Mountaineer V8 SAS

Great work so far man. By chance do you have a build thread for your '83 ranger with the 351w, C6 and np205 ? I'm doing a '89 F-250 351w, C6 and 1356 swap into my '03 Sport Trac that I'm also SAS'ing and will be running 37's.

Thanks man!
I built that back in '92 before the interweb was popular. It is no where's near as nice a job as what i am doing with this one.


Join the Elite Explorers for $20 each year.
Elite Explorer members see no advertisements, no banner ads, no double underlined links,.
Add an avatar, upload photo attachments, and more!
.


I'm trying to figure out a good gear ratio to run on the road as well as the trial and rocks. I'll be running 37x12.5x16.5 tires on recentered H1 double beadlocks. I was thinking either 4.56's or 4.88's. Right now in the ST's 8.8 rear I have 4.10 stock gears but I think those might be too high for rock crawling and trail use. Originally I was going to run 5.13's with the 37's but that was when I planned on running the 4.0 and ST's drivetrain (transmission died and motors on the way out too, reason for V8 swap).


That upper shock mount was kind of how mine used to be and the cross member cracked front to back at the weld after about a year.


I'm trying to figure out a good gear ratio to run on the road as well as the trial and rocks. I'll be running 37x12.5x16.5 tires on recentered H1 double beadlocks. I was thinking either 4.56's or 4.88's. Right now in the ST's 8.8 rear I have 4.10 stock gears but I think those might be too high for rock crawling and trail use. Originally I was going to run 5.13's with the 37's but that was when I planned on running the 4.0 and ST's drivetrain (transmission died and motors on the way out too, reason for V8 swap).

That's going to be a tough one without an overdrive transmission. it's either going to scream going down the road or be racing over the rocks. I would consider a doubler in your case and then 4.56's from my experience. that'll put you at 3000 rpm at 70 mph which is livable for the 351w.


That upper shock mount was kind of how mine used to be and the cross member cracked front to back at the weld after about a year.

That's good to know i will keep an eye on it and work on a better solution when i have more time.


Ok, thanks for the advice. It's been hard to get a suggestion from someone that's ran this drivetrain setup on 37's or larger. I've been considering an overdrive trans but would rather do a doubler setup instead. Thanks again.


Sunday I started by swaging the power steering pressure hose and then silver soldered the bronco hose end into it.
1001.jpg

Then i used some 3/8" tube to make new return/cooler lines for it.
1002.jpg

I cut one tab down on the original cooler and remounted it up front.
1003.jpg

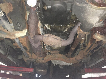
While i had the flaring tool out i came up with a plan and made the front brake lines for the axle. I cycled the suspension and there are no clearance issues.
1004.jpg

I still need to make some mounts for the tubing on the passengers side. I will do that with the axle out.
1005.jpg

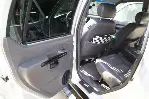
I decided that as long as i had the springs out i would flex the front and trim the fenders before i pull it all apart. It rubbed both front and rear.
1006.jpg

It looks like i guessed pretty close on the shock dimensions. Not quite completely compressed at full flex.
1007.jpg

The tire also just clears the shock at full lock. It also does not touch the radius arm.
1008.jpg

It almost rubs the frame on the front side and does rub the inner fender up front.
1009.jpg

I fixed that by drilling the bolt holes farther back and then flexing it back into place.
1010.jpg

The tire also rubbed on the front of the spring tower.
1011.jpg

Trimmed and all better.
1012.jpg

The front bumper is a different story. I think i am just going to space it forward until i can make the new one.
1013.jpg

1014.jpg

The last thing i did for the day was pull everything out and clean up so i can get a fresh start on the welding. I think I have a couple brackets to make for the brake hose and proportioning valve. Some plating around the steering gear and that should be it for fabricating. Oh and the oil filter stand needs a home yet. Paint and reassemble......
1015.jpg

So close i can taste it....


I am glad that this was the last steel to cast iron welding i had to do on this project. I think i finally have it figured out, well at least it's welded. I am not worried about this being a failure point. I way over did it.
1021.jpg

1022.jpg

Here you can see that the mount will not be a clearance issue for the steering even at full lock. I should be able to use it as a mounting point for the future steering ram.
1023.jpg

I welded in the shock and spring mounts next.
1024.jpg

The welds flowed really well for being done vertically.
1025.jpg

I still need to plate the frame around the steering gear mounts.
1026.jpg

With the frame still a little too warm to fit the plates i laid out the front end components and got them in primer.
1027.jpg

1028.jpg

I'm not really sure why but i threw some primer and paint at the passengers side frame and mounts.
1029.jpg

Then i painted the rest of the front end parts.
1030.jpg

1031.jpg

Everything looks better with a coat of paint to blend things.
1032.jpg

Oh and the forgotten picture of the completed rear suspension. It still needs correct bump stops and shackles but all in good time.
1033.jpg


My single-shear panhard axle mount has been welded to the original mount and axle tube for over a year now and is showing no signs of stress. I also have the shock mounts welded onto the inner "C"'s with a gusset/shock mount from Ballistic. I know Kirby did a full-size Bronco SAS for a friend that has the panhard mount welded directly to the side of the original mount. I have gotten mixed replies from people when I ask if the inner "C"'s and wedgies are cast or forged on the early Ford axles. Most people tell me they are forged like the radius arms. They seem to weld more like regular steel than cast to me, but I am no expert (judging by your build, you know much more than I about this). My axle is out of a 1976 F-150 and yours seems to be from 78-79 judging by the wedgies being casted into the tube ends, so they might be different. A rep at both Duff and BC Broncos said the 76-77 are forged. As many gussets as you have tying the mount to the axle tube, I don't think you will have a problem.


I was only able to work on it for a couple hours tonight but made good progress. I started by making this plate to strengthen the outer frame where the steering gear is mounted.
1041.jpg

The frame looks a little like Swiss cheese in that area.
1042.jpg

One more modification to fit the frame better.
1043.jpg

I welded the full perimeter of the plate and the two upper mounting boss's for the steering gear. I also made another plate to box in the lower mounting boss and the track bar mount.
1044.jpg

1045.jpg

I also boxed in the back side of the lower mounting boss.
1046.jpg

All cleaned up and ready for paint.
1047.jpg

Painted and done for the night.
1048.jpg


I was very close to pulling an all-nighter to get it put back together. But cooler heads prevailed after i looked at the punch list and i decided that there were just too many little details that need to be right. This doesn't mean i won't be working late into the morning being the holiday and i don't have any commitments till about 3:00.


Wednesday night i got rolling on putting the front suspension back in for the final time.
1051.jpg

I got the steering gear back in and didn't quite get the return line tightened.
1052.jpg
1053.jpg

Here i got the track bar and drag link back in.
1054.jpg

This is the maximum droop the drag link can handle before it tries to destroy the drag link end at the gear.
1055.jpg

1056.jpg

Springs, shocks and brake lines back on the axle.
1057.jpg

I tightened all of the mounting hardware, tie rod ends and then greased everything with a zerk. I also hooked up the oil lines to the engine adapter and ran them out between the new cross member and radiator. I stopped working on it at about 12:30 when i decided i was having a hard time concentrating on what i was doing.


Thanksgiving morning i started with finishing up the brake lines. I made this bracket for the front brake hose.
1061.jpg
1062.jpg

Then i completed the tubing from the master cylinder. I reused the flex hose section from the ABS pump for part of the front brake tube to allow for body flex.
1063.jpg

The next thing to figure out was the mount for the remote oil filter stand.
1064.jpg
1065.jpg

The only place i could find that had reasonable clearance and would not interfere with the installation of a winch in the future was off the front body mount.
1066.jpg

Originally i was just going to space the front bumper out for clearance but that was going to be ugly. So out came the sawzall to make it work.
1067.jpg

I had to trim the fog light mount a little to get the filter on but it worked.
1068.jpg

Now it looks complete.
1069.jpg

Every new build in my garage gets tested by doing a small brake stand!!!!
1070.jpg

The Traclock appears to work. Then i drove it up on a block just for giggles, it was too late to take it out for a test drive.
1071.jpg

According to my check list it is ready to go.
1072.jpg


Well after just 28 days it is back on the road as a totally different machine. I recheck all of the fluids this morning and bled some more air out of the brakes. Then it was time to drive it out the door for the first time with all new suspension under it. I took it for a few laps around the neighborhood and with no crazy noises or noticeable issues i drove it to work.
Boy does it look good!!!!
I am so happy i think i smiled the whole day.
1181.jpg

I took a run at the snow pile in the back of the shop but didn't get too far up with no front shaft. It did flex out some though.

1182.jpg
1183.jpg

Nothing close to what i know it is capable of.
1184.jpg

After work i went grocery shopping and when i came out i had to laugh at the Tahoe cowering next to it. I don't think i will have a problem figuring out where i parked it in the future, it used to blend in.
1185.jpg


Great job! It sure looks awesome.


This is my favorite thread on this forum so far. Awesome project.


Great job!! Looks great all done. cant wait to see some off road shots when you get a driveshaft in it.


Join the Elite Explorers for $20 each year.
Elite Explorer members see no advertisements, no banner ads, no double underlined links,.
Add an avatar, upload photo attachments, and more!
.


Thanks guy's!!!
It really does look better than i thought it was going to. I was afraid it wasn't going to look right on the 35's but it looks just right as far as I'm concerned. I sure got some serious stairs when i pulled into the junk yard today to get a new front drive shaft for it. On the way home i picked up 3 new joints for it seeing as i had to put the new flange on the c/v. Here it is all torn apart.
1186.jpg

This is the first c/v joint i have rebuilt, it wasn't as bad as i thought it was going to be.
1187.jpg

I installed the drive shaft tonight so i can go attack some stuff tomorrow with four wheel drive!!!
I put about 150 miles on it today with no problems so far except the rear shackles are indeed binding on the frame which is a bit annoying. I am planning on making new shackles in the morning. I also need to get the speedometer correction module wired in, it reads about 55 at 65mph according to the nav. unit.


Back
Top