Power Steering Cooler Replacement | Ford Explorer Forums - Serious Explorations

  • Register Today It's free!

Power Steering Cooler Replacement

Friborage

Member
Joined
July 16, 2010
Messages
40
Reaction score
0
City, State
Hazleton, PA
Year, Model & Trim Level
2000 XLT 4.0L
2000 Explorer 4.0L XLT

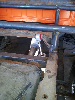
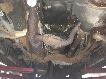
I've got a leak in my power steering cooler, it looks like it's coming from the seam where the pipe comes out from the fins on the inlet/outlet side.

I bought an aftermarket one, but man I cannot figure a good way to mount it with those stupid nylon rods they include. A replacement Ford cooler with the bracket is $150, screw that.

So, Im left with two paths.

Has anyone replaced their cooler with an aftermarket one? How did you mount it? Any pictures?

OR

Is it safe to just bypass the cooler? I have an unused piece of brake tubing in the garage from an old project, I was thinking of just bending it into a U and clamping the hoses down on the flares in the line, it would be plenty tight. I just keep thinking.. why would Ford put it there if it wasnt necessary, right?


Join the Elite Explorers for $20 each year.
Elite Explorer members see no advertisements, no banner ads, no double underlined links,.
Add an avatar, upload photo attachments, and more!
.


I came up with my own solution with a little "engineering", I'll do a quick write up when I get a chance to take some pictures in case anyone in the future has the same question.


i used the aftermarket cooler, left the stock one there and stuck the white plastic things right through it. Aftermarket cooler is sitting in front of the stock one. Its been good for about 8000 miles so far - no leaks!!


Another option?

Third option... How about getting an original equipment unit from a salvage yard?
I would NOT bypass the cooler. That might make this straightforward project quite expensive.... Good luck!


Alright, so here's what I did with this aftermarket Imperial ps cooler from Advance.

It's exactly the same dimensions as the factory one, minus the mounting bracket, which was my problem. I was trying to decide how to best mount it, so here's my process.

First, I used an 18mm wrench to unbolt the factory cooler from the rack, two bolts. Mine were very easy because they've been soaking in lubricant for months, yours might be harder if they were dry. Spray them up with Liquid Wrench and let them soak for a few hours. Get a wrench on them and tap it with a hammer, they'll go.

You wont be able to move the cooler much because the line to the rack is very short and very stiff. However, the little that you can move it was very important to being able to reach the spring clamps with pliers.

Second, I used my vacuum gun to suction out the reservoir as much as I could, then I disconnected the line from the bottom of the reservoir from the top. I figured this would minimize my chances of taking a ps fluid shower.

Second, I first undid the top clamp on the cooler because it was easier to get to with some twisting of the cooler. After it was off I tossed that line because the new cooler came with plenty of new hose. After the line is off, you can spin the cooler around a little so it's top is facing the rear of the vehicle. That makes it way easier to reach the bottom clamp prongs. Once you have that bottom clamp off, the hard part is over.

Now, installing the new one. Basically, I took the old cooler and snapped off the end of it with the loop and that side of the mounting bracket. I just used a chisel and hammer and brute forced it. I wasnt worried about damaging it, all you need intact is the loop and that part of the bracket.

547A647A-1846-4681-9FC5-A79F929A6CB9_zpsgrmspqfl.jpg


Then, I used the original nut to fasten that broken off section of the cooler to where it would have gone normally. This will form the mounting point to the passenger side of the cooler. The aftermarket cooler came with two little cushion pads. Basically I put the new cooler in front of the broken piece we bolted on, put those cushions in between as a buffer, and then zip tied them together.

8FD47FC3-E1AE-4834-8514-84B6F1C557A3_zpszz17yv2o.jpg


AF650CA9-4512-487F-98EA-F91ED883ED48_zpsmsibsfp2.jpg


The other side has plenty of support from the return line out of the rack, it's very stiff, my main concern was supporting this loop side.

5524792E-B6B9-4CB0-94F8-5D8432169588_zpsrfmbuorh.jpg


You can see where I messed up the fins because I forgot where I was gripping the thing when I tried to push the hoses on. Dont do what I did!

I refilled the reservoir slowly once I had all the lines reconnected (they were pretty tight going on) so I didnt trap any air inside. Take it for a good drive, do some sharp, turn-to-lock turns. Check for leaks when you get back in, all done!

I've had it on a few days now, leak free so far!


Back
Top