410Fortune - 96 5.0L XLT refurbish (making 1 great Ex from 2) | Page 31 | Ford Explorer Forums - Serious Explorations

  • Register Today It's free!

410Fortune - 96 5.0L XLT refurbish (making 1 great Ex from 2)

Okay here we go 09/13/05

In march of 05 I rolled my new to me 96 5.0L AWD 86K miles, just after driving it back to CO from OR and putting $1000 into it. You see I bought this truck from my brother with 86K miles on the clock, it would not pass emissions for him and he drove it into the ground. This was the same explorer he bought new when I got the BII from him for $500 12 something years ago.
Well I payed him $500 for the green Explorer and $1000 later (shocks, tune up, 02 sensors, etc) it was in primo condition. Then I rolled it in an ice storm...
RIP 96 EB:
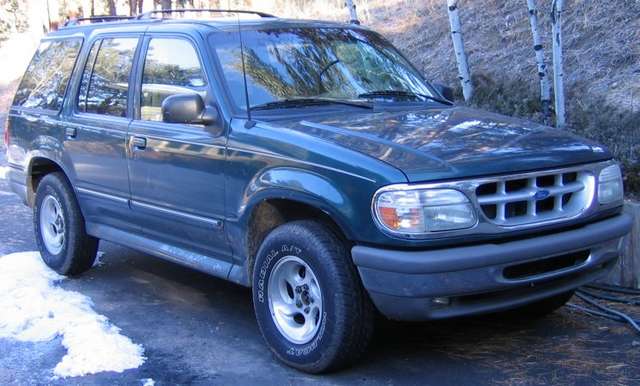
2893expldr-med.jpg

exafter.jpg


So in April my buddy Brett found this great deal here in town for a 96 XLT 5.0L AWD, $900 is what I paid, it has front end damage and air bags deployed, picked it up from a fellow board member:
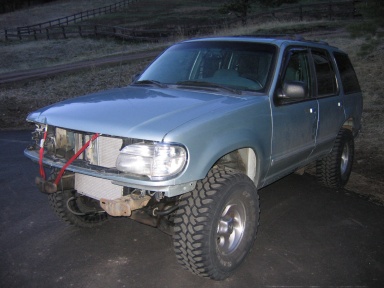
2893drives.jpg


After the wreck the owner put in a new radiator and battery so it could be driven.
The truck has sat since April of this year, untouched, until this morning.
I have been preparing my new garage to accept my new project, and well she's ready, so today is the day I am driving this truck home.
To my disbelief this truck had no problem and started right up after sitting since April!

Here are some "before" shots:
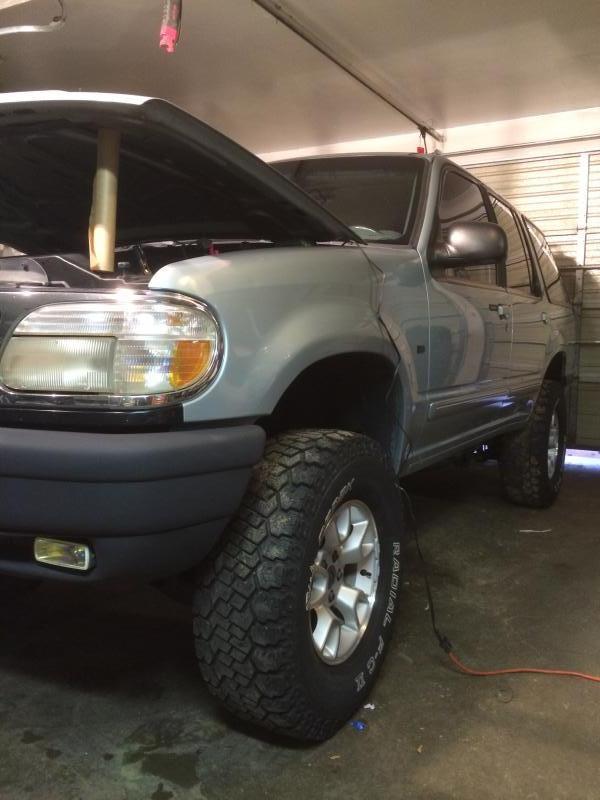
Font end damage, sagging T bars, new rad:
beforework1.jpg

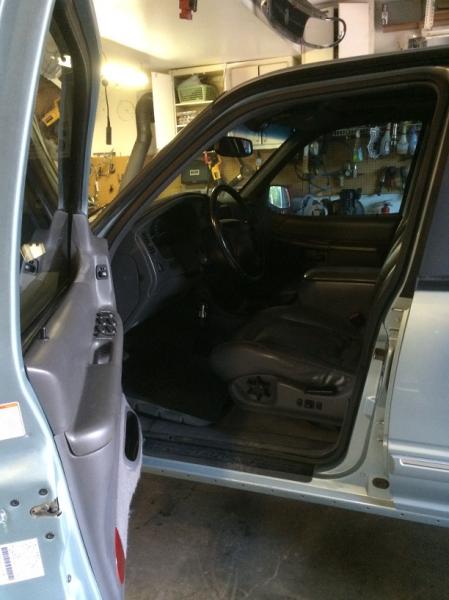
No airbags, interior is in great shape! (just needs TLC):
interiorbefore1.jpg

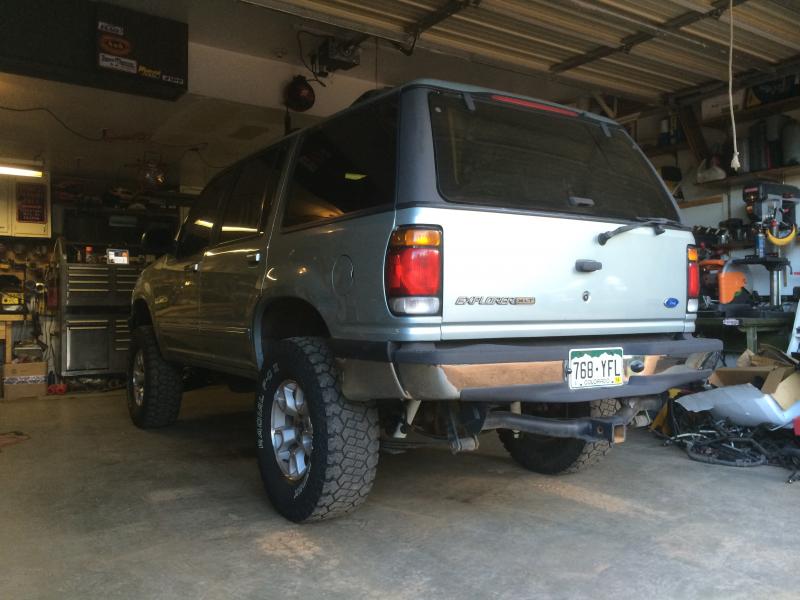
Rear:
rear.jpg

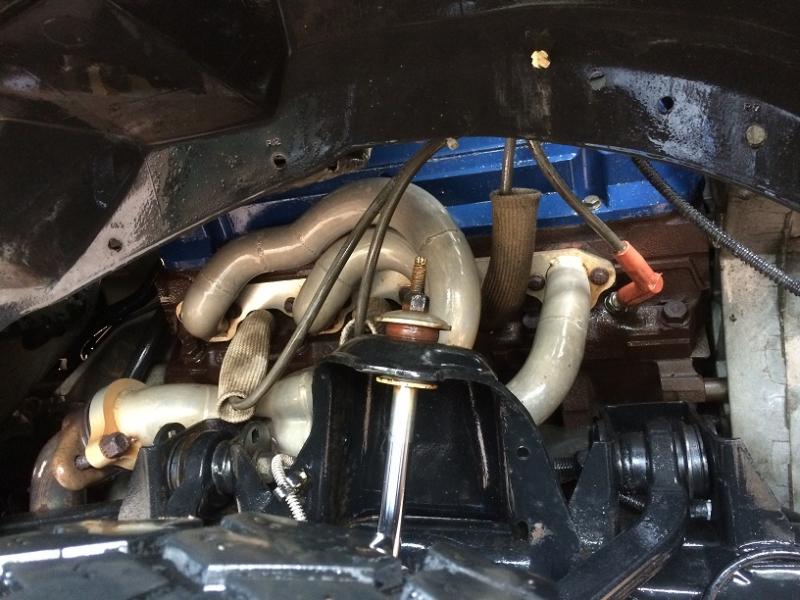
It has some "issues". Like steering extension is rubbing the manifold (3" body lift), no dipstick:
dipstickmissing.jpg

No fan, No ac condensor, and no trans cooler:
nofan.jpg


This is a 1996 5.0L AWD XLT with 151K miles on the clock.
Truck is loaded with sunroof, leather, tint, etc.
Previous owner installed 3" body lift and 33" tires.
Alot of things have been "rigged" but it runs and drives fine!

I will be completely removing the front clip, everything except the frame and inner fenders will be cut out. The entire drivetrain will be pulled (too many miles), the entire front end will be fixed, new bushings, bearings, new steering rack, torsio bar twist, shocks, brakes, etc.

the body lift will be fixed and or reduced to 1-2". the rear bumper will be re-located.

The drivetrain from my green 96 will be installed into this truck, along with alot of other "donor" parts.

The front clip will then be replaced using factory metal replacements, welding in new rad support, and then prepped for paint.

truck needs new windshield, airbags, and alot of TLC.


My long term plans for this truck include: "long travel" 4x4 IFS suspension lift (dixon bro's Camburg, etc). Stereo, tow package, SOA, low range T case, and custom everything else.
This is my "other" baby, and in keeping with tradition she will have the heart of my brothers old truck, just like the BII was his and run into the ground, so was "part" of this one.

Still no car payment after 12+ years.


Join the Elite Explorers for $20 each year.
Elite Explorer members see no advertisements, no banner ads, no double underlined links,.
Add an avatar, upload photo attachments, and more!
.


rackprep3.jpg


I have worn out bushings in a newish 2 yr old rack. Is it possible to replace the bushings without removing the rack itself? Can I just lift it up and replace them? I'm hoping I don't have to remove everything just for the bushings.

Thanks in advance :salute:


Join the Elite Explorers for $20 each year.
Elite Explorer members see no advertisements, no banner ads, no double underlined links,.
Add an avatar, upload photo attachments, and more!
.


I'm guessing you loosen the nuts, take out the bolts, unbolt the cooling pump from the rack, lift rack up, and just pry brushings up and out.


Any pics of her finally painted?


Any pics of her finally painted?

I doubt we'll see them if it did get finished. He hasn't been around much at all in the last couple of years since he got married and had a kid. It looks like it's been a month since he's logged in to the forum.


HID's?

Now after some testing of the wiring and the new lights I decided to make a few changes.
I wanted the flat light bar (above the projector) to illuminate yellow and flash with the turn signal
So I installed some 194 yellow marker bulbs:
yellow.jpg


and I made the following wiring changes:
wires1.jpg

This is the stock (truck side) light socket for the top turn signal

It attaches to the new light here:
mod1.jpg


yellow bulbs go here:
mod2.jpg


Now to cut the wires:
wirecut.jpg


brown CUT WIRE from truck now becomes power for halo's (parking lamp 12V+ feed)
mod3.jpg


1. Green from new light wired to brown, truck side (now + for halo ballast, from above)
2. Black from new light tapped into black ground (- for halo ballast, from above)
3. brown power feed to new yellow bulbs tapped into white/green (signal flasher from truck)
---ONLY DO #3 if you want your flat bar to be a turn signal not parking lamp as intended from manufacturer---
signalwire.jpg


now to fit the light
Wires route in prep for light (for best fit), ballsts go through the holes the wires are coming from
wireroute.jpg


light wired in prep for fitting:
lightwired.jpg

Note bluew socket on top right, red and black wires get pushed into the light and tan colored plastic fitting is twisted into the housing
turn signal bulb also gets pressed and turned into housing
not pictured, not lots of room to work here

NOW the grill goes on, it is not easy to get the lights through the grill and grill around lights, very carefully here:
grillscrew.jpg


Then the lights go in, press in 3 places like factory side marker and two top screws hold them in place
grill installed
CIMG0054.jpg


ballast is hung, I dont trust 2 sided tape behind the grill for long:
ballast1.jpg


I removed the battery and also zip tied the other ballast in place as well as loose wiring

installed!
CIMG0056.jpg


Oops fitment issue with grill:
fitbefore.jpg


the humps on top of the new lights dont clear:
problembumps.jpg


cut some plastic away with air grinder, careful here:
problemgone.jpg


Perfect fitment, I am impressed with the engineering in these new lights ($$$$$$$):
fitafter.jpg

sidefitafter.jpg


Bulbs are Sylvania Extra Vision, high and low beams (h3 and H1)
LIGHTS HAVE NOT BEEN AIMED yet

Lows:
lows.jpg


Highs:
highs.jpg


halo's:
halos.jpg


Video of the functions, note the yellow bulbs were not installed yet here:
http://fortuneelevatorconsultants.com/XLT/lights/xltlights.wmv

do you have a guide on how to install hids on these headlights?

thanks and nice work!


do you have a guide on how to install hids on these headlights?

thanks and nice work!

Same here. i would like to no how as well?

thanks,
Alex


Same here. i would like to no how as well?

thanks,
Alex

Don't hold your breath, 410 has not posted in a long time. Rumor has it that after hitting the Lottery he's gone all green getting rid of all his fossil fuel trucks and is now living the sweet life in an undisclosed location.
Just look at the date he last posted.


Don't hold your breath, 410 has not posted in a long time. Rumor has it that after hitting the Lottery he's gone all green getting rid of all his fossil fuel trucks and is now living the sweet life in an undisclosed location.
Just look at the date he last posted.

It's too bad Jaime doesn't come on the board anymore, his posts are always so informative or at least entertaining. Good guy on and off the board:cool:


Don't hold your breath, 410 has not posted in a long time. Rumor has it that after hitting the Lottery he's gone all green getting rid of all his fossil fuel trucks and is now living the sweet life in an undisclosed location.
Just look at the date he last posted.

lucky man!

aight... thanks,
Alex


It's too bad Jaime doesn't come on the board anymore, his posts are always so informative or at least entertaining. Good guy on and off the board:cool:

I have nothing but praise for him. He just had a way to keep you going.
Never a bad word.


Holy cow you guys are awesome

I took the headlights and tail lights back to stock before I sold her
I never did paint because I found a truck with same front clip and paint code in matching condition and bought the whole front clip

Its almost 2019 and I find myself back on EF!!! I do not however still own the 96.
45 years young now, I have a wife, a son, two stepsons and their families including two grandkids. We all moved to Idaho, even my parents are up here now too.......

I had to sell my beloved 96 XLT in 2015. I simply have tooooo many projects and she was just sitting, no insurance just getting moved around the lot. (bronco II, FJ cruiser, F350, Excursion, E350, and 7 Polaris machines)
So I parted ways with the old 96, but not until after I made her damn near perfect!

I found a front clip from same paint code 96 and installed that
I swapped the entire interior from the stock wedgewood blue to the very nice dark grey from a 2001 Explorer. And I do mean the entire interior, took 4 days.
I installed 4.10 axles front and rear from a 99 sport that only had 97K miles on it, 4.10 limited slip rear
I replaced the entire braking system including the knuckles rotors calipers from the later sport trac (larger rotors), booster and master
She had all new suspension, ball joints, bushings, etc
She had 2004 style Ranger wheels and 33" tires
Here are some pics from getting her ready to sell

171_191417_170000003.jpg


171_191415_000000003.jpg


171_191415_010000004.jpg


171_191417_150000001.jpg


171_191417_160000002.jpg


171_191417_150000000.jpg


171_191415_000000002.jpg


171_191415_000000000.jpg


Don't worry I still build trucks, lots of them. In my absence I was working in the shop processing explorers. Basically everyone around here drives an Explorer or Ranger of some sort and building them /keeping them on the road grew into a side business.
I do some diesel / full size stuff now, alot of off road stuff like UTV and snowmobiles, but we still have a family business based around Explorers and Rangers.
We moved from Colorado to North Idaho in 2018, I have been setting up the new shop for almost 12 months now. Our new place is completely off grid and I get to go 4wheeling every time I leave the house.
We have built a few trucks already, even this first year here.........
I have a 99 Ranger and two 2001 sport tracs all getting 4x4 5.0 conversions right now....so more build threads are coming!!


wow blast from the past. Great to hear!!!


first I have to remove the inner tie rods from the new rack, uner teh boot you will find your threaded nut:
rackprep1.jpg


This is how I got them loose, you need the prybar for leverage, my big ass mexican speed wrench works great for these SOB's:
rackprep2.jpg


BONUS! new inner tie rods for next time!

press the new bushings into the new rack (came with it):
rackprep3.jpg


next loosen the engine mount bolts and jack the engine up a bit:
(drivers side bolts, real easy to get with no header)
rackprep4.jpg

passenger side I un did the engine mount bolt from the underside of the x member

block of wood on oil pan:
rackprep5.jpg

rackprep6.jpg

No need to go too far! dont let the engine hit the firewall or fan hit the radiator!

attach the hydro lines and intermediate shaft to the new rack:
(top = low pressure out to cooler, bottom = high pressure from pump)
rackprep7.jpg

rackprep8.jpg


Now to install the beast:
turn the steering shaft all the way to the passenger side and slip the drivers side into place, steering shaft first:
rackin1.jpg

rackin2.jpg


now route the high pressure in hydro line up around the AC compressor, turn the steering shaft all the way to drivers side and slip then pass side of the rack into place:
rackin3.jpg

You can see how I access the rack mount stud bolts, 24mm socket I believe

mount the PS cooler and plumb the lines:
rackin4.jpg


connect the inner tie rods on both sides:
rackin5.jpg


both sides done, rack and pinion installed!:
rackin7.jpg


Thanks Guys, that is an awesome step by step instructions. The pictures are very clear . I'm gonna attack this Saturday. I'm sure it will have to refer to this info. Wish me luck .


aww 31 pages of input

d413fcde7aeb560deac50314791d3392.gif


Funny you posted Johnny 5
"no dis assemble" HAHAHAHAHA

I miss this truck sometimes that is for sure! Can't keep them all!


Back
Top