Courtesy Lights - Rear lift gate/window | Ford Explorer Forums - Serious Explorations

  • Register Today It's free!

Courtesy Lights - Rear lift gate/window

Scorpius68

Member
Joined
April 4, 2019
Messages
36
Reaction score
9
Year, Model & Trim Level
1993 Ford Explorer
So I noticed the rear hatch when opened no lights came on.
Pulled the panel and found the little courtesy switch on the drivers side is bad. (removed the connector, jumpered it and lights came on ). - part ordered.

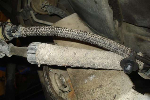
Then someone said what about when you just open the window :) sweet jesus. so yea. there's a switch there also, though it looks a bit different. Pulled the connector (2 wires), jumped it and no dice. Looks like the connector before it (4 wires) splits to here (2 wires) and the other two appear to run perhaps to the window defrosters. (sorry it was dark outside)

Any ideas on what else and where to check? I would surely have expected to receive power at that connector at the window lock.


Join the Elite Explorers for $20 each year.
Elite Explorer members see no advertisements, no banner ads, no double underlined links,.
Add an avatar, upload photo attachments, and more!
.


I'm in the manual looking at this. There is a switch in that general area that disables the rear wiper. I can't say for sure because there is a discrepancy about this being for the tailgate or just the window, but the switch I am taking about has two wires, one is White, the other is Black with a Pink stripe (on the '94). Pictures would help.


Unfortunately, the dome light does not come on with the just the rear glass open. I've thought about adding this to my vehicles. This and not being able to unlock the rest of the vehicle from the rear hatch area are some of my complaints with first gens.


Here are some pics. Hopefully this explains it. Now i wonder though, post above says lights dont come on with just rear glass open. then what’s the switch at the lock for? I see no lights on dash for door ajar (is there such a thing on these?)

F9325EA0-1FC5-4DB6-AB3C-8052EC371A6C.jpeg
38C800EC-7A45-451E-AB5E-4DEAD042D661.jpeg
03AE40DD-A5A7-4E09-B1E6-D33EEA06C3CE.jpeg
71D0AABB-6C83-458D-856B-C7F3B7F2F494.jpeg
061F65F7-D326-4A03-805D-FF142B0803E9.jpeg
08B67160-E26E-46D3-973F-26C9CD42AB88.jpeg
13379990-C585-4124-BC59-03BB4FBF9410.jpeg


I'm pretty sure this is what you're looking at. I believe with a relay and some ingenuity, one could utilize this switch for dome light control.

Does your truck have keyless entry?

IMG_20190408_202655096.jpg


I hope these help for identification. If you need anything else let me know. The first picture is from my Navajo books.

IMG_20190408_203656942.jpg


IMG_20190408_203830161.jpg


I hope these help for identification. If you need anything else let me know. The first picture is from my Navajo books.

You’re AWESOME! So....i can read these much better and with a sigh of relief i know know this is indeed a switch, its just not for lights as previously mentioned. What it is for and I confirmed is a wiper interrupter in case you twist and pop the glass while the wiper is going!

What book is that? It might come in handy.


It's the factory EVTM, Electrical & Vacuum Troubleshooting Manual. It shows a breakdown of all the vehicle circuits, options etc, for a specific model and year. I found some of mine on ebay. You may luck out and score some schematics as well. Those are much more rare though. Its been very handy!


Now though....i’m Thinking...i bet i could tap the cargo door switch for the dome light and find a pressure switch and tap a hole somewhere so that it triggers when the door or the glass is opened. :)


Make sure you get one for your year of vehicle. 91-92 explorers are similar, 93-94 are close with differences in the emissions systems.


Now though....i’m Thinking...i bet i could tap the cargo door switch for the dome light and find a pressure switch and tap a hole somewhere so that it triggers when the door or the glass is opened. :)

I'm kinda thinking the same thing!


I'm a big fan of the EVTM manual. I bought one on ebay, lost it after 5 years, and immediately bought another one. It has easily paid for itself... both times LOL

You may find the EVTM on sale as part of a 3-volume set, the others covering the powertrain, body, and chassis. I have not used the other volumes much. I mean, if I need to replace a water pump, I don't need instructions... the Explorer is a very straightforward repair. There are quirky unique things like the front hubs, but the info on this message board and YouTube videos are far better than the factory manuals, which tend to have convoluted procedures (do 5.22.3, then 5.3.21, etc..).

The EVTM, though, is a masterpiece. You get specific wiring diagrams in logical blocks, as you saw in those pictures earlier. But even better, there are reference pages for each connector and component and it's physical location on the vehicle in pictorial diagrams. That's a lot of words, let me give you a real example:

Your fuel gauge stops working. This is almost always the sensor/float part of the fuel pump, but you would like to know this for sure before buying a new one. So, you go to the EVTM Table of Contents, and find Gauges: Fuel... 62-3. On that page you will find a note that the sensor is 145 ohms full, 22.4 ohms empty. That alone is a huge gold nugget. Then, you see the wire from the sensor to the gauge cluster is Yellow with a white stripe... and goes through 2 connectors on the way. Next you see there are notations for the connectors that will take you to pictorials in the back of the manual showing you exactly where those connectors are, and what they look like. Now, the first one is part of the fuel pump pigtail assembly which can be hard to get to. But the next place that wire goes is under the hood, right under the master cylinder. So, you can probe that easier connector to verify the sensor.

The other real gem in the EVTM is that it gives you test procedures for the more complicated switches... the multi-function switch, etc... where you have it in your hand and can use a continuity tester. The manual shows you the layout of the connectors, and which to measure with.

You may not find the EVTM manual for your year on ebay the first time. Keep checking... dealerships are regularly selling off their old repair manuals.


Yes, they are sweet! I have managed to find a complete set of manuals for all the 91-94 Explorers as I own at least one of each year. Having this information has been invaluable.

I also lucked out and was able to get wiring schematics for each year explorer as well as my aerostar and Navajo. Where the EVTM is a diagram of specific circuits, the schematic is a true roadmap to the vehicle's complete electrical system. It shows everything that is and could be installed in the vehicle.

The service manuals are useful, but with these trucks most repairs are straight forward as previously mentioned. They are interesting to look through though to see the different combinations of options and other features that were available at the time. I look at the pictures more than anything to see how something comes apart and get torque specs.


So found three on eBay and have one on the way. Can’t wait. Already found my next item that’s just ticked me off. Lol (my list of little things to fix keeps growing)
So got a replacement rear speaker in the cargo area running off the amp. Hooked it up. Nada. Pioneer deh-21001b head unit. I I suspect there must be another connector behind the radio and somehow I need to wire it into the radio. Right now as I recall the radio has a wire kit that connected directly to the radio then plugs directly into the original connector. But I “think” I recall seeing a second connector.
My angst is I played he’ll getting the radio out since I don’t have the radio removal pins that come with the unit. It wasn’t an easy task just to get the trim off for access to the instrument panel. Anyhow searching this forum now, surely someone’s dealt with a new radio and this amp/cargo speaker before :)


Ok, I may not explain this very well, Explorer audio is not a strong suit...

Many, if not most 1st gen Explorers used a separate amplifier, which is mounted behind the plastic over the right rear wheel well. You are talking about what I think is the subwoofer in the very rear right, and that makes me think you must also have this separate amp. So, the factory radio feeds low-level signals to that amp, and then on out to the speakers, and I guess in your case, the sub-woofer.

I looked up your Pioneer DEH-21001B. It has separate outputs so you can either use it's internal amps (50W) or low-level via the RCA connections. It does not have an amplified sub-woofer output.

So, the decision at this point would be to:
1) Use the Pioneer amplified outputs and somehow add a sub-woofer with it's own amp (I think they make these?) If you do this, you need to jumper around the factory amp, and there are pre-made harnesses for that.
2) Use the Pioneer low-level RCA connections and match the wiring to the existing factory amp.

But, I think maybe your first move might be to go visit the audio section of these forums and check out the reference threads:

Explorer Audio & Navigation

I bet everything you want to know is there already.


i think i have a solution. The amp i am going to assume works, as many many moons ago i removed the original speaker because it was torn. Pretty sure amp hasn't been toyed with.

This is the radio installed (aftermarket) and from what i recall there was a wider connector to the stock. (more on that below under the 'harness link). The good thing is someone installed the conversion wiring that goes from the factory adapter to the larger square pin area ont he back of this radio unit.
Radio (DEH-12001b)
pioneer deh-21001b - Bing images

Woofer - got this one, but i recall in another thread someone mentioned the 4ohm might overheat the amp, that the factory delivered was 6hm? will test to get it working as is...then order a 6 ohm to be safe once my 'plan' works (fingers crossed)
NEW 6.5" Subwoofer Speaker.Car stereo six.inch woofer.4ohm.Mid BASS.6-1/2".6.5in | eBay

Harness - This one say's it fits. So the square connector. No problem here, pretty sure that connector is loose in the dash, i'll just plug this right into it, then use the Y connector in the below link to drop 4 down to 2 RCA points on the radio. Now...the only question is hopefully this is all i need to do. I would assume the amp is already powered by the connector harness already attached to the radio, all that is lacking is sound which the square connector should resolve.
CAR RADIO STEREO PREMIUM SOUND WIRE HARNESS INSTALL PLUG AMP INTEGRATION 700604540246 | eBay

Harness 4 points of RCA down to two to connect to radio
KnuKonceptz Klarity RCA Cable Y Adapter 1 Male to 2 Female RCA Splitter Pair (2) 817069015797 | eBay


Got my new eBay lights installed. Can see so much better now. Now just need a tool to adjust them, I tried the putter sides for up/down got it up some, hope those cheap gears don’t turn out to be a pita.

Bled brakes, now no more sponge pedal.

Got my Courtesy switch installed, now have light when rear deck is opened yeah!!!

Also just saved myself a bundle on new rear window seal. Playing with the thought of a super strong glue I found the seal has a u shaped piece of metal in it for clamp strength.
Used pliers to squeeze it shut then rubber hammered it back on! Now it sticks and doesn’t fall from the corners! Yeah!!!!

Only thing left to tinker with for now is oil change and getting that subwoofer working.

Well lights adjusted and probably just going to pay someone to convert the ac system since it’s already leaked the r12 :-(


Good deal. It's always nice to get things done. This week has been very productive for me as well.

That sucks on the A/C. If you ever decide to try to tackle it in the future, do some reading on it. It's not near as complicated as it seems. I may search here to see if anyone has done a conversion thread yet and if not, I might do one. I'm gonna convert my dad's 93 XLT in a few weeks, so it would be a good opportunity to start a ''how to' thread.


I’m interested in doing it myself. But looking very briefly a reman compressor is $200 the ac gauges another $100. I’m sure there’s more. If I’m over halfwAy there in doing it myself.....well a little extra to make someone else make it right plays into the diy for me.

But hey I’m up for tackling it just need good list of supplies and a diy specific to my vehicle so I don’t fudge things up.
There there is that little issue of getting the remaining r12 out somehow without releasing something that might really mess stuff up that it gets on.


Join the Elite Explorers for $20 each year.
Elite Explorer members see no advertisements, no banner ads, no double underlined links,.
Add an avatar, upload photo attachments, and more!
.


Yeah, that's the tough part. The only thing I don't have is way to capture the refrigerant. Each time I've worked on these, the system had already purged itself through leakage. I don't think my vacuum pump would have the balls to transfer it to a cylinder even at low pressure.

I really hate the thought of releasing that stuff into the air even though it does it on it's own through leakage anyway.

Rockauto has compressors new for around $125. You would need the receiver/drier as well, about $20. If you get parts for a 94, you don't have to covert the fittings. You'd probably want to replace hoses though so that would add cost.


Back
Top