Brian1 91 XLT 4x4 | Page 15 | Ford Explorer Forums - Serious Explorations

  • Register Today It's free!

Brian1 91 XLT 4x4

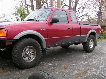
Brian1's 1991 Ford Explorer
Moab Edition

Drivetrain:

4.0 V6
BrianBuilt intake adapter with AEM Dryflow filter and Pre-filter
Dynomax cat back exhaust with
High flow cat
Spectre 3" Aluminum intake
BBK Throttle Body
5 speed manual trans With custom transmission mount
4.10 gears
Front D35 TTB, locked
Rear 8.8 with disc brakes, Powertrax No-slip locker, welded tubes to diff, Riddler Cover
Warn manual hubs
Manual BW1354 Transfer Case (swapped in)

Chassis & Suspension:
Skyjacker 2" coils and add a leafs
1" custom aluminum body lift
Quick disconnect front swaybar
Bilstein 5125s 10" shocks rear
Bilstein 5125s 10" shocks front
F250 Shock Tower Conversion
Custom Extended Radius Arms


Interior:
PRP daily driver seat
Cobra CB
E-track cargo tie down system
Lowrance HDS 5 Baja GPS for offroad explorations
Yaesu FT2800 HAM Radio

Wheels & Tires:
LT265/75R16 Dick Cepek Trail Country EXP tires (currently, Cooper STT and BFG MT in the past)
16" GenII teardrop wheels, formerly had 15" stock Gen II teardrop wheels

Misc:
Warn 9000lb multi mount winch with synthetic rope
Onboard Air using Viair 480c compressor and 2.5 gallon tank
Front diff guard from BrianBuilt
Rear u-bolt skid plates and raised shock mounts from BrianBuilt
Raised axle and t-case breathers
Custom Bolt-on Rock Sliders (version 2.0)
Custom Winch bumper
Custom rear bumper with tire carrier
9" Vision X ADV Cannons LED Lights (Old: 9" import LEDs and 7" HID Lights)
Reverse light
Pro-comp extended brake lines
9007 Headlight conversion
Fuel Pump Access Panel
Replacement Door Weatherstripping
Dual Batteries with auxillary fuse block
ARB Awning
ARB Fridge
Maxtrax Recovery Boards
Trasharoo Spare Tire Trash Bag

Project Super Stock

IMG_20170310_150924626_HDR.jpg


IMG_20170311_133734236.jpg


IMG_20200825_162657029.jpg


Join the Elite Explorers for $20 each year.
Elite Explorer members see no advertisements, no banner ads, no double underlined links,.
Add an avatar, upload photo attachments, and more!
.


Saw that posted on Facebook by 4Wheel magazine. Couldn't believe I was seeing an Explorer of any kind on that rag, so I checked the author and low and behold it was Brian!

Very cool, sir! :salute:


Join the Elite Explorers for $20 each year.
Elite Explorer members see no advertisements, no banner ads, no double underlined links,.
Add an avatar, upload photo attachments, and more!
.


I changed out my wheels for some 2nd Gen 16" ones after returning from Overland Expo. I cut out the front center caps for my hubs on the lathe and they are a perfect fit, flush with the hub face.

I took a drive on a back road through the local mountains to meet up with a 4x4 group the day after I got them put on. I like the look of these wheels much better!

IMG_20190523_133442372_BURST000_COVER_TOP.jpg


IMG_20190523_134201798.jpg


IMG_20190530_173346073.jpg


LRM_EXPORT_842770179696518_20190601_164810695.jpeg


LRM_EXPORT_842753606741482_20190601_164754122.jpeg


Much nicer.

What size tires are you running now?


Now that you are running 16" wheels, you can upsize to 285/75-16.

Of course, you might want 4.56 gears, too...


Those look very nice Brian. I am still working on getting mine mounted. as of now I have my Cookie Cutters. I have a set of 15 inch 2nd gen Tear drops that I will be using. I also will have a 5th one for a spare. I really like the look of the tear drop rims.


Very nice, I bought a set of those too long ago.

BTW, avoid using aluminum wheels as a spare, if it sees any road salts. Those will eat the clear coat off after a few years. You could keep it waxed under the truck too I guess.


It has been a year in the making and I am happy to report I have a new engine in my Explorer along with some other upgrades!

A little over a year ago I pulled out an engine from a parts Explorer to do a minor rebuild and eventually swap into mine as the valvetrain noise was getting worse and it was using coolant. The engine was relatively low mile but was neglected the last few years before I bought it and was filthy inside and so commenced a full rebuild. I'm not going to go into full details but here is a little summary of the new stock rebuild

  • New Melling high volume oil pump
  • New stock cam for manual trans spec
  • New Timing Chain set, tensioner and guide
  • NOS OEM Ford Lifters and all new Elgin pushrods and rockers
  • New Aftermarket heads with new valves and springs
  • Block bored 0.75mm over with new pistons and all new bearings done by local machine shop
  • New flow-matched yellow Bosch 4-hole injectors
  • New waterpump, crank balancer and all new sensors
  • Fresh coat of high-temp Ford Gray paint
DSC_9037.JPG


I pulled the old engine out at the start of the Labor Day weekend and started to clean the engine bay and swap my powdercoated parts over to the new engine. I also transferred the engine harness over since it was in better shape than the donor. I took the time to rewrap the engine harness and I also sand blasted the exhaust manifolds and gave them a coat of high-temp black paint. During the swap I also installed an entirely new A/C system since it hadn't worked in 15+ years. Also while the engine was out I installed a power steering cooler from a V8 2nd Gen with some mods to the bracketry.

IMG_20190830_131850064.jpg


IMG_20190830_160802292.jpg


IMG_20190831_120101691.jpg


IMG_20190904_160555043.jpg


In anticipation of installing the valve covers I designed my own version of the valve cover reinforcement rings and cut them out of 1/4" steel. It took many hours of design time starting from scratch and 9 different prototypes before I was happy with the fit. The thicker metal will help seal the thin valve covers properly and prevent warping around the bolts as it is a continuous clamping force all the way around the entire valve cover. I will be offering these for sale including new hardware for anyone interested just PM me.

LRM_EXPORT_247134229605880_20190901_210925571.jpg


LRM_EXPORT_247138580402408_20190901_210929922.jpg


I got the engine installed and it started right up by Wednesday. I charged the A/C Friday and it is nice to finally have cold air again. I am still in the break-in period but I am looking forward to getting back out for some adventures since it has been much too long!

DSC_9527.JPG
IMG_20190901_170009052.jpg


DSC_9541.JPG
IMG_20190907_150958628.jpg


Very cool. I have been thinking of rebuilding my engine, or the one I pulled from the donor vehicle, for some time now. Did you get any more power out of it with the larger pistons? I love my Explorer, but its so gutless.


Did you get any more power out of it with the larger pistons? I love my Explorer, but its so gutless.

If It did it was very minimal. It was out of necessity since the cylinder walls were out of spec. I debated on a bigger cam but stayed stock since I already had pushrods and didn't want to mess with getting different ones.

It was nice to build a spare engine as it kept downtime minimal. The short block was at the machine shop alone for close to 3 weeks.


Very cool. I have been thinking of rebuilding my engine, or the one I pulled from the donor vehicle, for some time now. Did you get any more power out of it with the larger pistons? I love my Explorer, but its so gutless.

An engine rebuild can make more power, but only if you can retune the computer for the major changes. So stick to virtually stock compression/cam/heads etc, if retuning the PCM is not possible or feasible. If the programming can be altered, then see what possible compression you can achieve with new pistons, and a custom camshaft(with valve springs called for by the cam designer). Those alone can be enough to feel it after a PCM retune. Stock compression is low in most Fords, the SOHC 4.0 has more and that's part of its advantage. The 4.0 doesn't have a ton of aftermarket choices, but it only matters if the PCM also gets reprogrammed. Don't do other big things and skip the computer retune, that will end up worse than stock.


It has been a year in the making and I am happy to report I have a new engine in my Explorer along with some other upgrades!

A little over a year ago I pulled out an engine from a parts Explorer to do a minor rebuild and eventually swap into mine as the valvetrain noise was getting worse and it was using coolant. The engine was relatively low mile but was neglected the last few years before I bought it and was filthy inside and so commenced a full rebuild. I'm not going to go into full details but here is a little summary of the new stock rebuild

  • New Melling high volume oil pump
  • New stock cam for manual trans spec
  • New Timing Chain set, tensioner and guide
  • NOS OEM Ford Lifters and all new Elgin pushrods and rockers
  • New Aftermarket heads with new valves and springs
  • Block bored 0.75mm over with new pistons and all new bearings done by local machine shop
  • New flow-matched yellow Bosch 4-hole injectors
  • New waterpump, crank balancer and all new sensors
  • Fresh coat of high-temp Ford Gray paint
View attachment 173596

I pulled the old engine out at the start of the Labor Day weekend and started to clean the engine bay and swap my powdercoated parts over to the new engine. I also transferred the engine harness over since it was in better shape than the donor. I took the time to rewrap the engine harness and I also sand blasted the exhaust manifolds and gave them a coat of high-temp black paint. During the swap I also installed an entirely new A/C system since it hadn't worked in 15+ years. Also while the engine was out I installed a power steering cooler from a V8 2nd Gen with some mods to the bracketry.

View attachment 173599

View attachment 173600

View attachment 173601

View attachment 173603

In anticipation of installing the valve covers I designed my own version of the valve cover reinforcement rings and cut them out of 1/4" steel. It took many hours of design time starting from scratch and 9 different prototypes before I was happy with the fit. The thicker metal will help seal the thin valve covers properly and prevent warping around the bolts as it is a continuous clamping force all the way around the entire valve cover. I will be offering these for sale including new hardware for anyone interested just PM me.

View attachment 173605

View attachment 173606


I got the engine installed and it started right up by Wednesday. I charged the A/C Friday and it is nice to finally have cold air again. I am still in the break-in period but I am looking forward to getting back out for some adventures since it has been much too long!

View attachment 173597 View attachment 173602

View attachment 173598 View attachment 173604

Very nice.

Missing 2 cylinders though, aren't you? :D


Wow! That is one heck of a lot of work shared in a single post!!!

I'm guilty of the opposite with posting, as I like the details involved in any / all parts of the build. LOL

Pretty awesome Brian! I dig the personal mods you always add to your work. Congrats on the rigs extended lifeline. I foresee extended long distance trips in your future now. :D


Join the Elite Explorers for $20 each year.
Elite Explorer members see no advertisements, no banner ads, no double underlined links,.
Add an avatar, upload photo attachments, and more!
.


That is awesome Brian. I have often thought about having a donor motor to go over with to put in once this one goes. But for now she is a strong motor. Love seeing things like this. I might have to once I am settled again. In the process of moving again. :-D


Back
Top