2002 Explorer V6 4.0 Engine Seized Up | Page 4 | Ford Explorer Forums - Serious Explorations

  • Register Today It's free!

2002 Explorer V6 4.0 Engine Seized Up

Please start your own thread

well now i am troubled! i removed the used engine i purchased because of a loud rattle to check and replace the timming chains as needed. . . .

While your symptoms are similar to MoonRocky's it would be much less confusing if you started your own thread.


Join the Elite Explorers for $20 each year.
Elite Explorer members see no advertisements, no banner ads, no double underlined links,.
Add an avatar, upload photo attachments, and more!
.


Ready To Move To Flat Terrian

Well the nice weather dictates I get out and do something.
So I gathered up some help to move the vehicle to a even spot to remove the engine. But I ran into a big snag. I hooked up a chain to my sons escort(TOWTRUCK). But I cant get it to come out of park.

Is there a way to get it in neutral ? (no battery)
Do I have to remove the drive shaft?

It is situated on a incline, which makes jacking it up as unsafe as it gets.

Stumped and wasting good weather.


Its In Neutral

Solved the problem:

Removed the fuse for the fuel pump and removed the relay for the fuel pump, then hooked up the battery and wala, the gear **** went to N. The move was a snap after that. Its on level ground and jacked up and on 3 jack stands an two car ramps for a secure lift.

Got the help working on the bell housing bolts. 6 out already.

Only 2 more and the exhaust down pipes.


Last Couple Fasteners

The day was productive.

With a little help:
Leggs004.jpg


We were able to remove eight bell housing bolts and three exhaust down-pipe bolts. I also loosened the two motor mount studs on the passenger side and the one pin bolt on the opposite side motor mount.

There seems to be a problem with the down-pipe bolt on the drivers side. I removed the O2 sensor and was still unable to get a 15mm socket squarely on the bolt. The other three came out fairly easy. No need to heat up. They just gave way with a little old fashion muscle.

The troublesome bolt may need a new approach. It can be seen easily from the wheel well. There was no 15mm box or open end wrench available to make an attempt with a wrench. The search for a 15mm wrench is on.

With all that said.. Engine Lift rental is scheduled for Tuesday(today is Saturday). Hopefully the weather will hold out for a couple more days.


Good going

Great going moonrocky! just make shure you make a safe working enviroment for you and helpers and people whom will be around this vehicle while you are not around.By the way,i found out what the raddle was in my engine and why i could not turn it very disturbing!!someone put a screw in the #5 cylinder,some sick *******. hoping i could just clean piston and head and slap it back toguether.good luck and keep up the good work.I took some pictures and e-mailed to regions autopart,wondering how to post on here for you guys to see.mabe you could help me with that.


V6 Engine Removal

Partly Sunny 45 Degrees. What a great day to work outside. The shade tree has lost all its leaves. Time to take it indoors.

The rental company opened at 7:30am . By 10.00am the engine lift was at my location and hooked up. Earlier I learned that the engine would weight approximately 300 pounds. With that in mind I was able to use the 1/2 ton hole of the lift.
The hood was marked and removed. There were two 8mm bolts on each side. What I did notice was that these bolts were almost rounded off. A couple years back I had the hood replaced. You know the story.(momentary lapse of reason in the car wash) They must have used the wrong size wrench.
(
engineout001.jpg


I connected the lifting chain to the center of each head with a bolt. Connecting it there seemed to work well. No real stress on anything.

engineout002.jpg


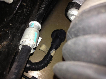
With the lift taking just a little pressure off the motor mounts, I removed the mounts from the engine. Not just the pin bolt but three mounting bolts holding the mount to the engine on both sides. The removal of the mounts from the engine was needed to move it forward without lifting and putting undo stress on the transmission spline. The only thing that got in the way was the oil filter that was not removed earlier. Removing the filter allowed the engine to come forward quite easily. With a little jacking and moving forward the engine popped right out. Sliding forward with the torque converter connected. Was the transmission damaged? I hope not.

All through this process I was never able to put my finger on any pictures of a 5R55W with the starter on the drivers side. So questions of how many bolts there was connecting it to the engine still existed. But as the engine came forward it was obvious the eight bolts that were removed did the trick.

5R55WBolts.jpg


Interesting to see the transmission from this angle. Now I can understand how confusion could occur. One of the bell housing holes was not used at all in this application. The rear of the engine does not have that hole tapped.

enginemove006.jpg


enginemove005.jpg


This is the engine strapped and tied to an old power washer dolly. The moving to the winter location down the steps and in the basement was a feat that paralleled the building of the pyramids. But its there now.

enginemove009.jpg


In a climate controlled environment, I can put much more effort in trying to spin the engine. I was thinking of tapping a wood dowel in each spark plug opening. Maybe using two sets of tools to spin the cam shaft nuts at the same time?
I am going to put an add on craigslist under Items Wanted, for the possibility someone might have a engine stand they could part with or a least loan me for the winter.
Thanks to all who helped me get this far.

Today is over.

V6 4.0 Engine STILL seized.


Hmm...quite interesting. Learned some things from reading that! Definately continue to keep us updated on this...


Seriously, this was insanely informative.

thank you. i love you


Nice going!

There are a lot of steps in the photo! Going back up the steps will be tougher than going down.

Please post some photos of the valve train on both banks. Maybe someone can spot a problem.

A tremendous demonstration of ingenuity and perseverance.


Can You See What I See?

Pictures are worth one thousand words or less.

Front:

thnksgiving2010035.jpg
Valvetrain005.jpg


Back:

camposition003.jpg
Valvetrain003.jpg


Top:

Valvetrain001.jpg
Valvetrain002.jpg


Do you need more Pictures?


slipped lobe?

I may be misinterpreting the photos but it looks to me like the rear camshaft lobe on the driver's side has slipped relative to the camshaft timing slot and the camshaft position sensor nub. The lobe looks to be about 170 degrees advanced from the stock position. I can't tell if other cam lobes are out of position. The cam lobes being out of position would definitely cause crankshaft rotation problems. If you remove the driver side camshaft to investigate further release the cam bearing caps a little at a time and try to keep the cam from binding in the thrust (front) bearing.


Just a wee bit slip of timing....

Nice write up moonrocky - very informative -subscribed


loosening camshaft sprocket retaining bolt

In order to remove the driver side camshaft you will have to loosen the camshaft sprocket retaining bolt. You could place all of the torque on a valve jammed against a piston unless you hold the jackshaft sprocket in place or hold the flexplate in place. The front jackshaft sprocket retaining bolt is normally torqued to 34 ft-lbs+75 degrees which is probably enough to hold against the camshaft sprocket bolt that is torqued to 62 ft-lbs. However, if you want to be certain that the front jackshaft bolt doesn't come loose to preserve the passenger side camshaft timing you can hold the flexplate from moving with a chain.

Assuming that no lobes on the passenger side camshaft have slipped and the timing is still preserved, once the driver side camshaft is removed you should be able to rotate the crankshaft since none of the valves will be depressed. Keep track of the camshaft bearing cap positions. Then you can use an air compressor to check for leaks on each cylinder due to bent valves.

I assume that the camshaft lobes are welded to the camshaft tube. I wonder if the weld broke due to the broken guide or if the guide broke due to the weld breaking.


Mirror That?

First take a look at this:

thnksgiving2010031.jpg


When I put a wrench on the passenger side rear cam bolt, to try and get some spin, it turned in the clockwise direction with very very little torque applied. In the reverse direction, it spun also. The bolt is moving all around with no tension.The more I played with it, trying to tighten or loosen it , the gear started to come off. I stopped right there. As shown in the picture.

After that thrill of disaster. I bent over and picked up my heart.

Does this mean that the timing is off on both sides?

Would I then use the procedure described in the previous post, on the opposite side?

Did I screw up?

I want to take something apart. I am not sure where to start.
I know patience. Counting aloud. One Breath, Two Breaths, Three Breaths.

To all who thought the timing was off:
I wish I could be as interpretative as you. Thanks

No Doubt Now. The Timing Is Off, or if it was not, it is now. (Right?)


remove the bolts that hold the cam sprokets, then its pretty much head removal.

you will need a timing kit to put the engine back together.


Sheared retaining bolt?

The passenger side camshaft sprocket retaining bolt tightens counter-clockwise (reverse) and loosens clockwise. My guess is the retaining bolt sheared when the engine seized. Otherwise, the bolt shaft would keep the sprocket centered even if loose. Yes, the timing is lost. But that's probably the lesser of your problems. I anticipate that if you remove the heads you will find significant valve damage and some piston damage. A lot of force would be required to shear the passenger side bolt and relocate the driver side cam lobe if that's what happened.

However, I suggest that you proceed as if there isn't internal damage until you find out for sure.

Confirm that the passenger side camshaft sprocket retaining bolt is sheared and not just loose. If sheared, remove it and the sprocket and tie the loose chain so it won't fall into the depths of the head. Then remove the camshaft bearing caps as previously described. The thrust bearing is at the rear on the passenger side. If the retaining bolt is just loose, then I suggest that you concentrate on the driver side first. First confirm that the rear lobe is out of position relative to the timing notch. If so, then remove the camshaft. If the valves don't raise all the way after the camshaft is removed then you don't need an air compressor to determine that they're bent.


my mistake on lobe

I went back to the photos I took of my engine to confirm the possible slipped lobe on the driver side. Here's my photo for comparison:
AllenL.jpg

I must have been looking at someone's photo of the passenger side cam lobe when I thought the lobe had slipped. The center of the lobe in my photo is 15 or 20 degrees advanced of the timing slot. That's about the same as yours.


Taking a step back.

Just ran down stairs and put a wrench on the retaing bolt and tightend it going counter clockwise. It snuged up. I feel like a fool.

Still need to follow your suggested procedure I am guessing. But wich one now?


does the motor turn?

can you spin it?

drop the pan and bed pan anything in the oil pan? pickup?


Join the Elite Explorers for $20 each year.
Elite Explorer members see no advertisements, no banner ads, no double underlined links,.
Add an avatar, upload photo attachments, and more!
.


good news on the retaining bolt!

OK, so now you know that both camshafts are probably still usable. The next thing is to determine if there is valve damage. Since you can't rotate the crankshaft yet I suggest that you remove passenger side camshaft and see if all of the valves on that bank retract. One may be wedged against a piston. Keep track of the bearing cap positions and loosen the caps uniformly a little at a time to keep the camshaft from ****ing at an angle due to valve spring pressure. Once the camshaft is removed, try rocking the crankshaft back and forth with the still tight driver side camshaft sprocket retaining bolt. The driver side camshaft may still be timed correctly.


Back
Top