A little background on the Ex (skip down for pictures):
My mother graduated college in 1991 and as a graduation gift from my father, they bought the Explorer in August of 1991, as I was getting ready to go into the second grade. In 2001 they bought a PT Cruiser and I finally passed my drivers test, inheriting the Ex. In 2003 there was a blizzard on President's Day weekend that blanketed the east coast in about four feet of snow and it took me about ten hours to drive from Washington DC to Philadelphia, where I was living at the time. On the way I hit black ice and crashed into the cement jersey barriers that separated the two sides of RT-676. The damage was nominal, but the next day she was towed to south Philly. May of 2008 I decided that the Ex was too tired to be my commuter car (80 miles a day) and bought a 2007 Dodge Caliber, retiring the Ex to my part time turbo lover. There was much to do about her fate, but I decided in early September to take a self-enrichment class at our local vo-tech and fix up the beast.
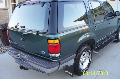
And so, she opens her eyes and breaths once more.

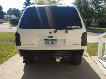
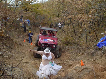
About two years ago, on my first day of work.


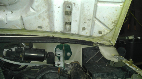
I didn't think to take full pictures of the car before I started working on it, so here it is about two weeks after class started, having already removed the chrome wings that kissed the bumper.


Aformentioned wings. One was considerably dented from someone having rearended me in high school. These images show the two wings, one polished after being hammered on for a while. I regret not getting an image of how dented it really was.
Quarter Panels:


Right and left side quarter panels rust spots.


Close up on some nasty rust.
We cut out the rust and then cleaned out the insides. There was a little more rust that we had found afterward and cut out after these pictures were taken.


The cleaned up and primed innards. In the second picture there is a spot on the inside that was cut out and had new metal welded in.

Some pieces that we used a "Shrinker-Stretcher" on to give it that nice bend.


More welding, grinding and priming!

Yum, body filler.

Larger image.
After I used sandpaper to make it nice, I used a "DA" to smooth down all the layers of paint and primer. I took those pictuers just after squirting a little bit of primer on it and then remembering that I wanted a picture.


So that is where I am now. There are still various dents and dings that need working on, and I will update with more pictures in a few weeks. Here is a link that should take you to the gallery where I have everything uploaded.
My mother graduated college in 1991 and as a graduation gift from my father, they bought the Explorer in August of 1991, as I was getting ready to go into the second grade. In 2001 they bought a PT Cruiser and I finally passed my drivers test, inheriting the Ex. In 2003 there was a blizzard on President's Day weekend that blanketed the east coast in about four feet of snow and it took me about ten hours to drive from Washington DC to Philadelphia, where I was living at the time. On the way I hit black ice and crashed into the cement jersey barriers that separated the two sides of RT-676. The damage was nominal, but the next day she was towed to south Philly. May of 2008 I decided that the Ex was too tired to be my commuter car (80 miles a day) and bought a 2007 Dodge Caliber, retiring the Ex to my part time turbo lover. There was much to do about her fate, but I decided in early September to take a self-enrichment class at our local vo-tech and fix up the beast.
And so, she opens her eyes and breaths once more.
About two years ago, on my first day of work.
I didn't think to take full pictures of the car before I started working on it, so here it is about two weeks after class started, having already removed the chrome wings that kissed the bumper.
Aformentioned wings. One was considerably dented from someone having rearended me in high school. These images show the two wings, one polished after being hammered on for a while. I regret not getting an image of how dented it really was.
Quarter Panels:
Right and left side quarter panels rust spots.
Close up on some nasty rust.
We cut out the rust and then cleaned out the insides. There was a little more rust that we had found afterward and cut out after these pictures were taken.
The cleaned up and primed innards. In the second picture there is a spot on the inside that was cut out and had new metal welded in.
Some pieces that we used a "Shrinker-Stretcher" on to give it that nice bend.
More welding, grinding and priming!
Yum, body filler.
Larger image.
After I used sandpaper to make it nice, I used a "DA" to smooth down all the layers of paint and primer. I took those pictuers just after squirting a little bit of primer on it and then remembering that I wanted a picture.
So that is where I am now. There are still various dents and dings that need working on, and I will update with more pictures in a few weeks. Here is a link that should take you to the gallery where I have everything uploaded.