How to: - Ethan's 1990 eec-iv ranger - 99 SOHC Swap + A4LD to M5OD | Page 2 | Ford Explorer Forums - Serious Explorations

  • Register Today It's free!

How to: Ethan's 1990 eec-iv ranger - 99 SOHC Swap + A4LD to M5OD

Prefix for threads which are instructional.
Hello explorer forum! I hate to have started this thread a bit late in the season but I feel like this could help others that may decide to do a OHV - SOHC engine swap. I have already completed my swap and put 1250 miles to this date on ranger and im looking back on all these pics that I cant help but think may be useful to you all. So im rounding up my pictures and soon im going to start a detailed write out of all the modifications made to make this swap work for my daily driven situation. I stayed up all night putting the pics in a pile from all the friends I had sent them to in the past and tomorrow I will start posting on this thread how it all came together.

The chassis I started with was a 1990 ford ranger XLT 4x4 4.0 OHV auto A4LD

The donor vehicle was a 1999 ford explorer 4.0 sohc with a newer auto trans, 4r55/5r55???

Pics the day I bought the pickup assuming I was only in for a head gasket replacement

13342272_1052998034776537_615393932_n.jpg


13321242_1052998054776535_1169312210_o.jpg


Join the Elite Explorers for $20 each year.
Elite Explorer members see no advertisements, no banner ads, no double underlined links,.
Add an avatar, upload photo attachments, and more!
.


To start with the manual swap I decided the motor was staying in the chassis. So I stripped the interior by taking the two seats out, the center console and pulled out what was necessary to pull the carpet back, I realized the body lift had got in the way of the 4x4 shifter and when it was in 2WD Hi, the transfer case shifter could not move fully forward to its correct position, here are pics to show...

IMG_2274.JPG

IMG_2276.JPG
IMG_2277.JPG
IMG_2278.JPG


Now I removed the transmission crossmember, the front drive shaft, the A4LD Transmission and the borg warner 1354 mechanical transfer case. Then I unbolted the flex plate to prepare for a flywheel.
IMG_0021.JPG


Next I was worried I would have to find some new bolts to go through my flywheel and into the crankshaft because I had read online that the flex-plate bolts were too short, I had remembered my best friends dad had told me a couple years ago that there is a point at which when a bolt is threaded into a hole, that after that point there is no more increase in strength when the threaded portion is inserted any more. He is a machinist/tool/die/mold maker so he knows everything I would need to know about the strength of machines, bolts, metal and anything I could possibly need to know.

So this equation is, the max strength of the bolt is achieved when it is threaded 1.5X the width of the bolt. So I sat there and measured, and measured and remeasured and I kept coming up with the stock flywheel bolts being 0.010 short of their max inserted strength, and when inserted in the flywheel they would be 1/10th of an inch short of their max inserted thread strength, so I was a little worried. After tons of online research and eviction closing in, I went all in and used the flex-plate bolts on the flywheel.
IMG_0023.JPG
IMG_0024.JPG
IMG_0029.PNG
IMG_0063.JPG


Join the Elite Explorers for $20 each year.
Elite Explorer members see no advertisements, no banner ads, no double underlined links,.
Add an avatar, upload photo attachments, and more!
.


So while I was at the local pick n pull I found a ranger that was stock with a borg warner 1354 mechanical transfer case, and a manual transmission, so I decided to see the clearance around the shifter for the hole which I would have to cut myself, so I took this picture.
IMG_0039.JPG

So I decided the next part would be swapping the automatic brake pedal, for the manual brake pedal and clutch pedal assembly, attaching the clutch switch, wiring the reverse light and neutral safety switch. Here is the automatic column torn apart, and while I did this I removed the automatic 4 on the tree shifter.
IMG_0045.JPG

In the above pic on the left side you can see a wire hanging, that was actually stuffed up inside the dash, just tangled around a few wires. The plug has a plug cap which simply bridges 2 or 3 of the connectors to tell the computer or ECU that the truck is in nuetral and it is safe to start, with this plug removed the truck will not start, but the manual clutch switch which attaches to the clutch pedal plugs right into this connector with zero modifications, it is entirely bolt on, plug and play. This is a place where you can really see where it was cheaper for ford to make the wiring loom for the auto and manual of this year exactly the same.
IMG_0044.JPG
IMG_0041.JPG

So I decided since the clutch switch would work fine, I would next start splicing the reverse light switch and the neutral safety switch.
The first two photos are the original way I wired them, the reverse light switch was wired correctly but the truck wouldn't start a month later when I had it all together so I came back and fixed the neutral safety switch in the 3rd photo and it started no problem.
IMG_0058.JPG
IMG_0060.JPG

This second photo shows for my wiring loom, the wires were spliced to the exact same colors, black wire with pink stripe was spliced to a black wire with a pink stripe. Then the purple wire with an orange stripe was butt connected and crimped to the purple wire with an orange stripe. Yours may not be this easy so please do your research on your loom and dont just play follow the leader, dont copy me without a little research.
IMG_0155.JPG

Now the photo above was a month after the other wiring was done, this was the correct way to get the neutral safety switch to work, I think my problem was I had connected the red with white stripe on the switch, to the red with white stripe from the loom, the fix as you can see in the photo was to use the red with white wire on the switch and the red with grey stripe from the wiring loom. After I did this one splice, the truck fired right up with zero problems. Dont freak out if it does nothing when you turn the key, you can only get it wrong like 2-3 more times before you get it right, I got it right the 2nd time without frying any electronics which was my main worry.
Now that the transmission wiring is out of the way I headed over to swapping the pedals, It was a major pain in the ass but here are the new pedals in place, then carpeting put back in place.
IMG_0093.JPG

IMG_0095.JPG
IMG_0097.JPG


Now my truck was ready for the transmission, but before I put it in I thought I would replace my radius arm bushings while I have a ton of space, so I researched and found out I don't even need to take the lug nuts off, I didn't even put the truck on jack stands, I went to the local hardware store "Ace Hardware" and bought 4 grade 8 bolts with washers and nuts, I think it was about $8-12 but its been a couple months so I could be off, I believe they were 1/2" by 1" or 1.5" length bolts. I started with an angle grinder trying to cut the first rivet head off, but it took so long so I switched to the grinder wheel instead of a cutting wheel, the grinder wheel went right through the head of the rivet and I used a large punch and hammered the rivet inwards. They all came out quite easily then I cleaned the crossmember and set it infront of the transmission for this pic before I put the entire bottom end of the truck back together.
IMG_0098.JPG

Now I put the transmission in the hole, bolted it all together, torqued the bolts, put the transfer case back in, both crosmembers, drive shaft and plugged in everything, I left a rag in the manual transmissions shifter hole. Then I cut the hole in the access plate for the shifter, then cut the carpet for the shifter and installed the assembly. I have a lack of pics of when I cut the access plate and when I cut the carpet up but I got the pics when I was done....
IMG_0118.JPG
IMG_0120.JPG

IMG_0121.JPG
IMG_0122.JPG
IMG_0123.JPG
IMG_0124.JPG
IMG_0125.JPG

The garage had several cutting tools so I gave them all a try in this area. It turned out the tin snips with the yellow handle worked out very well for cutting the hole in the access panel for the shifter and cutting the transfer case shifter hole larger because of the body lift. The red handled cutters worked very well for cutting the hole in the carpet, and the blue shears were horrible at everything.

Now that the interior was all finished, I took the shifter back out of the transmission and put a funnel right in the top, I overfilled the transmission by the nearest quart, then opened the "FILL" bolt on the bottom side of the transmission to let it overflow out of the hole and into a drain pain. Now the transmission was properly filled with fluid and the shifter was installed along with the rest of the interior.


The master cylinder was a very simple install, so was the slave cylinder before the transmission was put in, but the hydraulic line was a pain in the ass, I originally pulled the wrong hydraulic line so I went back to pick n pull and grabbed the correct year hydraulic line, its been a couple months but I believe it was newer than 1994? the old hydraulic lines had a black quick disconnect and the new ones had a brass quick disconnect and the brand new slave cylinder I had bought from the parts store would only take the brass colored quick disconnect hose, the truck I pulled it off of at the parts yard had a pain in the ass nut on the firewall for the master cylinder that wouldn't stop spinning so I cut the master cylinder in half with a hacksaw blade, did not use a hacksaw handle. at first I thought it may have been ruined but it hasn't leaked to this day, I just filed the rough edges and pushed the roll pin out of my used master cylinder, put the used hydraulic line in and pushed the roll pin back in, bench bled it and installed them.
IMG_0149.JPG
IMG_0150.JPG
IMG_0152.JPG

Now I forgot what I was doing but I was fixing something in my engine bay I had done wrong and while it was apart I put an elbow on my radiator and had done this!.... Not fun.....
IMG_0126.JPG
IMG_0127.JPG


Thats right, its in this next picture that I was replacing the thermostat housing because the steel sensor threaded nut had spun in the plastic so the entire unit needed replaced, I removed the alternator to get at it and it was when I was putting the belt back onto the motor that I had rested my elbow on the radiator and broke it. so back to pick n pull for a radiator I went.
IMG_0160.JPG


So here I was last month at my girlfriends house doing my 3,000 mile check up on my truck, double checking all my problems and fixing all the tiny things I wasnt worried about before such as checking for exhaust leaks, replacing shocks, fixing my passenger window motor that wouldnt roll up or down, and general inspection of everything.
IMG_0251.JPG

Now I found out I have an exhaust leak on both sides of the Y pipe and an exhaust leak on a hangar near the muffler like in the next picture.
IMG_0256.JPG

So I scheduled an appointment with an exhaust shop and while I waited for that to happen I decided to drop about $150 on DIY Cold air intake parts.... Now before I get hate mail, I didnt do the cold air intake for horsepower, I did it because as you can see in some pics, my original intake rubber hose was ripped in half and fixed with gorilla tape for 3,000 miles, not only that but the stress of it being stretched to reach the airbox had ripped the airbox in half and broken the mounts before I had even driven the first mile, so I had driven 3,000 miles on 100% unfiltered air. So the name of the game was to save my motor and filter the intake air.
IMG_0284.JPG
IMG_0286.JPG
IMG_0290.JPG

Got that unfiltered air problem to go away and I then went towards that damn window motor, I didnt drill out the rivets keeping the parts together because I had no new hardware and id be stuck without a window again, so instead of taking two steps back, I guessed where to drill a hole in the steel inner door panel to access the window motor nuts and two out of 3 I guessed perfectly, the 3rd and last hole I had to drill a 4th because I guessed wrong by about an inch, then finally hit it the 4th time and got the motor out, cleaned out the gunk and broken plastic nubs and replaced them with the OEM plastic nubs I had in my center console for miles, i had just been too lazy to fix the problem until now.
IMG_0279.JPG
IMG_0280.JPG

I put the window motor back in and it worked totally fine, problem fixed for $8 and here was my truck out of the garage after all this.
IMG_0265.JPG

I forgot to add earlier that the 1990 motor had the temp sender threaded into an aluminum intake manifold which grounded it, and the 99 motor has a plastic thermostat housing, so I took a block to firewall ground from the junkyard and filed one end until the temp sensor/sender would fit inside the hole, then simply bolted the ground to the block and now my temp gauge in the dash works perfectly fine. Before I had done that I had never seen the temp gauge lift a hair, now it never lifts farther than 3/8ths of an inch, that larger radiator for a v8 explorer automatic "The biggest radiatior with the correct mounts to fit" keeps the engine super cool, the temp gauge usually stays between 1/4" and 3/8" from resting on cold and im interested to see what summer will bring me temp-wise.


After I got the cold air intake setup finished I took it outside for a couple videos on seperate days, mashed them all up into one youtube video so thats why its a little jumpy and my odometer reading changes throughout the video a little bit.


So recently I went to an exhaust shop because not only did I have 3 exhaust leaks, but I figured out the 1990 chassis came with 2" exhaust and the 1999 motor came with 2-1/4" exhaust so I upgraded to a flowmaster 2" Y pipe, removed the 3 cats and had test pipes welded on and went 2.5" exhaust from the Y pipe to the tail with the addition of a magnaflow straight through muffler with stainless steel mesh inside. I only paid $450 for the entire exhaust system from motor to tail pipe, steel with aluminized coating and the muffler is stainless steel. PLUS the SOHC manifolds are taller than the OHV which pushed the Y pipe right into my front driveshaft when 4x4 was engaged, so before it hit the muffler shop there was 1/2" of clearance between the Y pipe and front drive shaft, I pointed out this problem to the exhaust shop and now there is a good 4-6 inches of clearance, so ive not only gained performance, sound deadening and exhaust leaks are gone, but ive gained my 4 wheel drive back in addition to a rust free exhaust and a much better sounding truck. Ill have to get out there in the next few days and capture a video of my exhaust sound but it may be a pain with setting a camera phone on the ground, ill do it for the forum though. Time for bed, been a rough couple hours updating my thread tonight, lots of info, pics, videos and posting done.

Also, yes I know my belt squeals like crazy! It really annoys the hell out of me but ive already taken it in for a warranty replacement which started squeeking after about 2 miles, used a bar of soap and that lasted for maybe 10-15 miles, I think ill just have to save up for a more expensive belt (I bought the cheapest serpentine belt I could possibly find, think it was $25)


To this day I believe i'm $2,100 into this truck in total investment including the $350 I bought it for. I have about 150 hours of online research into this engine swap and about 250-300 labor hours invested into problem solving and putting it all together, my main goal here was not only to have a nice reliable daily driver for myself, but if anyone else wants to try this swap, I wanted to point out all the problems I had to decrease everyone elses work and research hours they would invest into the same project, I just cant stress enough that my swap was very easy because I had a single crank position sensor, after 1991 or 1992 this swap may be very much more difficult so I still urge you to do your research on what you are planning to do, but I hope that I have helped at-least a few people in achieving a goal they had set, just remember i'm 20 years old, no mechanical schooling, i'm all self taught and any question i had, I used the good old google search engine for hours until I got the exact info I needed to continue.

I think if you had a very similar situation to mine, this swap can be done in about 60-100 work hours, and 20 or so research hours that are not included on my build thread, for an example if your SOHC has a distributor type crank positon sensor, and if your OHV has a distributor type crank positon sensor also, these are things YOU need to figure out and I cannot stress that enough. It just so happens, and accidentally fell into my lap that this chassis and this motor were the easiest years to mate together.


Very nice work!


Nice work dude I recently finished my swap too that I was working on at the same time as you but did not go to the lengths you did i.e. never quite modded the heater box it's going to be tough getting it back on to those studs, the exhaust y pipe is cut and joined with 2 inch hose clamps and I have leaks and it's very loud and a couple of other loose ends to tie up but moral of the story is that the swap is possible on a 93 4x4 as well. Just wondering did you have as much trouble as I did getting the back intake plenum screws on? Holy cow they were stripped by the time I was out of there using swivels and torx and stubby screw drivers it was a nightmare and then I realized I was leaking radiator fluid and it all had to come off again.


Thanks you two, as for the heater/blower motor housing from the pics I posted you can see I chopped the outside edge of the non-a/c housing so the 2 bolt holes on the motor side are like slots, so it slides into place rather than inserting the studs through the hole, that fixed a huge clearance issue and I dont think it would have been possible at all to put it on without making just those two holes into slots.

Also I see a problem with your exhaust leaks and having no blower motor housing, that can be very dangerous where as you can be driving and have the cab fill up with exhaust, this can cause headaches, im not a doctor but I can guess brain damage and the possibility you can pass out while driving. I felt a little noxious and always had a headache with my tiny Y pipe exhaust leak so I cant imagine the conditions you may be driving in. I mean im a man, and I can tough things out, but thats not one area i would skimp on.

I did have a little bit of trouble getting the torx screws on the plenum in but I developed a strategy because I removed them and installed them several times, and with a plastic nut you always put it in the hole and loosen it until it falls into the original groove then you tighten it so it never makes new threads in the plastic causing it to strip.

My strategy was to use the torx socket on the front screws with an 8" 3/8 extension then at the rear (Remember, I have a 2" body lift) I would use a single wobbly extension and an 8" extension on that, it was a pain in the ass and I definently lost a torx screwdriver bit back there, its probably on the road somewhere, but now I have torx sockets to make it much easier.

Today I took my serpentine belt off and cleaned my pulleys, I found out my alternator makes a ton of noise when turned by hand and that is the cause of all my problems! So even though my alternator works perfectly fine, ill have to buy a new one to remove the noise.

Also today I was looking at my MAF and realized the MAF I have been using the past 3,900 miles to this date, has a 50mm ID (Which is a hair under 2") which is my biggest restriction in my intake. So I went through my junk parts bin and found the 4.0 SOHC MAF housing from the 1999 explorer XLS and measured the ID. Turns out its most restricted part was 70mm in the middle, and about 73mm at the edge of the mouth on both ends. The MAF sensor switched right over and I drove with the 70mm MAF for about 2 miles but then did some research and I was afraid of ruining my motor from leaning out and it also drove like **** but I hadnt reset the computer, so I put the 1990 50mm MAF back in and I plan to buy a quarter horse tunable chip soon, when I get the chip in the truck and start tuning ill throw in the 70mm MAF and ill have to figure out a wideband O2 sensor for an accurate reading on the exhaust for proper tuning. Also the throttle body has a 65mm ID and I plan on going back to pick n pull and snagging a 70mm throttle body from a 4.6L V8 ford, then port/polish/knife edge it and install it with the 70mm MAF at the same exact time that im ready to tune with the quarter horse.

I read on a forum that a 1993 ford/lincoln mark VIII has an 80mm MAF, on the same thread it sounds like a ford lighting pickup may have a 90mm MAF. Or if you wanna fork out $200, pmas-maf.com has 80/85/95mm MAF housings for $199-ea

But I think with the intake tubing I have, I believe the ID is around 68-70mm so I see no possible need or want to go above 70mm for my application since I just spent about $150 on this intake tubing, I just want all the restrictions to be the same size. Just my .02 cents.

70mm throttle bodies can be found on...
1996-2004 Mustang 4.6L V8
1991-2011 ford/lincoln town car's had the 4.6L V8 but who knows if all of them had a 70mm throttle body
1992-2012 Ford Crown Victoria also had the 4.6L V8 but im unsure as stated above^
1992-2011 Mercury Grand Marquis also had a 4.6L V8 ^^^^^^^^^^^^^^^^^^^^^^
1994-1997 Ford Thunderbird had the same 4.6 V8^^^^^^
1997-2010 Ford F-series has the same 4.6 "triton" v8^^^^
2002-2005 Ford Explorer has the 4.6 V8^^^^^^^^^

So I can assume the vehicles listed above most likely have a 70mm throttle body since the crate motor comes off the same assembly line, I may be wrong but these are the motors ill be looking for, for my new throttle body to snag from at the pick n pull next time I go, so not only listing it here will help anyone looking for the same info as me, but it gives me a solid list to look back on in the future when I look for one.


Id like to bridge the gap between my page and the man who made it all possible for me to even think about starting this engine swap, if it wasnt for this URL page, I would not have even tried to swap this motor into my chassis. I dont claim to be the man who figured it all out, im just planning for our future generations and I want a fuel injected motor swap to be as common, if not more common than how often we see carbeureted motor swaps today. We just need more info, more accessible information available and that requires trial and error and determination. Here is the original genius behind this fuel injected swap....

http://www.explorerforum.com/forums/index.php?threads/bretts-4-0l-sohc-swap.159001/


I'd also like to point out I finished the engine swap and there was a half tank of regular fuel in the gas tank, I ran it almost dry and ever since, the last 3900 miles ive ONLY used premium fuel 91/octane because on that first half tank I experienced slight engine knocking. Soon I hope when I get the quarter horse I may be able to tune my ECU to 87 octane fuel.

Also if your interested in doing this yourself and you want to run the engine on an ECU that was not ment for it, you should do research on your ECU. I did countless hours of online reading and even though these are for a mustang 5.0 V8, these next two URLs are still about the EEC-IV computer which I believe was used from 1989-1994. the 1993-94 computers were more complicated but its still the same structure. Heres some reading material, ive read both of these from top to bottom so it is worth the read

The first one is definitely worth the information gain, but the second ive tried to read and have found myself a little lost.

http://www.myo-p.com/Ford-EEC/EEC Help files/Files/For Beginners part 1.html


http://www.veryuseful.com/mustang/tech/engine/EECIVInnerWorkings.pdf


Okay so, laying in bed tonight thinking about horsepower upgrades for my pickup and I get slapped in the face with my thoughts. Not about horsepower but proper grounds!

So my truck never changes its idle, so it's probably stuck in closed loop somehow. Well I remembered suddenly that when I added a ground to my water temp sender, my temp gauge in the dash finally started working.

Well then I thought, what other sensors used to be in aluminum (grounded) and are now just stuck in plastic?

Idle air control valve!
Water temp sensor!
Throttle position sensor (throttle body is not grounded to chassis or motor due to being bolted to the plastic plenum)
Air intake temperature sensor!
The MAF was never grounded past the metal MAF housing to anything further so I feel like that may be fine but I still want to add a ground.

So then I thought, what could contradict this theory? Well I've checked my eec-iv trouble codes many times. I have disconnected my idle air control valve and successfully got the trouble code (iac out of range).

Now I was very unsure, so I said let's look at a wiring diagram.

IMG_0510.JPG


Well it seems almost all these sensors do indeed have a ground, by referencing to this 2008 ford wiring diagram key below the large dots apparently are supposed to be a ground
IMG_0527.JPG

So now I'm very interested to see if covering my engine bay with ground wires to everything inserted in plastic will help or waste my time.

I happen to see my wiring diagram has a MAP and MAF sensor and I thought you would have one or the other, I guess my Mass Air Flow is my intake sensor like I assumed, but my Mass Absolute Pressure sensor doesn't have a vacuum line on it, it's for pressure though, how can it read pressure with no vacuum line? So I went to the vacuum diagram to see what I deleted...
IMG_0529.GIF

So, know for a fact I have deleted my vacuum resovoir which is a big NO-NO.
If I press my brakes hard when I'm coming to a stop the engine will stall because there's no vacuum resovoir.
So I'll need to reinstall that.

A/CL DV: Air Cleaner Diverter Valve
A/CL BI MET: Air Cleaner Bi-Metallic Valve
The two above were both deleted which seems like that shouldn't change a damn thing
PCV: positive crankcase vent was deleted and vented to atmosphere
Throttle body to CPR vacuum hose was deleted but the CPR was zip tied up tight in the engine bay.

So I'm about 60 miles from my truck currently so I can't look at the MAP for a vacuum hose location, but I'm wondering, should I add a ground to everything in plastic? Could it be my MAP? Also, could it just be a stuck wide open thermostat since my temp never really reads higher than 1/8"-1/4" above cold, EVER... ??? But I expect my engine to run cold since I have a 2 core explorer radiator with the auto trans lines (the biggest radiator available for this chassis)


"Ground (2) indicates point where component is grounded directly to body"

Does that above phrase mean each separate sensor used to be grounded to the aluminum intake manifold which passed a ground to the block then the block to chassis? It doesn't have a single wire color code past that dot from where all those "ground cables" meet to where they are grounded directly to chassis?

I know that's a 2008 or whatever, newer wiring key, but could my truck run without the input of all these sensors I'm chasing after? Or just the fact that it runs and drives, compensates and adds more fuel for when I press the gas pedal throw out the whole idea saying "I should add a ground to these sensors"


okay so ive done some more work on my truck lately, so it used to idle at around 1500-1800 rpms so I thought MAYBE my tachometer was off. I know my 90 shares interchangeable parts between 89-92 and on youtube I saw that a 92 ford f-250 tachometer repair was done with the removal of the tachometer, then resoldering the joints on the backside, so that is exactly what I did to my tach, the video said only one corner of the solder joints are the cause but I ended up reflowing the solder on the entire board just so I wouldnt have to take it apart again.

Now my idle sits steady around 1100 RPMS and when I input my details into a "Tire speed calculator" or "Final drive ratio calculator" the numbers FINALLY MATCH! :D

So I know my idle wasn't entirely fixed, but I decided to move on for now.

Next thing I did was went for my 99 alternator from the donor truck... it was rusted shut, okay pick n pull time then. I bought a pick n pull alternator for $35 with a 30 day warranty, took it straight to Oreilly's auto parts to get it tested, failed 2/3 tests so I brought it back to pick n pull the same day and got another, straight back to the auto parts store to test the 2nd. Passed the parts store test very well, the man behind the counter said only problem is it screams like hell

oh no I thought... lol

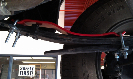
My 90 alternator was giving me a headache with its squeal, so I tore it apart after youtube disassembly videos and found both bearings. spun them around my finger, the rear one had very loose tolerances and wouldnt spin good, the front (Belt driven side) spun pretty good and had tight action. So I checked the parts store for the bearings, one was $7 the other was $15. I was dead broke and it just so turned out the worn out bearing was the $7 one so I caught a break here, headed to the parts store and got it after returning some cans and bottles. The other bearing that was somewhat alright I decided to take the side plates off of it that seal the grease in, removed all the grease and packed as much grease in there as possible, popped it all back together and installed the alternator.

So, alternator installed, now the plug issue. the old 2 plugs had 5 wires, the new single plug has 2 wires in the plug, and one 6 gauge positive wire from the post.

The two white wires I believe were an alternator field wire? went from one plug to the other, this wire was deleted because the new alternator i am assuming fielded itself from within, or didn't need that.

There is a green wire (I forgot the stripe color) that goes straight to the voltage meter on the dash, 1990 and 99 wires to the volt meter are the same color with the same color stripe, they probably kept this the same for technicians.

So that covers 3 of the 5 wires from the 1990 alternator plug's. the 4th was a blue wire, it was the only I couldnt figure out what was going on with it, I couldnt tell if it was a spare fuse slot or something else but I ran it over to the remaining 1 wire left in the new alternator plug.

Now we have 1 red or black/org wire leaving the 1990 plug that is 6 or 8ga. and we have the 99 alternator with a 6ga wire on the positive terminal. I deleted these wires because they were tiny, the 90 positive wire went directly to the fender mounted starter solenoid, so I replaced that with a 4ga super flexible amp wire I found in a junkyard explorer with "FX AUDIO" stickers, looked like someone already stripped the amp and subs so I stripped the super flexible 12 ft 4ga wire for projects.

So now that the alternator is entirely wired, I heard a trick online to keep your alternator cooler, aparently they not only output/produce positive current, but also negative current. Now the theory is your negative current has to travel through the engine block to the tiny ground strap to the firewall, then around the fenders to your chassis, then to your chassis to battery ground and this long path creates resistance, the resistance keeps the negative current choked near the rear of the alternator inhibiting the circuit board in the alternator or I was thinking, possibly even the bearing in the rear to wear out quicker "Fords commonly have squealing alternators". So I ran a 4ga wire from the top of one of the alternator mounting bolts directly to the negative battery terminal, because electricity chooses the path of least resistance.

Starter her up and no more funny noises :D

Moved onto the throttle body mod, I bought a 70mm throttle body that I pulled from a ford expedition v8 I believe. I knife edged the throttle plate and ported the step in the bored, then ported the opening where the intake hose fit on so the lip was smooth and didnt cause turbulence before air even got to the throttle plate. I did have to buy a round headed screw and some nuts from a hardware store to make the head that the throttle cable snaps onto, I used a bench grinder to shape the head of the screw to the right shape and put the screw in an existing hole on the throttle body. YOU MUST DO THIS, why? because if you bolt the throttle body on, upside down (Ford logo facing the ground rather than the hood or "UP" which is what I did, I faced my logo downwards) Then with the throttle body attached in this position which is the only position that will work, then the throttle body will only accept a throttle cable coming from the grill coming back towards the motor, which is 180 degrees from where the rangers actual throttle cable comes from. so there is an existing hole which you can put a bolt and nut through to snap the throttle cable on.

I didnt like the throttle body spacer so I removed it, except im already planning to make a spacer from a sheet of delrin because the throttle plate makes contact with the plastic inside the plenum AND whistles, the whistle is actually very sharp and hurts my ears while driving so a spacer is a MUST. But the factory spacer really really restricts the bore, so you must make a custom spacer and you cannot bore the factory spacer because the perfect bore is directly where the rubber seal is, which would make it ineffective.

So my next mods im looking at is the throttle body spacer, then i already have picked 90% of the parts from a junkyard for an electric fan swap, then after that ill probably hit the 1100 rpm idle problem and see where its coming from.

btw, I got a volvo 740 electric fan and relay, siemens fan, apparently that is the highest CFM electric fan you can possibly find at a junkyard and its relay controller, plus some jeep siemens relays so I can wire it directly to my key on switch so my fan will turn off when the key is off but that is NOT hard wiring it, I will be using hi/lo/off features from the fan, controlled by a BMW temp switch. It sounds complex, it may actually be the most complex route of doing this mod, but I assure you its not that hard. My goal is to make it so you get in, turn the truck on and drive like everything is absolutely factory and there is no (Let me watch my temp gauge until I see a temp I need to switch my fan on and off at) there wont be any manual fan switch, it will all be controlled by relays and temp switches entirely. The part most people leave out is a relay to the key ignition so your fan doesnt continue after the key is off and drain your battery.

The parts I have left to find for the electric fan conversion is a radiator hose adapter to thread my temp switch into, and some scrap aluminum for making the fan shroud.


I would also like to point out, it is very much preferred to use the newer alternator because the older alternator is 80amp and the newer alternator is 130amp (Those are factory numbers) that is an alternator upgrade plus just from the engine swap lol


So recently I've done a bunch of work on a homemade aluminum electric fan shroud.
IMG_0818.JPG
IMG_0819.JPG

IMG_0822.JPG

IMG_0821.JPG
IMG_0823.JPG

IMG_0824.JPG

IMG_0825.JPG


The electric fan I got from a Volvo fit perfectly in the shroud I made to the exact dimensions of the radiator core size.
20" total height
18" total core height
(1" tab on both top and bottom)
17.75" width of the core and shroud.
Fan protrudes 1/2" out from mounting point.
I bent the depth to 1/2" and plan to fix it with washers
4" fan depth total
Available space between radiator core and water pump pulley 4.75" so I should have 1/4" of play room, I may have more.

I riveted the whole shroud together with support material, it was a $22 sheet of aluminum from Home Depot 3'x3'


Hey I'm back working on the 93 sohc swap from a hiatus. Youre right the exhaust leak combined with no blower also I have no airbox installed either but I'vent found a guy on the islaND I live on to help weld the y pipe. I had to shorten the ohv one as you probably know because the sohc ex manifold is l0nger. The truck drives however has very poor low end torque ie i have to shift into 4 low sometimes to make it up hills. Im hoping an exhaust without leaks will help with more back pressure for the low end torque. My exhaust is just clamped together right now. I ended up running the 93 maf sensor too, and i also think im running in open loop or closed loop because the check engine light is always on. I will be considering a chip too if i cant get the tuning figured out. One more thing i deleted my vacuum resovoir too but i read that that was for the vacuum powered throttle body length adjustment thing which my sohc had but is disabled. Again it does seem to work on a 93 ohv however my truck was heavily modded when i bought it, the previous owner did a m5od swap and the motor might not have been stock but the crank position sensor bolted right on to the sohc and once i spliced the wiring harness together it drives ive even hauled loads of wood off the beach with that truck. Thats all for now ill post more questions when i get back into it thanks again for all your research.


I don't quite remember if I listed it earlier on this forum but my 1990 chassis stock exhaust was 2" and the 99 motor I swapped in had 2.25" exhaust, and when I bought my custom exhaust from the manifolds to the tip I had my cat removed and I moved up to 2.5" exhaust, here was my bill, it was all aluminized steel pipe. I got a straight thru muffler with stainless steel mesh and that's helped tremendously with not only the heat underneath my feet, but the noise infront of me is quieter and all the noise is now way behind me at the tail. The cab exhaust smells are gone and the truck seems to have more power.
IMG_0926.JPG

That was 450 USD

I definitely recommend that you use the MAF housing that is stock to your computer and that is very very crucial to keeping the air to fuel mixture correct or else you will have tons of problems possibly including destroying your engine. I drove 2 miles on the SOHC maf housing with the 1990 sensor bolted to it and the computer was VERY confused and I can tell you I've got much much better performance from the stock maf that has about half the inside diameter.

The check engine light will continue to stay on forever IF the computer that you are using came stock with 2 crank position sensors and you only have 1 currently attached, which I think is what you did? Yeah I'd put tape over that light because it's not useful anymore or just google a way to bypass it.

You could switch to a different plenum, I don't know which one is superior but I do not have the variable length manifold, also you really really should put a vacuum tank on your manifold. I really need to find one that fits my truck but I'm quite busy with so many other things in life I just keep driving it and forgetting I need to do a couple more things to my truck.

I'm surprised you need 4 lo to make it up some hills, my truck has 3.73 gears and has never had a problem making it up hills, it doesn't really use torque to get up hills it loves the higher rpms. I can crawl up hills at 3k rpms but I'd prefer to be around 4500

You said you have no airbox, I went to my local oreillys auto parts store, not sure if you have one in your area.... but they sell DIY air intake parts, I pieced together my own kit and it cost me around $120-140 USD here's my intake

IMG_0284.JPG
IMG_0286.JPG
IMG_0290.JPG
IMG_0987.JPG
IMG_0988.JPG
IMG_0989.JPG
IMG_0994.JPG

Recently I fit a little 22 degree bend in the last couple pics because the air filter stuck above the fenders with the hood open, so I was afraid of breaking my intake every time I shut my hood, it was also being half covered up by my hood sound proofing.

My intake parts brand is SPECTRE and they have a lifetime warranty, plus I think you can find them on amazon. It looks chrome but it's just chrome colored plastic


Join the Elite Explorers for $20 each year.
Elite Explorer members see no advertisements, no banner ads, no double underlined links,.
Add an avatar, upload photo attachments, and more!
.


You said you were looking at tuning also, I have been waiting to save up for a tuner myself and here's exactly what I want to get, it's the cheapest I could find for me to be able to tune myself without paying someone else to tune it for me.

Here is the chip

http://www.moates.net/quarterhorse-for-fords-p-199.html?cPath=63

And here is the editing software. With something like this I don't feel like risking my motor I will be tuning, for the free software being used by me (a person whose never tuned an EFI computer) so I might as well put the odds on my favor by paying for the correct software that I know is already designed for this chip. So $40 it is.

http://www.moates.net/tunerpro-rt-v5-p-68.html?cPath=63


Back
Top